Author

The Feral Way

Browsing

The myth that vanlife is “free” or even automatically cheap? That’s bollocks. Here’s the actual cost of living in a van in the UK in 2025, with nothing hidden and no Instagram fantasy numbers. This article explores The True Cost of Vanlife in the UK, detailing every expense involved.

The Instagram Lie vs The Reality

What Instagram says: “I quit my job and live rent-free in my van! #freedom”

What Instagram doesn’t show:

  • The £18,000 they spent on the van and conversion
  • The £680/year insurance that’s twice what their car insurance was
  • The £200 diesel heater repair at 2am in Scotland
  • The £2,400/year they spend on fuel because they’re constantly moving
  • The £800 emergency when the alternator died
  • The gym memberships, launderette costs, phone bills, and food that still needs paying for

The reality: Vanlife CAN be cheaper than renting. But it requires significant upfront investment, ongoing running costs, and unexpected expenses that nobody warns you about.

Let’s break down the real numbers.

Part 1: Initial Investment (The Big Scary Numbers)

Before you’re “living rent-free,” you need to buy and convert a van.

Buying the Van

Budget tier (£3,000-£8,000):

  • High mileage (150,000+ miles)
  • 10-15 years old
  • Likely to need work soon
  • Examples: 2010 Transit, 2008 Sprinter, 2012 Vivaro

My first van: 2011 Transit Custom, 168,000 miles, £6,200. Needed new clutch within 6 months (£800). Turbo failed 18 months in (£1,400). Sold it at a loss.

Total cost of that “cheap” van: £6,200 + £800 + £1,400 + various other repairs = £9,100 over 18 months.


Mid-range (£8,000-£15,000):

  • More reasonable mileage (80,000-120,000 miles)
  • 5-10 years old
  • Better condition
  • Examples: 2016 Transit, 2017 Sprinter, 2015 T5

More reliable but not bulletproof. Still need to budget for maintenance.


Higher-end (£15,000-£30,000+):

  • Low mileage (under 60,000)
  • Nearly new or new
  • Warranty still active possibly
  • Examples: 2020+ Transit Custom, 2021 Sprinter, new Ducato

My current van: 2019 Transit Custom, 42,000 miles, £21,500 (bought 2022). Zero major issues in three years. This is what spending proper money buys you.


The harsh truth: Cheap vans cost you in repairs. Expensive vans cost you upfront. There’s no magic cheap option that’s also reliable.

Average UK price for decent vanlife van (2025): £12,000-£18,000 for something that won’t immediately bankrupt you in repairs.


Van Conversion Costs

Budget DIY conversion (£2,000-£5,000):

What this gets you:

  • Basic insulation
  • Simple bed platform
  • Basic electrics (leisure battery, few lights, USB sockets)
  • Minimal cooking setup
  • DIY cabinetry
  • No heating, basic water system

My budget breakdown (my second van, 2021):

  • Insulation materials: £420
  • Ply, wood, screws: £380
  • Leisure battery (110Ah AGM): £140
  • Solar panel (100W) and controller: £180
  • LED lights and wiring: £95
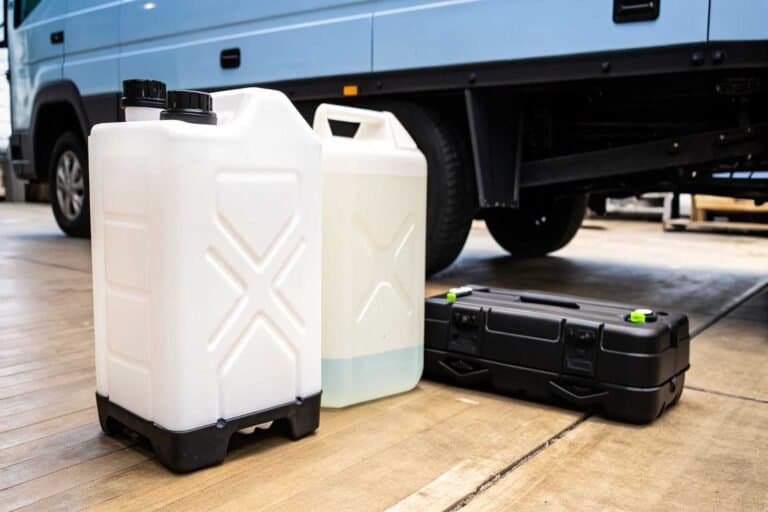
  • Water containers and pump: £60
  • Basic cooker: £45
  • Bed foam and fabric: £140
  • Paint and finishing: £80
  • Tools I didn’t already own: £220
  • Miscellaneous (adhesive, screws, mistakes): £180

Total: £1,940

Time investment: 6 weeks of evenings and weekends (probably 200+ hours)

Result: Basic but functional. Cold in winter. No proper kitchen. Worked for a year before I upgraded.


Mid-range DIY conversion (£5,000-£10,000):

What this adds:

  • Proper insulation (thicker, better coverage)
  • Leisure battery upgrade (200Ah+)
  • Diesel heater (£150-£400)
  • Better solar (200W+)
  • Proper kitchen with sink/cooker
  • Swivel seats (£300-£500)
  • Better storage and cabinetry
  • Roof vent (£150-£250)

My current van conversion cost (2024-2025):

  • Insulation (Celotex + sheep’s wool): £600
  • Leisure battery (230Ah AGM): £280
  • Solar panels (2x 175W) + MPPT: £420
  • Diesel heater (Webasto copy): £210
  • Ply, wood, and hardware: £560
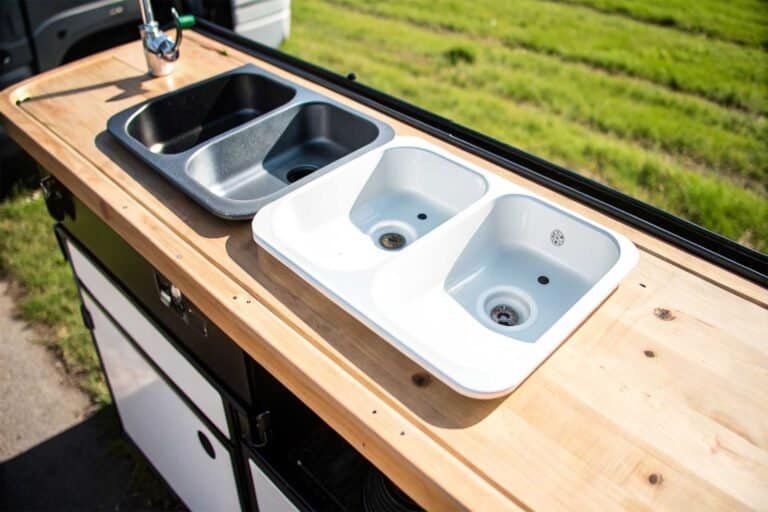
  • Kitchen sink and fittings: £180
  • Propane system and cooker: £140
  • Fridge (40L compressor): £280
  • Swivel seats: £380
  • Roof vent (Fiamma): £180
  • LED lighting throughout: £120
  • Water system (tank, pump, taps): £160
  • Bed platform and storage: £240
  • Wall lining and finishing: £320
  • Paint, varnish, sealant: £90
  • Tools and consumables: £180

Total: £4,320

Time investment: 3 months solid work (probably 400+ hours)

Understanding The True Cost of Vanlife in the UK: It’s essential to consider all potential expenses before jumping into this lifestyle.

Result: Properly comfortable year-round. This is what I’d recommend as minimum for full-time living.


Professional conversion (£10,000-£40,000+):

What you get:

  • Everything done for you
  • Warranty on work
  • Professional finish
  • Certified gas and electrical
  • Usually includes expensive extras (premium fridge, heating, solar)

Reality: Most people can’t afford this. But if you can, you’re buying reliability and compliance.

My take: Unless you’re hopeless at DIY or have money to burn, do it yourself. You’ll learn invaluable maintenance skills.


Other Essential Initial Costs

Insurance (first year): £600-£1,200

  • Varies wildly based on age, location, no-claims
  • Conversion cover costs more
  • My first year: £920

MOT (if needed immediately): £55

  • Plus any work needed to pass: budget £200-£500

VED (road tax, first year): £315 for most vans

Basic living equipment:

  • Bedding: £100-£200
  • Cooking equipment: £100-£150
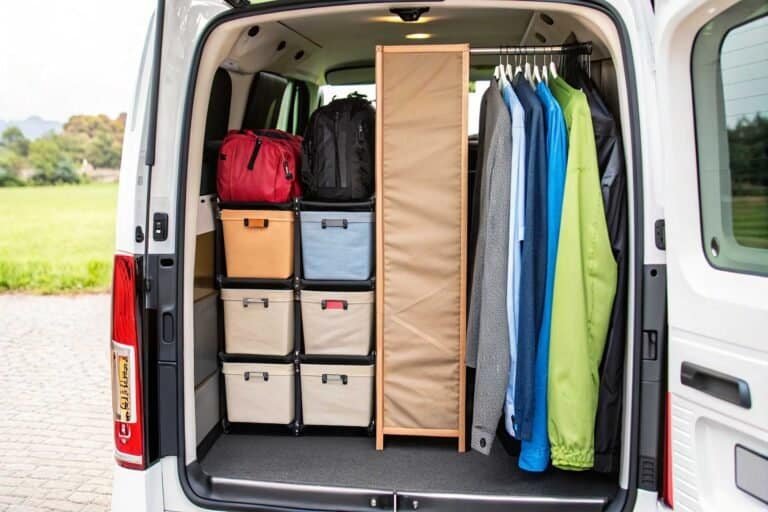
  • Storage boxes and organization: £80-£150
  • Basic tools for maintenance: £150-£300
  • Fire extinguisher, CO detector, first aid: £60
  • External storage solutions: £100-£200

Total initial kit: £590-£1,260


Total Initial Investment Summary

Budget setup (older van, basic conversion):

  • Van: £6,000
  • Conversion: £2,500
  • Insurance/tax/MOT: £1,200
  • Essential kit: £700
  • TOTAL: £10,400

Mid-range setup (decent van, good conversion):

  • Van: £14,000
  • Conversion: £6,500
  • Insurance/tax/MOT: £1,300
  • Essential kit: £900
  • TOTAL: £22,700

My actual spend (2019 van, mid-range conversion, 2024):

  • Van: £21,500
  • Conversion: £4,320
  • Insurance/tax/MOT: £1,050
  • Essential kit: £840
  • TOTAL: £27,710

This is before you’ve driven a single mile or lived a single day in the van.

The “rent-free” lifestyle requires five-figure investment upfront. Don’t let anyone tell you otherwise.


Part 2: Fixed Running Costs (The Bills That Don’t Stop)

These costs hit monthly or annually whether you’re driving or stationary.

Insurance

Typical costs (2025):

  • Basic van insurance: £400-£800/year
  • Conversion declared: £600-£1,000/year
  • Motor caravan insurance: £700-£1,200/year
  • Under 25 or newly passed: £1,200-£2,500/year

Ways To reduce it:

  • Tracker fitted (saves 10-15%): £200 one-off, saves ~£90/year
  • Business use added (needed anyway): +£35/year
  • Increased voluntary excess to £500: -£95/year
  • Limited mileage to 8,000/year: -£60/year

VED (Road Tax)

Current rates (2025):

  • Van under 3,500kg (most conversions): £315/year
  • Van over 3,500kg: £165/year (yes, cheaper)
  • Motor caravan: £190-£315/year (depends on emissions)

My cost: £315/year (£26/month)

This is unavoidable. No way to reduce it legally.


MOT

Cost: £54.85 per year (maximum legal charge)

Plus inevitable work:

  • Average MOT failure repair cost UK: £200-£400
  • I budget: £300/year total (£54.85 test + £250 contingency)

My actual costs:

  • Year 1: £54.85 (passed, no work)
  • Year 2: £54.85 (passed, advisory on brake pads)
  • Year 3: £289.35 (failed on rear light, tire tread, brake pipes – all legitimate)
  • Year 4: £54.85 (passed)

Three-year average: £165/year (£14/month)


Phone Bill

Unless you’re off-grid completely (you’re not), you need phone service.

Costs:

  • Budget PAYG: £10-£15/month
  • Mid-range unlimited data: £15-£25/month
  • Unlimited everything: £20-£35/month

My bill: EE unlimited data, £18/month (£216/year)

Why unlimited data matters: It’s your internet. You need it for work, entertainment, navigation, everything.

I’ve tried limiting data (£10/month plans). Ended up spending £15-£20/month in cafe purchases for wifi anyway. False economy.


Breakdown Cover

Costs:

  • Basic roadside: £50-£80/year
  • Roadside + recovery: £80-£150/year
  • Full cover including home start: £120-£200/year

My cover: RAC comprehensive (includes Europe, onward travel, hotel if needed): £145/year

Is it worth it?

I’ve used it twice in three years:

  • Alternator failure (recovered 80 miles, saved ~£200)
  • Flat tire I couldn’t change (wheel bolt seized – saved £80 call-out)

Value delivered: £280 saved over three years. Cost: £435 paid. Net cost: £155.

Worth it for peace of mind alone.


Fixed Monthly Costs Summary

CostMonthlyAnnually
Insurance£64£770
VED (road tax)£26£315
MOT + maintenance buffer£14£165
Phone bill£18£216
Breakdown cover£12£145
TOTAL FIXED COSTS£134£1,611

This is the absolute minimum before you’ve driven anywhere or bought any food.

Compared to rent? My last flat was £825/month (Leicester, 2019). So vanlife’s fixed costs are £691/month cheaper.

But we’re not done yet.


Part 3: Variable Running Costs (The Expensive Bits)

These costs vary based on usage, but you can’t avoid them.

Fuel

This is the biggest variable and the one that destroys budget calculations.

My van specs:

  • 2019 Transit Custom 130PS
  • Official MPG: 42mpg
  • Real-world MPG: 34-38mpg (depending on load and driving)
  • I average 36mpg

Fuel costs (2025):

  • Diesel: ~£1.52/litre average (fluctuates £1.45-£1.60)
  • Petrol: ~£1.48/litre average

Annual mileage scenarios:

Low mileage (5,000 miles/year):

  • Fuel used: 632 litres (at 36mpg)
  • Cost: £961/year (£80/month)

Medium mileage (10,000 miles/year):

  • Fuel used: 1,264 litres
  • Cost: £1,921/year (£160/month)

High mileage (15,000 miles/year):

  • Fuel used: 1,895 litres
  • Cost: £2,881/year (£240/month)

The mistake people make: Thinking vanlife means staying still. Most van lifers drive significantly MORE than when they had a car (touring, relocating, visiting places, poor wifi forcing moves).

If you’re doing 15,000+ miles annually, you’re spending £2,500-£3,000 on fuel. That’s £208-£250/month.


AdBlue (Diesel Vans Only)

Modern diesel vans (Euro 6) need AdBlue for emissions.

Costs:

  • 10L bottle: £12-£15
  • Forecourt top-up: £10-£20

Usage:

  • Roughly 1 litre per 600 miles
  • On 10,000 miles/year: 17 litres needed
  • Cost: £25-£40/year

My spend: About £30/year. Minimal but annoying extra cost.


Maintenance and Repairs

This is where budgets die.

Routine maintenance (annual):

  • Oil and filter change: £80-£120
  • Air filter: £20-£40
  • Fuel filter (diesel): £30-£50
  • Cabin filter: £15-£25
  • Screen wash: £5-£10

Annual routine total: £150-£245

I spend: About £180/year on routine maintenance (I do oil changes myself, saves £40-£60)


Non-routine repairs (inevitable):

This is highly variable but WILL happen.

My three-year repair history:

Year 1:

  • Clutch replacement: £780
  • Front brake pads: £140 (DIY, £300+ at garage)
  • Wiper mechanism: £65
  • Total: £985

Year 2:

  • Turbo failure: £1,380
  • Battery replacement: £110
  • Exhaust bracket: £35 (welded at local garage)
  • Total: £1,525

Year 3:

  • Alternator: £280 (remanufactured, fitted myself)
  • Rear brake discs and pads: £185 (DIY)
  • Coolant leak repair: £95
  • Front suspension arm: £140 (MOT failure)
  • Total: £700

Three-year repair total: £3,210 (£1,070/year average, £89/month)

This is on a van that was decent condition when I bought it. Older vans will cost more.

Budget recommendation: £100/month minimum for repairs and maintenance. Some months nothing breaks. Some months you spend £800.


Diesel Heater Running Costs

If you have a diesel heater (recommended for UK winter), it uses fuel.

Consumption:

  • 0.1-0.3 litres per hour (depending on setting)
  • Average night (8 hours, low/medium): 1.5 litres
  • Winter usage (November-March, 150 nights): 225 litres

Cost: 225 litres × £1.52 = £342 per winter

My actual usage: About £280-£320 per winter (I run it on very low most nights, only medium when really cold)

Annual average: £300/year (£25/month)

Alternative heating (electric): Would need massive battery and solar setup (£2,000-£4,000 extra initial cost). Diesel heating is cheaper overall.


Leisure Battery and Solar Maintenance

Battery replacement:

  • AGM batteries: Every 3-5 years, £150-£300
  • Lithium batteries: Every 8-10 years, £600-£1,500

My setup: 230Ah AGM (bought 2022). I expect to replace 2026-2027.

Amortised cost: £280 battery ÷ 5 years = £56/year (£5/month)

Solar panel lifespan: 15-25 years usually. Minimal replacement cost over time.

Charge controllers and inverters: Can fail. Budget £30-£50/year contingency.


LPG/Propane (If Using Gas Cooking)

13kg propane bottle: £40-£55 (refill £25-£35)

Usage:

  • Cooking only: Lasts 3-6 months
  • Cooking + occasional heating: Lasts 1-2 months

My usage: One 13kg bottle every 4 months = 3 bottles/year

Cost: £75-£105/year (£6-£9/month)

I’m light on cooking (lots of meals out, basic cooking when I do). Heavy cookers might use 6+ bottles/year (£150-£210).


Water and Waste

Water fill-ups:

  • Usually free (taps, streams, friends’ houses)
  • Campsites charge £1-£5 sometimes
  • My spend: £20-£30/year

Waste disposal:

  • Grey water: Usually free (drains, campsites)
  • Black water (if you have toilet): Campsites charge £2-£5
  • My spend: £0 (I use public toilets)

Some van lifers with full bathroom setups spend £50-£100/year on waste disposal fees.


Variable Running Costs Summary

CostMonthlyAnnually
Fuel (10,000 miles)£157£1,882
AdBlue£3£30
Maintenance & repairs£89£1,070
Diesel heater fuel£25£300
Battery/solar contingency£5£60
LPG/propane£8£90
Water/waste£2£25
TOTAL VARIABLE COSTS£289£3,457

Combined fixed + variable: £423/month or £5,068/year

Still cheaper than rent. But we’re STILL not done.


Part 4: Living Expenses (The Normal Life Stuff)

You still need to eat, wash, and exist.

Food and Drink

This varies enormously based on lifestyle.

Budget eating (cooking everything, no eating out):

  • £40-£60/week per person
  • £173-£260/month
  • £2,080-£3,120/year

Mid-range (mostly cooking, occasional eating out):

  • £60-£90/week per person
  • £260-£390/month
  • £3,120-£4,680/year

Eating out regularly:

  • £90-£150+/week per person
  • £390-£650/month
  • £4,680-£7,800/year

Comparison to house-dwelling: My food costs haven’t changed. Same as when I rented a flat. Vanlife doesn’t make food cheaper (despite Instagram claims about “foraging” and “wild cooking”).


Hygiene and Toiletries

Monthly costs:

  • Shower gel, shampoo, toothpaste: £10-£15
  • Deodorant, shaving, skincare: £8-£12
  • Laundry detergent: £5-£8
  • Toilet paper, tissues: £5-£8
  • Cleaning supplies: £6-£10

Total: £34-£53/month (£410-£640/year)

My spend: About £480/year (£40/month)

Same as house-dwelling. No savings here.


Laundry

Van lifers don’t have washing machines (usually).

Options:

Launderettes:

  • Wash: £4-£6 per load
  • Dry: £2-£4 per load
  • Total per load: £6-£10
  • Weekly: £24-£40/month (£288-£480/year)

Campsites with laundry:

  • Usually £4-£6 per load
  • Requires staying at campsite (£15-£30/night)

Hand washing:

  • Free but time-consuming
  • Not practical for bedding, towels, jeans

My approach: Launderette once a week, hand-wash small items between.

Cost: £300-£350/year (£25-£30/month)

Comparison to house: Washing machine costs maybe £50-£80/year to run (electricity, detergent). Vanlife laundry costs 4-6x more.


Gym/Shower Access

Most van lifers use gyms for showers.

Options:

Gym membership:

  • Budget chains (PureGym, The Gym): £15-£25/month
  • Nationwide chains (DavidLloyd, Virgin Active): £30-£80/month
  • Local leisure centres: £25-£40/month

My setup: PureGym membership (£18.99/month, nationwide access)

Cost: £228/year

Value: Unlimited hot showers, clean toilets, somewhere warm in winter, workout equipment I actually use.

Alternatives:

Swimming pools (day passes): £5-£8 per visit

  • 2x per week: £520-£832/year
  • More expensive than gym membership

Campsites: £15-£30/night

  • Just for showers? Expensive

Friends/family: Free but limited

Truck stop showers: £5-£8 per shower, often grim

My take: Gym membership is the best value for regular access to quality showers and facilities.


Internet and Entertainment

Phone data: Already covered in fixed costs (£18/month)

Entertainment subscriptions:

  • Netflix/streaming: £7-£18/month
  • Spotify/music: £11/month
  • Amazon Prime: £9/month
  • Other apps/subscriptions: Variable

My spend: Netflix (£11), Spotify (£11), Amazon Prime (£9)

Total: £31/month (£372/year)

Same as house-dwelling. No difference.


Living Expenses Summary

CostMonthlyAnnually
Food and drink£329£3,947
Toiletries and hygiene£40£480
Laundry£28£335
Gym membership£19£228
Entertainment subscriptions£31£372
TOTAL LIVING COSTS£447£5,362

This brings our total monthly cost to £870/month (£10,430/year)


Part 5: Hidden and Unexpected Costs

These are the expenses that destroy budgets because nobody warns you.

Parking

Most nights: Free (laybys, forest car parks, street parking)

But sometimes you pay:

Campsites:

  • £15-£35/night depending on location and facilities
  • If using once a week for facilities: £60-£140/month

Park & Display car parks:

  • City centres: £2-£15/day
  • Coastal spots: £3-£8/day
  • Sometimes unavoidable (bad weather, nowhere else to go)

Private land:

  • Pubs (with permission): Usually free if you eat/drink there
  • Farms (asking permission): £5-£15/night common

Parking fines:

  • £50-£130 per ticket
  • I’ve had three in three years: £205 total

My annual parking costs:

  • Campsites (15 nights/year): £360
  • Car parks (occasional): £120
  • Fines (hopefully rare): £70/year average
  • Total: £550/year (£46/month)

Many van lifers spend more. If you use campsites 2-3 nights/week, you’re looking at £120-£210/month (£1,440-£2,520/year).


Tools and Spare Parts

Essential tools: £200-£400 initial investment (covered in setup)

Ongoing tool purchases:

  • Specialty tools as needed: £50-£100/year
  • Spare bulbs, fuses, fluids: £30-£50/year
  • Emergency repair supplies: £40-£60/year

My spend: £120-£150/year (£10-£13/month)

Example purchases:

  • Spare alternator belt: £15
  • Fuses and bulbs: £25
  • Electrical tape and connectors: £18
  • Spare diesel heater glow plug: £12
  • Engine oil for next change: £35

Upgrades and Improvements

This is the budget-killer nobody admits to.

You will upgrade and improve your van. It’s inevitable.

My three-year upgrade spending:

Year 1:

  • Better solar charge controller (MPPT): £120
  • Upgraded LED lights: £65
  • Additional USB sockets: £35
  • Storage improvements: £80
  • Total: £300

Year 2:

  • Larger water tank: £95
  • Better mattress: £180
  • Roof bars and storage: £240
  • Upgraded fridge: £280
  • Window covers (Reflectix): £45
  • Total: £840

Year 3:

  • Swivel seats (game-changer): £380
  • Better cooker: £90
  • Additional batteries (more capacity): £160
  • Soundproofing: £120
  • Various small improvements: £95
  • Total: £845

Three-year upgrade total: £1,985 (£662/year, £55/month)

This isn’t maintenance or repairs. This is “that would be nice to have” spending.

It’s optional. But you’ll do it anyway.


Depreciation

Your van loses value. This is a real cost even though you don’t “spend” it monthly.

Typical depreciation:

  • New van: 20-30% in first year, 10-15% annually after
  • 5-year-old van: 8-12% annually
  • 10-year-old van: 5-8% annually
  • Very old van (15+ years): Minimal depreciation

My van:

  • Bought: £21,500 (2022, van was 3 years old)
  • Current value: £17,200 (2025 estimate)
  • Depreciation: £4,300 over 3 years
  • Annual: £1,433 (£119/month)

This is money you won’t get back. It’s a real cost of ownership.


Insurance Excess

If you crash or make a claim, you pay excess.

Typical excess:

  • Compulsory: £200-£400
  • Voluntary: £0-£1,000 (your choice)
  • Total: £200-£1,400

I have: £250 compulsory + £500 voluntary = £750 excess

I’ve never claimed. But if I did, that’s £750 I’d need immediately.

Budget for this in emergency fund.


Emergency Accommodation

Sometimes the van isn’t habitable (major breakdown, too cold, too hot, emergency repair).

I’ve paid for emergency accommodation four times in three years:

  1. Van heater died in January, -3°C overnight: Hotel £60
  2. Major repair needed van in garage 2 days: Hotel £110 (2 nights)
  3. Summer heatwave, 35°C days: Campsite with facilities £25/night × 3 = £75
  4. Invited to wedding, needed proper shower/prep: Hotel £85

Total emergency accommodation: £330 over 3 years (£110/year, £9/month)

Most van lifers experience this occasionally. Budget for it.


Eating Out (Beyond Regular Food Budget)

When your van’s too hot/cold to cook, when you need wifi, when you’re somewhere without facilities, you end up eating out more than planned.

Cafe working sessions:

  • Coffee and use of wifi: £3-£5
  • 2-3 times per week: £312-£780/year

Forced restaurant meals:

  • Too cold to cook: £10-£18 per meal
  • Several times per month in winter: £200-£400/year

My additional eating out (beyond food budget):

  • About £480/year (£40/month) on “working from cafes” and forced eating out

Hidden/Unexpected Costs Summary

CostMonthlyAnnually
Parking and fines£46£550
Tools and spares£12£145
Upgrades and improvements£55£662
Depreciation£119£1,433
Emergency accommodation£9£110
Extra eating out (cafes/wifi)£40£480
TOTAL HIDDEN COSTS£281£3,380

This brings our realistic total to £1,151/month (£13,810/year)


Part 6: Real Budget Breakdowns

Let me show you three realistic scenarios.

Budget Vanlife (Minimal Spending)

Scenario: Older van, basic conversion, stationary lifestyle (low mileage), maximum self-sufficiency

Setup:

  • Van: £6,000
  • Conversion: £2,500
  • Initial kit: £700
  • Total startup: £9,200

Monthly costs:

  • Insurance: £75
  • VED: £26
  • MOT/maintenance: £25 (higher for older van)
  • Phone: £10 (PAYG limited data)
  • Breakdown: £10
  • Fuel (5,000 miles/year): £80
  • Maintenance/repairs: £120 (older van)
  • Heating fuel: £20
  • LPG: £8
  • Food (budget cooking): £180
  • Toiletries: £30
  • Laundry: £20 (mostly hand-washing)
  • Public showers (not gym): £25 (leisure centre day passes)
  • Entertainment: £10 (minimal subscriptions)
  • Parking: £20 (mostly free)
  • Tools/upgrades: £25

Total monthly: £684 Total annually: £8,208

This is lean. Requires discipline, minimal driving, acceptance of discomfort, and luck with repairs.


Comfortable Vanlife (My Actual Spending)

Scenario: Decent van, good conversion, moderate touring, reasonable lifestyle

Setup:

  • Van: £21,500
  • Conversion: £4,320
  • Initial kit: £840
  • Total startup: £26,660

Monthly costs:

  • Insurance: £64
  • VED: £26
  • MOT/maintenance: £14
  • Phone: £18
  • Breakdown: £12
  • Fuel (10,000 miles/year): £157
  • Maintenance/repairs: £89
  • Heating fuel: £25
  • LPG: £8
  • Food: £329
  • Toiletries: £40
  • Laundry: £28
  • Gym: £19
  • Entertainment: £31
  • Parking: £46
  • Tools/spares: £12
  • Upgrades: £55
  • Depreciation: £119
  • Emergency accommodation: £9
  • Extra eating out: £40

Total monthly: £1,141 Total annually: £13,692

This is realistic and sustainable. Not luxurious, but comfortable.


Touring/Premium Vanlife (Higher Spending)

Scenario: Newer van, professional conversion, constant touring, regular campsite use

Setup:

  • Van: £28,000
  • Professional conversion: £15,000
  • Premium kit: £1,500
  • Total startup: £44,500

Monthly costs:

  • Insurance: £90
  • VED: £26
  • MOT/maintenance: £10 (newer van)
  • Phone: £25 (premium data)
  • Breakdown: £18 (premium cover + Europe)
  • Fuel (15,000 miles/year): £240
  • Maintenance/repairs: £60 (newer, less issues)
  • Heating fuel: £25
  • LPG: £10
  • Food: £390 (eating out regularly)
  • Toiletries: £45
  • Laundry: £35
  • Gym: £25 (premium chain)
  • Entertainment: £40
  • Parking: £150 (campsites 2-3 nights/week)
  • Tools/spares: £10
  • Upgrades: £70
  • Depreciation: £200
  • Emergency accommodation: £15
  • Extra eating out: £80

When Vanlife Becomes Financially Better

Scenario 1: Buying budget van (£10,000 setup):

  • Annual saving vs rent: £5,676
  • Break-even: 1.8 years
  • After 3 years: £7,028 better off

Scenario 2: My setup (£26,660):

  • Annual saving vs rent: £5,676
  • Break-even: 4.7 years
  • After 3 years: £9,432 worse off
  • After 5 years: £1,720 better off

Scenario 3: Premium setup (£44,500):

  • Annual saving vs rent: Much less (maybe £876/year)
  • Break-even: Never, potentially
  • Vanlife isn’t cheaper here, it’s a lifestyle choice

The Non-Financial Benefits I Value

Why I’m £9,432 “worse off” but don’t care:

  1. Freedom to travel: I’ve toured Scotland (6 weeks), Wales (3 weeks), Cornwall (2 weeks), Lake District, Peak District, Northumberland — all without accommodation costs
  2. Flexibility: Lost my job? No 12-month tenancy to break or house to sell. Want to move? Just drive.
  3. Experience: Three years of adventures
  4. Skills learned: Mechanical maintenance, electrical systems, carpentry, problem-solving
  5. Simplified life: Can’t accumulate stuff. Forces intentional living.
  6. Location independence: Can be near coast, mountains, or city based on weather/mood

I’m financially worse off. I’m experientially far richer.

If you’re doing vanlife purely to save money? You might be disappointed. Do it for the lifestyle, with financial benefits as a bonus.


Part 7: Ways to Reduce Costs

Immediate Cost-Cutting

1. Reduce mileage (biggest impact):

  • Drop from 10,000 to 5,000 miles: Save £900/year
  • Stay stationary longer, tour less frequently
  • Work from one location more

2. DIY everything possible:

  • Oil changes: Save £40-£60 per service
  • Simple repairs: Save hundreds
  • Van upgrades: Save 50-70% on labor

3. Use free parking exclusively:

  • Avoid campsites: Save £360-£1,500+/year
  • Wild camp, public land, street parking
  • Requires more planning and flexibility

4. Minimize eating out:

  • Cut cafe working sessions: Save £300-£500/year
  • Cook everything: Save £500-£1,000/year
  • Meal prep and planning

5. Reduce upgrade temptation:

  • Use what you have longer
  • Don’t browse van conversion Instagram
  • Save £500-£800/year

Potential total savings: £2,500-£4,000/year


Longer-Term Cost Reduction

1. Buy better van initially:

  • Pay more upfront, save on repairs
  • Newer van = fewer repairs = lower costs years 2-5

2. Insulate properly first time:

  • Reduces heating costs (£100-£200/year)
  • Better comfort = less eating out/emergency accommodation

3. Build reliable electrical system:

  • Adequate solar = less driving to charge batteries
  • Good battery = less worry about power
  • Saves fuel and stress

4. Location strategy:

  • Scotland = more free parking options
  • Rural areas = cheaper everything
  • Avoid expensive cities

5. Seasonal adjustments:

  • South in winter (warmer, less heating cost)
  • North in summer (cooler, less cooling needs)
  • Follow good weather = better comfort

Income Strategies

Making vanlife cheaper by earning more:

1. Remote work:

  • Keep regular job while living in van
  • Cafes/libraries for work (costs £15-£30/week)
  • Net benefit: Massive (full salary, reduced living costs)

2. Seasonal work:

  • Fruit picking, festival work, tourism
  • Often includes accommodation/food
  • Save van living costs during work periods

3. Van-based business:

  • Mobile services (cleaning, repairs, delivery)
  • Location-independent freelancing
  • Photography/content creation (though saturated)

4. Work camping:

  • Campsite jobs with free pitch included
  • Saves £120-£210/month in parking/facilities

My income: Freelance writing (£1,800-£2,800/month). Work from cafes, libraries, van when wifi allows.

Without income, vanlife is impossible. Budget all you want, money needs to come in.


Part 8: Emergency Fund (The Crucial Buffer)

You need savings. More than you think.

Minimum Emergency Fund

Three categories of emergency:

1. Vehicle breakdown (most common):

  • Major repair: £500-£2,000
  • Example: Clutch, turbo, alternator, DPF
  • Fund needed: £2,000

2. Temporary accommodation:

  • Van uninhabitable for a week
  • Hotel/campsite: £60-£100/night × 7 = £420-£700
  • Fund needed: £700

3. Living expenses backup:

  • Lost job, reduced income
  • 2-3 months expenses
  • Fund needed: £2,400-£3,600

Total recommended emergency fund: £5,000-£6,000


My Emergency Fund Experience

Year 1: Started with £3,000 emergency fund

Month 7: Clutch failed. Cost £780. Emergency fund: £2,220

Month 14: Turbo failed. Cost £1,380. Emergency fund: £840

Crisis point. Had to borrow from family, took 6 months to rebuild emergency fund.

Current emergency fund: £5,500 (learned my lesson)

I’ve needed it. Last year alternator died (£280), diesel heater failed in winter (£210). Without emergency fund, I’d have been homeless or in debt.


Building Emergency Fund

Start van life with minimum £3,000 accessible savings beyond initial setup costs.

Build to £5,000+ over first year:

  • Save £100-£200/month
  • Any extra income goes to emergency fund first
  • Don’t touch it for upgrades or nice-to-haves

This is your safety net. Without it, one breakdown can end your vanlife.


Part 9: Regional Cost Variations

Vanlife costs vary across UK.

England

Most expensive regions:

  • London and Southeast: Parking difficult/expensive, higher costs generally
  • Southwest (Devon/Cornwall): Tourist pricing, expensive in summer
  • Popular cities (Bath, Oxford, Cambridge): Parking restrictions

Cheapest regions:

  • East Anglia: Flat, quiet, cheap
  • Northeast: Fewer restrictions, lower costs
  • Midlands: Moderate costs, good facilities

Scotland

Generally cheaper for vanlife:

  • More wild camping tolerance
  • Beautiful locations with free parking
  • Fewer parking restrictions outside cities
  • Fresh water readily available (streams, lochs)

Watch for:

  • Camping management zones (Loch Lomond, Trossachs)
  • Midges (May-September, not a cost but affects where you can park)

My Scotland costs: About 20% lower than England (mostly parking savings)


Wales

Middle ground:

  • Some areas very van-friendly
  • Others (Pembrokeshire coast, Snowdonia) stricter in summer
  • Generally cheaper than England

Part 10: Seasonal Cost Variations

Costs change with seasons.

Winter (November-March)

Higher costs:

  • Heating fuel: +£100-£150
  • Hot showers needed more: +£20-£40/month
  • Food (comfort eating): +£40-£80/month
  • Indoor locations (cafes): +£50-£100/month

Total winter increase: £210-£370/month

My winter months: Average £1,380/month (vs £1,050 summer average)


Summer (June-August)

Higher costs:

  • Fuel (touring more): +£80-£150/month
  • Campsites for showers: +£60-£120/month
  • Food (eating out more): +£50-£100/month
  • Ice for cool box: +£20/month

Lower costs:

  • Heating: -£25/month
  • Less cafe time: -£30/month

Net summer change: +£100-£200/month


Shoulder Seasons (Spring/Autumn)

Most affordable:

  • Minimal heating needed
  • Less touring (weather variable)
  • Fewer tourists = easier free parking
  • Comfortable outdoor cooking

My shoulder season months: Average £980/month


Final Thoughts: Is Vanlife Financially Worth It?

After three years part time, here’s what I know:

Vanlife is NOT automatically cheaper than renting. Initial investment is substantial. Running costs are higher than most people expect. Hidden costs add up fast.

But it CAN be cheaper if:

  1. You buy sensibly (not too cheap, not too expensive)
  2. You control mileage (touring is expensive)
  3. You do maintenance yourself
  4. You use free parking 80%+ of the time
  5. You stick with it long enough to recover initial investment (3-5 years)

The break-even point exists. But it takes time.


The non-financial value is harder to quantify:

I’ve woken up by Scottish lochs, Welsh coastlines, Lake District mountains. I’ve toured 47 locations I couldn’t have afforded accommodation for. I’ve simplified my life dramatically. I’ve learned skills I’ll use forever.

Is vanlife financially better than renting long-term? Yes, if you stick with it.

Should you do vanlife primarily to save money? Probably not. Do it for the lifestyle. The financial benefits follow eventually.


The honest numbers:

  • Setup: £10,000-£45,000 depending on choices
  • Monthly running: £680-£1,600 depending on lifestyle
  • Annual costs: £8,000-£19,000 realistic range
  • Break-even vs renting: 2-6 years depending on initial spend

You’ll spend more than you expect. Plan for it. Budget realistically. Keep an emergency fund. And accept that the financial case isn’t instant.

Vanlife is expensive to start, cheaper to maintain, and valuable beyond money if it’s the lifestyle you want.

Three years in, I’m still here. That tells you something about the non-financial value.


A traffic warden knocked on my window at 6:47am in Hackney. I was still in bed, wearing just pants, trying to work out where I was and why someone was banging on my van.

“You can’t park here overnight,” she said through the window.

“I wasn’t parked overnight,” I lied, badly. “I just pulled over because I felt tired.”

She looked at my pillow visible through the windscreen, my clearly lived-in van interior, and the condensation on all my windows.

“Right. Well, you need to move now or I’m issuing a ticket.”

I drove off in my pants, found a side street three roads away, and went back to sleep. She didn’t follow me. I’d learned two things: London traffic wardens start early, and having curtains that actually block the view is essential.

That was three years ago. Since then I’ve spent multiple nights parked in UK cities—mostly London, Edinburgh, and Manchester. I’ve been moved on maybe fifteen times. I’ve been ticketed once (£60, disputed it, won). I’ve been woken by police twice (both times they just checked I was okay and left).

City stealth camping isn’t glamorous. It’s not wild camping with mountain views. It’s parking on residential streets, trying not to draw attention, occasionally getting hassled, and making the best of limited options.

But it’s necessary if you’re: working in cities, passing through, visiting friends, or just need facilities that cities provide. And if you do it right, it’s mostly hassle-free.

This guide covers what actually works for stealth camping in London, Edinburgh, and Manchester—the legal grey areas, the practical realities, and how to not be that dickhead in a van who ruins it for everyone else.

What “Stealth Camping” Actually Means

Stealth camping is parking overnight in urban areas without drawing attention. The goal is to be invisible—park, sleep, leave quietly, and nobody notices you were there.

It’s not:

  • Camping in obvious tourist spots
  • Setting up chairs and awnings
  • Emptying grey water in the street
  • Being loud or antisocial
  • Staying in the same spot for weeks

It is:

  • Parking legally (following all parking restrictions)
  • Arriving late (after 9-10pm usually)
  • Leaving early (before 8am)
  • Being respectful and quiet
  • Not leaving any trace

Done properly, stealth camping means you blend in with parked cars. Nobody knows you’re sleeping in your van. You’re just another vehicle on a residential street.

The Legal Reality (It’s Complicated)

Here’s the honest truth: sleeping in your vehicle isn’t illegal in the UK. But parking overnight often violates local bylaws or parking restrictions.

What’s legal:

  • Sleeping in your vehicle (not illegal anywhere in UK)
  • Parking on public roads where parking is permitted
  • Overnight parking where no restrictions prohibit it

What’s often NOT legal:

  • Parking in bays with time limits (even if outside enforcement hours)
  • Parking in residents-only zones without permit
  • Parking where signs prohibit overnight parking/waiting
  • Parking in ways that obstruct traffic or driveways
  • “Camping” (which some councils define as being in a vehicle overnight)

The grey area:

Most councils don’t explicitly ban sleeping in vehicles. But they ban “camping” or “overnight habitation” which might mean the same thing. Enforcement varies wildly—some areas aggressively move on vans, others don’t care.

If challenged:

You’re “resting because you felt tired” or “working early shift nearby and needed to arrive night before.” You’re not “camping”—you’re parked legally and happened to sleep. This distinction sometimes matters to enforcement officers.

My experience:

I’ve been moved on by:

  • Traffic wardens (3 times)
  • Police (2 times)
  • Council parking enforcement (5 times)
  • Angry residents (5 times)

None resulted in tickets except once (successfully disputed). Most were just “please move along” conversations. Being polite and leaving immediately has always worked.

Universal Rules for City Stealth Camping

These apply to all cities, not just the big three.

Rule 1: Read the Signs

Every parking spot has signs. Read them carefully.

Look for:

  • Time restrictions (no parking 8am-6pm Mon-Fri, etc.)
  • Resident permit zones (you need permit or can’t park)
  • Loading bays (time-limited)
  • Disabled bays (obviously don’t park here)
  • Maximum stay periods (2 hours max, etc.)
  • “No overnight parking” signs
  • “No waiting” restrictions

What actually works:

Residential streets with:

  • No restrictions after certain hours (e.g., “no parking 8am-6pm Mon-Fri” means you CAN park outside those hours)
  • Free unrestricted parking (common in outer zones)
  • Meters that are free after 6:30pm (you can park overnight legally)

What doesn’t work:

  • Residents-only zones (you’ll get ticketed)
  • Time-limited bays (you’ll get ticketed)
  • Bus stops, taxi ranks, loading zones (ticketed or towed)
  • Anywhere with explicit “no overnight” signs

Rule 2: Arrive Late, Leave Early

The golden hours for stealth camping: arrive after 9-10pm, leave before 7:30-8am.

Why this matters:

  • After 9-10pm: Most people are home, streets are quieter, you’re less noticeable
  • Before 8am: Avoids morning rush hour, traffic wardens, and being obviously “camping”
  • Short window: You’re just another car that arrived late and left early

My routine:

  • Arrive 9:30-10pm (after dinner, people watching TV, not looking out windows)
  • Park, draw curtains/blinds quietly
  • Sleep
  • Wake at 7-7:30am
  • Leave by 8am latest

If you’re parked and settled by 10pm and gone by 8am, you’re just a parked car. Stay later or arrive earlier and you look like you’re living there.

Rule 3: Be Invisible

Your van should look like a parked vehicle, not a mobile home.

Make your van anonymous:

  • No obvious campervan signage or stickers
  • Plain exterior (ideally white or silver—most common van colours)
  • No roof racks loaded with surfboards/bikes
  • No awnings, chairs, or camping equipment visible
  • Blackout curtains or blinds (no light visible from outside)
  • No condensation on windows (ventilation or crack windows)

My van: White Transit, completely unmarked, blackout curtains, nothing on roof. Looks like a builder’s van. Perfect.

Rule 4: Don’t Take the Piss

This is critical for not ruining spots for everyone.

Don’t:

  • Stay in same spot every night for weeks (you’ll get reported)
  • Empty grey water in street (illegal and disgusting)
  • Put rubbish outside your van
  • Make noise (music, talking loudly, slamming doors)
  • Set up chairs/table outside
  • Run generator or loud equipment
  • Be drunk/antisocial
  • Block driveways or tight spaces

Do:

  • Rotate spots (different street each night or every few nights)
  • Take rubbish with you (dispose properly elsewhere)
  • Be quiet and respectful
  • Park considerately
  • Leave no trace
  • Wave/acknowledge residents if they look concerned

One dickhead in a van who empties chemical toilet in a drain or blasts music ruins stealth camping for everyone in that area. Don’t be that dickhead.

Rule 5: Have a Backup Plan

Sometimes spots don’t work out. You arrive and there’s no space, or signs you missed, or just bad vibes.

Always have:

  • 2-3 backup locations mapped out
  • Nearby 24-hour supermarket car park (emergency option)
  • Knowledge of next area over (can drive 5-10 mins to different neighborhood)
  • Enough fuel to move if needed

I’ve driven around for 45 minutes looking for suitable parking more times than I can count. It’s frustrating but it’s part of city stealth camping.

London: The Ultimate Challenge

London is the hardest UK city for stealth camping. It’s massive, parking enforcement is aggressive, and most areas have restrictions.

But it’s doable. I’ve spent a fair few nights parked in London over three years.

Where NOT to Try

Central London (Zones 1-2):

Forget it. Almost everywhere is:

  • Residents parking only
  • Metered with overnight restrictions
  • Business areas with night-time loading restrictions
  • Actively patrolled by parking enforcement

I’ve tried. I’ve been ticketed, moved on, and hassled. Not worth it.

Tourist areas:

  • Westminster, South Bank, Tower Bridge area: Heavily restricted
  • Camden, Shoreditch, Brick Lane: Overnight restrictions common
  • Kensington, Chelsea: Residents parking exclusively

Parks and commons:

  • Hyde Park, Regent’s Park, Hampstead Heath: Bylaws prohibit overnight parking
  • Richmond Park: Gates locked at night
  • Clapham Common: Restricted parking

Areas That Actually Work

These are zones and neighborhoods where I’ve successfully stealth camped multiple times. I’m not giving exact streets because that’s how spots get ruined, but these areas are worth exploring.

Zone 3-4: Outer London

North London:

  • Finchley, Barnet, Hendon area: Lots of residential streets with unrestricted evening/night parking. Some residents-only zones but many streets are free after 6:30pm.
  • Wood Green, Turnpike Lane: Mix of restricted and unrestricted. Check signs carefully. Streets off main roads often fine.
  • Tottenham, Edmonton: Further out, more relaxed. Some areas feel sketchy—trust your instincts.

East London:

  • Walthamstow, Leyton, Leytonstone: Good options. Residential streets with free parking after hours. Near tube stations but not touristy.
  • Stratford outskirts: Not near Olympic Park (restricted) but residential areas around Stratford are workable.
  • Forest Gate, Manor Park: Further out but decent parking availability.

South London:

  • Lewisham, Catford, Forest Hill: Residential areas with unrestricted parking. Not trendy so less enforcement.
  • Streatham, Tooting (outer parts): Central Tooting is restricted, but edges of these areas have free streets.
  • Croydon (outer): Yes, it’s Croydon. But parking is easier and you’re still on the tram/train network.

West London:

  • Ealing, Acton: Some residents zones but many streets free after 6:30pm.
  • Hanwell, Greenford: Further out, more relaxed parking.
  • Hounslow (not near airport): Residential areas have decent unrestricted parking.

My Actual Strategy for London

  1. Identify the area I need to be in (meeting, work, visiting friend)
  2. Look at zones 3-4 within 30-40 mins public transport
  3. Use Google Maps to scout residential streets
  4. Check for parking signs on Street View
  5. Arrive evening, drive around until I find suitable street
  6. Park, sleep, leave early
  7. Get tube/train into central London

Example: Need to be in Shoreditch. Park in Walthamstow (20 mins on Victoria Line). Free, quiet, never been hassled.

London-Specific Tips

Parking enforcement:

  • Traffic wardens start early (6:30-7am in some areas)
  • They’re aggressive and have no sympathy for “I was just resting”
  • Evening/night enforcement is rare but exists in problem areas
  • Tickets are £60-130 depending on violation

Facilities:

  • 24-hour supermarkets: Asda and Tesco extras are all over London
  • Public toilets: Sparse. Use McDonald’s, Wetherspoons, or train stations
  • Water: Supermarkets, gyms (if member), or refill apps
  • Showers: The Gym Group (£20-30/month), PureGym (£25-35/month)

Safety:

  • Most areas are safe but trust your instincts
  • Avoid parking in obviously rough areas
  • Keep van locked always
  • Don’t open door to strangers
  • Have phone charged for emergencies

If police knock:

Be polite. Explain you’re traveling through, felt tired, parked legally. They usually just check you’re okay and leave. Police rarely care unless you’re causing problems.

If traffic warden knocks:

You need to move immediately. Arguing is pointless. Just drive away and find another spot.

Cost to stealth camp London:

  • Parking: £0 (if you find free spots)
  • Gym membership: £20-30/month (showers and toilets)
  • Fuel: £10-20 to drive around finding spots and repositioning

London Reality Check

London stealth camping is:

  • Time-consuming (finding spots takes effort)
  • Sometimes frustrating (moved on, no spaces, restrictions)
  • Requires patience and flexibility
  • Not relaxing (you’re in a city, it’s noisy and busy)

But it’s free accommodation in one of world’s most expensive cities. That’s worth some inconvenience.

Edinburgh: Tourist Trap or Manageable?

Edinburgh is easier than London but harder than it should be because the council has gotten increasingly hostile to campervans.

I’ve stayed in Edinburgh probably 10 or so nights across multiple visits.

Where NOT to Try

City Centre:

  • Royal Mile, Grassmarket, Old Town: Forget it. Tourist area, restrictions everywhere.
  • New Town: Residents parking only.
  • Princes Street, George Street: Commercial with overnight restrictions.
  • Holyrood area: Near parliament, heavily restricted.

Tourist spots:

  • Arthur’s Seat car parks: Height barriers or locked overnight.
  • Portobello Beach: Restricted parking, regular enforcement.
  • Leith Shore/waterfront: Council ban on overnight parking in many areas.

Problem areas:

Edinburgh Council has become increasingly anti-campervan in response to overtourism. Many previously-good spots now have “No overnight parking,” “No campervans,” or “No motorhomes” signs.

Areas That Work

Leith (carefully):

  • Residential streets away from Shore area
  • Check signs obsessively (many have new overnight restrictions)
  • More industrial areas (careful—some feel sketchy)
  • Near Ocean Terminal sometimes works

Craigmillar, Niddrie:

  • Further south/east
  • Less touristy, more working-class areas
  • Free parking common
  • Some areas feel rough—use judgment

Portobello (residential streets, not seafront):

  • Streets back from beach often unrestricted
  • Beach area itself is banned for overnight
  • Pleasant neighborhood if you find spot

Bruntsfield, Morningside:

  • More affluent areas south of center
  • Some residents parking but many streets free after 6pm
  • Quieter, safer feeling
  • 15-20 min bus to center

Blackford, Liberton:

  • South Edinburgh
  • University area (students don’t care about vans)
  • Lots of free parking on side streets
  • 20-30 mins to center

Corstorphine, Sighthill:

  • West Edinburgh
  • Near zoo and airport but residential
  • Less restricted parking
  • 20-25 mins to center

My Edinburgh Strategy

Edinburgh is compact. I park in residential areas 2-4 miles from center and walk, bus, or cycle in. Traffic in Edinburgh center is nightmare anyway—better to park out and commute.

Typical routine:

  1. Arrive late afternoon/evening
  2. Drive to Leith or south Edinburgh areas
  3. Scout residential streets for free parking
  4. Park by 9pm
  5. Sleep
  6. Leave by 8am or walk into town

Festival time (August):

Forget stealth camping centrally. Edinburgh is rammed during Festival/Fringe. Parking is impossible, enforcement is heavy, and everywhere’s chaotic.

Options:

  • Park way out (Portobello, Blackford, Corstorphine) and commute
  • Skip Edinburgh entirely during August
  • Pay for campsite (Mortonhall, Edinburgh Caravan Park are closest)

I tried stealth camping during Fringe once. Took me 90 minutes to find parking, got moved on at 7am by traffic warden, gave up and left Edinburgh. Not worth the hassle.

Edinburgh-Specific Tips

Weather:

  • Edinburgh is cold and windy even in summer
  • Condensation is worse than other cities (humidity from sea)
  • Good ventilation essential

Parking enforcement:

  • Less aggressive than London but present
  • Focus on tourist areas and restricted zones
  • Residential areas rarely checked overnight

Facilities:

  • 24-hour Asda in Chesser (west Edinburgh)
  • Tesco extras scattered around suburbs
  • Public toilets near Waverley, St James Quarter, Grassmarket
  • Water: Supermarkets or public toilets
  • Showers: PureGym locations (£25-30/month), The Gym (£20/month)

Council attitude:

Edinburgh Council is increasingly hostile to campervans due to overtourism and motorhome influx from NC500. They’ve added restrictions in many areas. This might get worse.

Respect the local sentiment. Don’t park obviously, don’t stay weeks, don’t be the reason they add more restrictions.

Safety:

Edinburgh is generally very safe. Some areas (Craigmillar, Niddrie, parts of Leith) feel rougher but actual crime against parked vans is rare. Use common sense.

Cost to stealth camp Edinburgh:

  • Parking: £0 (free spots available)
  • Gym: £20-30/month
  • Food: Supermarkets cheaper than London
  • Bus/transport: £1.80 per trip or day ticket £4.50

Edinburgh Reality Check

Edinburgh is medium difficulty. Easier than London, harder than Manchester. Doable but requires effort and flexibility.

Main issues:

  • Council restrictions increasing
  • Festival makes it impossible
  • Weather (cold, wet, windy)
  • Finding spaces can take time

But it’s manageable for short stays (few days to a week). Longer term gets harder as you need to rotate spots more.

Manchester: The Easiest of the Three

Manchester is the most van-friendly major UK city I’ve experienced. Less parking restrictions, more relaxed enforcement, easier to find spots.

I’ve spent maybe 10 nights in Manchester area and rarely had issues.

Where NOT to Try

City Centre:

  • Northern Quarter, Spinningfields, Deansgate: Commercial areas with restrictions.
  • Piccadilly Gardens area: Overnight restrictions, not safe feeling.
  • Salford Quays: Looks tempting but restricted parking and patrols.

University area:

  • Oxford Road, Fallowfield: Student area, restricted parking, break-ins more common.

Areas That Work

Manchester has loads of residential areas with unrestricted parking within 15-30 mins of center.

Chorlton:

  • South Manchester, affluent-ish area
  • Lots of unrestricted residential streets
  • Near tram line (20 mins to center)
  • Safe, pleasant, never been hassled here

Didsbury (West and East):

  • Leafy suburbs, very safe
  • Free parking on many streets
  • Tram or bus to center
  • Middle-class area (neighbors less likely to care about vans)

Levenshulme:

  • East Manchester
  • More working-class, cheaper food/facilities
  • Lots of free street parking
  • Train to center in 10-15 mins
  • Some streets rougher than others—scout first

Withington:

  • South Manchester
  • Mix of students and families
  • Free parking common
  • Buses to center frequent

Sale, Altrincham:

  • South/west, technically Trafford but close to Manchester
  • Suburban, lots of unrestricted parking
  • Tram line into center
  • Very safe, never had issues

Prestwich:

  • North Manchester
  • Residential with free parking
  • Tram to center (25 mins)
  • Jewish area (Friday night-Saturday daytime area is very quiet)

Stretford:

  • West Manchester
  • Working-class, cheaper area
  • Free parking readily available
  • Tram to center (20 mins)
  • Near Trafford Centre for facilities

My Manchester Strategy

Manchester is easy. Pick any residential area near tram or train line, park on side street, sleep, done.

I’ve parked in same spot in Chorlton 3-4 nights without moving and never been hassled. Can’t imagine doing that in London.

Typical routine:

  1. Choose area near tram/train
  2. Arrive evening (9-10pm)
  3. Drive around until I find good street (usually takes 5-10 mins)
  4. Park and sleep
  5. Leave when I want (no rush in most areas)

Manchester-Specific Tips

Parking enforcement:

  • Much more relaxed than London or Edinburgh
  • Residential areas rarely patrolled overnight
  • City center has enforcement but suburbs don’t really

Facilities:

  • 24-hour Asda locations (Hulme, Eastlands, others)
  • Tesco extras scattered around
  • Arndale has public toilets (city center)
  • Trafford Centre for everything (massive shopping center, free parking, facilities)

Safety:

Manchester has reputation for crime but parking overnight in residential areas has been fine for me. Avoid obviously rough streets (common sense).

Some areas I’ve avoided:

  • Moss Side (reputation)
  • Parts of Salford (varies)
  • Longsight (heard stories, never tested)

But honestly most of Manchester suburbs are fine.

Transport:

Manchester’s tram system (Metrolink) is excellent. Park anywhere near a tram line and you can get center in 20-30 mins. Much easier than London tube or Edinburgh buses.

Weather:

Manchester is wet. Like, really wet. Good ventilation essential or condensation is awful.

Cost to stealth camp Manchester:

  • Parking: £0 (free spots everywhere)
  • Gym: £20-25/month (The Gym Group, PureGym)
  • Food: Cheaper than London/Edinburgh
  • Tram: £4.70 day ticket or £2-3 per journey

Manchester Reality Check

Manchester is genuinely easy for stealth camping. If you’re nervous about starting city stealth camping, start in Manchester.

Why it’s easier:

  • Less parking restrictions in residential areas
  • Enforcement is relaxed
  • Easy to find spots (usually 5-10 mins of driving)
  • Good public transport (tram system)
  • Cheaper than London or Edinburgh
  • More van-friendly attitude generally

I’d happily stealth camp in Manchester for weeks without stress. London I can tolerate for a week max. Edinburgh maybe 5-7 days comfortably.

Other UK Cities (Brief Notes)

Birmingham

Similar to Manchester—easier than London, lots of unrestricted residential parking in suburbs. Digbeth and Jewellery Quarter have industrial areas that work overnight. City center restricted. Never had issues.

Bristol

Medium difficulty. Council has gotten hostile to campervans (Clifton, harbourside banned). Residential areas in suburbs okay (Southville, Bedminster, Horfield). Park and ride sites sometimes work overnight but check signs.

Leeds

Similar to Manchester. Easy to find residential parking. Headingley, Hyde Park, Horsforth areas all work. City center restricted. Relaxed enforcement.

Glasgow

Easier than Edinburgh (less touristy). West End (around university) and south side residential areas fine. Some areas feel rough—use judgment. Parking enforcement pretty relaxed.

Liverpool

Easy. Residential areas have free parking (Aigburth, Sefton Park, Wavertree). Waterfront touristy and restricted. Never been hassled.

Newcastle

Very easy. Residential suburbs have loads of free parking (Jesmond, Gosforth, Heaton). Friendly city, relaxed about vans.

Cardiff

Easy. Bay area restricted but residential suburbs fine (Canton, Roath, Cathays). Smaller city so less pressure on parking.

Practical Stealth Camping Setup

What you need in your van for successful city camping.

Essential Equipment

Blackout curtains/blinds:

  • Must block all light
  • Must not be see-through
  • Magnetic or suction fitting (easy to put up/remove)
  • I use black fabric with silver backing, fitted to window frames with magnets

Ventilation:

  • Crack windows overnight or you’ll wake up in condensation hell
  • Roof vent essential (MaxxFan or similar)
  • Some airflow needed without being obvious

Quiet:

  • Nothing creaking or rattling when you move
  • Silent toilet if you have one
  • Quiet heater (diesel heaters are noisy—use sparingly in cities)

Low profile:

  • No obvious modifications visible from outside
  • Plain exterior
  • No stickers or signs

Security:

  • Good locks on all doors
  • Alarm system (optional but reassuring)
  • Hidden valuables
  • Keep cab area empty (no laptop bags visible)

Facilities Strategy

Toilets:

  • McDonald’s (everywhere, always open)
  • Wetherspoons (cheap food, toilets, no one cares)
  • Supermarkets (during opening hours)
  • Train stations (usually accessible)
  • 24-hour petrol stations (small, not great)

Showers:

  • Gym membership (£20-30/month for budget chains)
  • Swimming pools (£4-8 per session)
  • Friends (if you have any left after asking repeatedly)
  • Truck stop showers (some have them, £4-8)

Water:

  • Supermarkets (fill bottles from taps in toilets)
  • Gyms (bottle fill stations)
  • Refill app (shows places that offer free water refills)

Grey water disposal:

  • NOT in street (illegal and disgusting)
  • Campsite waste points (£5-10 dumping fee or free if staying)
  • Some petrol stations (ask first)
  • Dedicated motorhome service points

Rubbish:

  • Take with you, dispose in public bins
  • Or Tesco/Asda bins when shopping
  • Don’t leave rubbish by your van

Daily Routine

My typical city stealth camping routine:

Evening:

  • 6-7pm: Finish whatever I’m doing (work, sightseeing, meeting friends)
  • 7-8pm: Find area I’m parking (residential suburb near transport)
  • 8-9pm: Get dinner, use supermarket toilet, fill water
  • 9-10pm: Drive to spot, park, set up curtains
  • 10pm-11pm: Evening routine, read, watch stuff on phone
  • 11pm-midnight: Sleep

Morning:

  • 7-7:30am: Wake up
  • 7:30-8am: Morning routine, pack up
  • 8-8:30am: Drive to gym/pool for shower, or use McDonald’s toilet
  • 8:30am-9am: Breakfast somewhere (cafe, pub, park)
  • 9am onwards: Whatever I’m doing that day

Takes maybe an hour total of “van stuff” per day. Rest is living normally but based out of a van.

When Stealth Camping Goes Wrong

Despite best efforts, sometimes you’ll have problems.

Moved On by Police

Happened to me twice.

First time: Parked in Hackney, police knocked at midnight. Said someone reported “suspicious van.” Checked I was okay, asked me to move. I drove two streets away. No problem.

Second time: Parked in Leith, police knocked at 2am. Same deal—checked I was okay, asked me to move. I left area entirely.

How to handle:

  • Be polite and cooperative
  • You’ve done nothing wrong (assuming parked legally)
  • Just move when asked—arguing is pointless
  • Don’t take it personally

Police are responding to resident complaints usually. They’re not interested in causing trouble, just want you to move along.

Moved On by Traffic Wardens

Happened three times.

Traffic wardens have less power than police but can issue tickets.

How to handle:

  • Move immediately
  • Don’t argue (they don’t care)
  • Check you weren’t violating parking restrictions
  • If you were, you might get ticket in post

Angry Residents

Happened five times.

Residents knock on your van or leave notes saying you can’t park there.

How to handle:

  • If they knock, be polite and explain you’re just resting/traveling through
  • If you get note, just move (not worth confrontation)
  • Remember: you’re in their neighborhood, respect that
  • Don’t park in same spot multiple nights (this causes complaints)

Most complaints come from repeat parking. If you rotate spots, rarely get hassle.

Tickets

Got one ticket in three years.

Camden, parked in bay with restrictions I misread. £60 ticket.

Disputed it (argued signage was unclear). They cancelled it.

If you get ticketed:

  • Read ticket carefully
  • Check if parking restrictions were clearly marked
  • If unclear signage, photograph and dispute
  • If you were clearly wrong, just pay it (fighting adds stress)

Break-Ins

Never been broken into but know people who have.

City break-ins are more common than rural. Take precautions:

  • Don’t leave valuables visible
  • Lock everything
  • Don’t park in obviously dodgy areas
  • Alarm system helps (mostly as deterrent)
  • Consider steering wheel lock for extra security

If broken into, report to police (crime number for insurance) and move areas immediately.

Feeling Unsafe

If spot feels wrong, leave.

I’ve abandoned spots because:

  • Drunk people hanging around
  • Felt too isolated
  • Sketchy area I didn’t notice until dark
  • Just bad vibes

Trust instincts. Finding new spot is easier than dealing with problems.

The Ethics of Stealth Camping

Stealth camping exists in ethical grey area. Here’s my thinking:

Arguments for:

  • You’re using public space (roads are public)
  • Not harming anyone
  • Parking legally (following all restrictions)
  • Need accommodation, cities are expensive
  • Brief stay (not setting up permanently)

Arguments against:

  • Residents pay taxes/permits for street parking
  • You’re effectively getting free accommodation in expensive city
  • Some vans are messy/antisocial (ruins it for everyone)
  • Takes up parking spaces residents might want

My approach:

I stealth camp but try to minimize impact:

  • Never stay same spot multiple nights running
  • Always park legally
  • Leave no trace (no rubbish, no dumping grey water)
  • Be quiet and respectful
  • Move immediately if asked
  • Use facilities elsewhere (not resident streets for toilet/rubbish)

If everyone did this, stealth camping would remain viable. Unfortunately some people are antisocial, which ruins it and causes councils to add restrictions.

Don’t be the reason your city bans overnight van parking.

Alternatives to Stealth Camping

Sometimes stealth camping isn’t worth the hassle.

Park and Ride sites:

  • Some allow overnight (check signs)
  • Usually secure
  • Transport into city available
  • Free or cheap (£5-10)

Pub car parks:

  • Ask landlord if you can stay overnight
  • Buy meal and drinks (£15-20)
  • Usually fine with vans
  • Often have toilets

Campsite outskirts:

  • Sites on edges of cities (30-40 mins to center)
  • £15-30/night
  • Facilities included (toilet, shower, waste disposal)
  • More relaxing than stealth camping

Park4Night spots:

  • Crowdsourced database of parking spots
  • Some near cities
  • Reviews help avoid bad spots

Friends’ driveways:

  • Free, safe, facilities available
  • Requires having friends who don’t mind
  • Can only abuse this so many times

Hotel/hostel:

Sometimes just pay for accommodation. £40-60 for night in hostel or budget hotel, includes shower, WiFi, breakfast sometimes, and you’re not stressed about parking.

I use mix of stealth camping and paid accommodation. If I’m tired, stressed, or weather’s awful, I’ll pay for room. If I’m on budget and don’t mind the effort, I’ll stealth camp.

Final Thoughts

City stealth camping is never perfect. It’s compromise between:

  • Free accommodation (pro)
  • Effort and hassle (con)
  • Limited comfort (con)
  • Flexibility (pro)
  • Independence (pro)
  • Occasional stress (con)

Is it worth it? Depends on your priorities.

Do city stealth camping if:

  • Budget is tight and you’re trying to save money
  • You’re passing through briefly (1-3 nights)
  • You don’t mind the effort and uncertainty
  • You want flexibility (no booking, no commitments)
  • You’re reasonably experienced with vanlife

Don’t do city stealth camping if:

  • You’re stressed easily
  • You need guarantees (knowing exactly where you’ll sleep)
  • You’re new to vanlife (start easier, rural camping)
  • You have other options (friends’ places, affordable accommodation)
  • The city has made it very difficult (London during events, Edinburgh during Festival)

After three years doing this, I’m comfortable with city stealth camping but I understand why some people avoid it.

It’s not glamorous. It’s often frustrating. But it’s free accommodation in expensive cities, and that’s valuable.

My final advice:

Start in easier cities (Manchester, Leeds, Newcastle). Learn the basics. Build confidence. Then attempt London or Edinburgh if needed.

Read signs obsessively. Be respectful and quiet. Leave no trace. Rotate spots. Don’t take the piss.

And remember: you’re a guest in someone’s neighborhood. Act accordingly.


Useful Apps:

  • Park4Night: Finding parking spots (£9.99 one-time)
  • JustPark: Booking private parking (free app)
  • Parkopedia: Checking restrictions and prices
  • Google Maps: Street View to scout spots
  • Citymapper: Public transport (London, Manchester, Birmingham)

Legal Disclaimer: This guide is based on personal experience. Laws and regulations change. Always check local bylaws and parking restrictions. I’m not encouraging illegal parking—park legally and responsibly. If asked to move by authorities, comply immediately.

Turns out, converting a van changes everything about how it’s tested. And nobody tells you this until you’re sat in a waiting room watching your pride and joy get ripped apart by an MOT tester who’s suddenly very interested in that dodgy leisure battery installation.

So here’s what I’ve learned after four campervans, and seven MOTs, and more servicing bills than I’d like to admit. This is the guide I wish I’d had before that first test.

If you’re a van lifer or considering the lifestyle, understanding MOT And Servicing Campervans is crucial for your peace of mind.

Do Campervans Need MOT Tests?

Yes. And sometimes they’re tested differently than you’d expect.

If your campervan is over three years old, it needs an annual MOT — just like any other vehicle. But here’s where it gets interesting: depending on how you’ve converted it and what it’s registered as, you might be tested under different criteria. Understanding MOT And Servicing Campervans can help navigate these complexities.

Your MOT class depends on your V5C registration:

  • Class 4 (standard car/van) — Most DIY conversions stay here
  • Class 5 (private passenger vehicle) — Some larger conversions
  • Class 7 (goods vehicle over 3,000kg) — Bigger coach-built motorhomes

I’ve had vans tested under Class 4 and Class 7. The difference? About forty-five minutes of extra checks and a lot more scrutiny of your conversion work.

When Your Conversion Changes Everything

Here’s what nobody tells you: that beautiful interior you’ve spent months building can fail your MOT.

The tester doesn’t just check your brakes and tyres anymore. If you’ve registered your van as a motor caravan (which most people do for insurance reasons), they’re legally required to inspect your living space. And they’re looking for things that’ll kill you.

What They Actually Check Inside

Gas systems — Every connection, every regulator, every pipe. If you’ve bodged your Propane installation or used jubilee clips instead of proper hose clamps, you’re failing. No exceptions.

Last year, I watched a van fail because the owner had routed their gas line too close to an electrical cable. They’d never have noticed. The MOT tester did.

Electrical installations — Leisure battery secured properly? Cables chafed? Fuses rated correctly? They’ll check. I failed once because my battery wasn’t in a sealed box. £60 fix, but I had to rebook the test.

Sharp edges and protrusions — This one catches everyone. That exposed screw in your ceiling? The corner of your bed frame that sticks out? Potential passenger injuries mean potential MOT failures.

Fire extinguisher and blanket — Not technically required by law, but some testers expect them in motor caravans. I keep both near the door. Cost about £40 total and probably saved me a fail.

Fixed furniture — If your bed or cabinets can move in a crash, that’s a fail. Everything needs securing properly. I use M8 bolts into the chassis ribs, not those crappy self-tappers into thin metal.

The Hidden Costs Nobody Mentions

Standard MOT test? £54.85 is the maximum fee.

But here’s what actually happens with campervans:

  • Pre-MOT inspection — £60-£100 at a good garage (absolutely worth it)
  • Remedial work — Budget £200-£500 for stuff you didn’t know needed fixing
  • Retest fees — Free if you return within 10 working days, but you’re paying for the fixes
  • Annual service while you’re there — Another £150-£300 depending on the vehicle

My average campervan MOT “event” costs somewhere between £400-£700 once everything’s said and done. Some years it’s just the test fee. Other years it’s a grand when something major needs replacing.

Common Campervan MOT Failures (From Someone Who’s Had A Few)

1. Corroded Brake Pipes

Campervans live harder lives than regular vans. You’re parking in muddy fields, by the coast, up mountains. All that moisture eats brake pipes for breakfast.

I’ve had one van fail for corroded brake lines. The fix isn’t cheap — expect £150-£400 depending on how many pipes need replacing — but it’s not optional. Brakes are kind of important.

Prevention: Spray your brake lines with ACF-50 or similar corrosion inhibitor every six months. Takes ten minutes and costs about £15 a year.

2. Perished Tyres

Your van might only do 5,000 miles a year, but those tyres are ageing regardless. Rubber perishes. Sidewalls crack. And MOT testers know exactly where to look.

I failed once with tyres that had 7mm of tread but five-year-old sidewalls showing cracks. Four new tyres at £100+ each. Ouch.

Reality check: Replace campervan tyres every 5-6 years regardless of tread depth. And check the date codes — those tyres you bought “new” on eBay might already be three years old.

3. Windscreen Damage

That tiny chip you’ve been ignoring? If it’s in the driver’s line of sight and bigger than 10mm, it’s a fail.

I’ve had two windscreen repairs done at MOT time. One garage tried to charge me £80 for a repair that Autoglass did for free under insurance. Shop around.

4. Emissions Failures (Diesel Vans)

DPF problems are everywhere now. If you’re only doing short trips and your diesel van has a Diesel Particulate Filter, it probably isn’t regenerating properly.

One of my vans failed emissions because the DPF was clogged. The fix? A forced regeneration (£100) and a long motorway drive before the retest. Now I make sure to give it a proper run before MOT time.

5. Dodgy DIY Wiring

This is the big one for self-builds.

If your leisure battery installation isn’t isolated from the vehicle’s electrical system properly, that’s a fail. If you’ve tapped into the main loom without proper connectors, that’s a fail. If your split charge relay is held together with hope and insulation tape, that’s definitely a fail.

I’ve seen vans fail because the owner drilled through the vehicle loom when installing a bed frame. The tester found it. They always find it.

Finding a Campervan-Friendly MOT Station

Not all garages understand conversions. I’ve been to places where the mechanic looks at the interior like I’ve landed a spaceship in his workshop.

What you want:

  • A garage that regularly tests motorhomes or campervans
  • Testers who understand LPG/Propane systems (if you have gas)
  • Somewhere that’ll give you an honest pre-MOT inspection
  • A place that can do the remedial work immediately (saves rebooking)

How to find them:

Ring ahead. Ask: “Do you MOT campervans? Do you understand motor caravan conversions?” If they hesitate, go elsewhere.

I use a small independent garage in Yorkshire that specialises in motorhomes. They found £300 worth of issues in a pre-MOT check that would’ve been a nightmare to fix at test time. Worth the 40-mile drive.

Servicing Schedules: What Actually Needs Doing

Your manufacturer’s service schedule still applies. Converting a van doesn’t change the fact that it’s still a Fiat Ducato or VW Transporter underneath all your lovely wood cladding.

Standard intervals:

  • Oil and filter — Every 12 months or 12,000 miles (I do mine at 10k)
  • Air filter — Every 24 months or 24,000 miles
  • Fuel filter — Every 24 months or 30,000 miles (diesel)
  • Brake fluid — Every 2 years (everyone ignores this, don’t)
  • Coolant — Every 3-4 years or per manufacturer schedule

Additional campervan-specific servicing:

  • Leisure battery check — Every 6 months (load test annually)
  • Gas system inspection — Annually by a qualified Gas Safe engineer (legally required if you have gas)
  • Water system sanitisation — Every 6 months minimum (more if you’re full-timing)
  • Solar panel connections — Check annually for corrosion
  • Roof vent seals — Inspect every spring (leaks are expensive)

The Gas Certificate You Legally Need

If you’ve got a gas cooker, heater, or fridge in your van, you need a Gas Safety Certificate for insurance and legal purposes.

Cost? £80-£150 depending on your location and system complexity.

A Gas Safe registered engineer inspects everything, pressure tests the system, and issues a certificate. It’s valid for 12 months.

I had one installation fail inspection because I’d used the wrong type of hose. The engineer made me replace it before he’d sign off. He was right — I’d bought automotive fuel hose instead of proper LPG hose. Could’ve been catastrophic.

Find engineers at: gasafe.org.uk (don’t use someone who isn’t registered)

What I Wish I’d Known Before My First MOT

Book early. MOTs get busy in March and September when registrations spike. Book yours for a random Tuesday in November and you’ll get better attention.

Get a pre-MOT inspection. Seriously. Spending £60 to find problems before the test is worth it. You can fix issues on your own schedule instead of panicking in the garage car park.

Take photos of your conversion. If they question something about your build, having photos of the installation process helps. I keep a folder on my phone showing how everything was installed properly.

Don’t mod the vehicle just before MOT. I installed a new leisure battery three weeks before an MOT and didn’t secure it properly. Failed. If you’re making changes, do them right after your test, not before.

Ask questions. If your van fails for something you don’t understand, ask the tester to explain it. Most are happy to show you exactly what the problem is.

Keep your paperwork. Every receipt, every gas certificate, every service record. When you sell the van, this stuff adds value. And if you’re pulled over by police or DVSA, having your gas certificate and receipts proves you’ve done things properly.

The DVLA Minefield: Registration Changes

This is where people get tangled up.

If you convert a van into a campervan, you should tell the DVLA. They’ll change your V5C from “panel van” to “motor caravan.” This affects your insurance, your MOT testing criteria, and sometimes your road tax.

To get motor caravan status, you need:

  • A fixed bed
  • A fresh water storage tank
  • A sink with waste water tank
  • A cooking facility
  • Storage facilities

Seems simple. But the DVLA interprets this however they feel like on any given Tuesday.

I’ve had one application accepted in three weeks, another rejected twice before they approved it six months later. Same conversion standard on both vans.

Should you bother?

Depends. Motor caravan insurance is usually cheaper. But you’re opening yourself up to more scrutiny at MOT time. If your conversion is solid and legal, do it. If you’ve bodged something, maybe stay registered as a van and get it fixed first.

DIY Service vs Garage: What I Actually Do

I do myself:

  • Oil and filter changes (£40 vs £120 at a garage)
  • Air filter replacement (takes five minutes)
  • Fluid level checks
  • Leisure battery maintenance
  • Water system cleaning
  • Basic brake inspection

I pay someone else for:

  • Brake work (I don’t mess with brakes)
  • Suspension components
  • Anything involving the DPF or emissions system
  • MOT welding if needed
  • Gas system certification
  • Anything I’ve never done before

Know your limits. Some things aren’t worth learning the hard way.

The Bottom Line

Budget £500-£700 annually for MOT and servicing combined. Some years it’ll be less. Some years it’ll be more when your clutch decides to die two days before the test (true story, don’t ask).

Get a good garage that understands campervans. Get your gas system certified annually. Keep on top of basic maintenance. Don’t ignore warning lights just because you’re living the vanlife dream.

Your campervan isn’t just your transport. It’s your home. Look after it properly, or it’ll fail you when you’re 300 miles from anywhere with no phone signal and a storm rolling in.

Been there. Done that. Learned expensive lessons.

Where to Find Qualified Help

Gas Safe Register: gasafe.org.uk — Find qualified gas engineers near you

DVLA guidance: gov.uk/government/organisations/driver-and-vehicle-licensing-agency — Registration changes and motor caravan criteria

MOT history check: check-mot.service.gov.uk — See any vehicle’s MOT history (useful when buying used)

NCC certification: thencc.org.uk — If you want your conversion professionally verified (not required but adds value)

And if you’re unsure about anything with your conversion, just ask. There’s no stupid questions when it comes to keeping your van legal and safe.

Just expensive mistakes if you don’t.

I’ve been moved on a few times in five years of wild camping. Twice by police, seven times by landowners, three times by wardens, and twice by angry farmers who found me at dawn and made their feelings very clear.

I’ve also successfully wild camped so many nights without issues. I’ve woken up to Scottish sunrises over lochs, Welsh mountain views, Cornish coastal dawns, and Peak District mists. I’ve parked in lay-bys, forestry commission car parks, beach access roads, and remote farm tracks.

Here’s what I’ve learned: wild camping in the UK exists in a grey area between technically illegal trespassing and tolerated common practice. The law says one thing. Reality is different. Success depends on understanding both.

This isn’t another article listing “wild camping spots” that are actually paid campsites or showing you photos of vans parked in prohibited areas. This is the reality of wild camping in the UK — what’s actually legal, what’s tolerated, where you’ll get moved on, and how to do it without being a dickhead.

In this guide, I will share some of the best wild camping spots in the UK that I’ve discovered during my adventures.

I’ll tell you about spots that work, spots that look perfect but always get you moved on, and the tactics that actually keep you under the radar. I’ll cover the legal situation in each country (it’s different), the unwritten rules that matter more than the written ones, and what happens when it goes wrong.

Because it will go wrong sometimes. You’ll misjudge a spot. You’ll park somewhere that seemed fine but turns out to be someone’s driveway. You’ll wake up to a farmer knocking on your window. And you need to know how to handle it.

Let’s get into it.

The Legal Reality: It’s Complicated

Right, let’s sort out the legal situation because everyone gets this wrong.

Scotland: Actually Legal (Mostly)

Scotland has the Land Reform (Scotland) Act 2003, which gives everyone the right to access most land for recreational purposes, including wild camping. This is real, actual, legal wild camping.

The rights:

  • Camp on most unenclosed land
  • Stay for 2-3 nights in one spot
  • Access most hills, mountains, moors, forests
  • Use motorhomes and campervans (with restrictions)

The restrictions:

  • Not on enclosed agricultural land (fields with crops/livestock)
  • Not within sight of houses (generally 100m+ away)
  • Must follow Scottish Outdoor Access Code
  • Some areas have camping management zones (Loch Lomond, Trossachs)
  • Must leave no trace

What this means in practice:

You can legally park your van on forestry tracks, in remote car parks, by lochs (if there’s access), on moorland passing places, and in the Highlands. As long as you’re discrete, respectful, and leave no trace, you’re exercising your legal right.

I’ve wild camped in Scotland dozens of times. Never been moved on when following the rules. It’s brilliant.

England and Wales: Technically Illegal, Practically Tolerated

There’s no right to wild camp in England and Wales. Legally, parking overnight on someone’s land without permission is trespassing (civil offence, not criminal). But:

The reality:

  • Wild camping happens constantly
  • Authorities mostly tolerate discrete camping
  • Being moved on is the worst consequence (usually)
  • Some areas actively tolerate it
  • Others enforce no overnight parking

The trespassing law:

Trespassing is civil, not criminal. The landowner can ask you to leave. If you refuse, they can pursue civil action. But they rarely do because:

  • It’s expensive
  • It’s effort
  • Most campers leave when asked
  • You’re not causing damage

What actually happens: someone asks you to move, you move, end of story.

Exception – Criminal trespassing:

You can be criminally prosecuted for trespassing if:

  • You’re causing damage
  • You’re part of a group (6+ vehicles)
  • You’re on specific protected land
  • You refuse to leave when asked by authorities

Single campervan, causing no damage, leaving when asked? Civil matter only.

Northern Ireland: Restrictive

Northern Ireland has no wild camping rights and stricter enforcement than England/Wales. Most land is private. Authorities are less tolerant. I’ve camped there twice, got moved on once. It’s doable but harder.

The practical legal position:

Scotland: Do it legally and freely
England/Wales: Do it discretely and respectfully, expect occasional moving on
Northern Ireland: Find campsites or be very discrete


The Scottish Highlands: Where It’s Actually Legal

Right, Scotland first because it’s easiest. Here are some of the best wild camping spots I’ve used successfully, sometimes multiple times.

1. Glen Etive (Scottish Highlands)

What it is: Long single-track valley road with multiple pull-offs and parking areas alongside a river.

GPS starting point: Glen Etive, PA39 (multiple spots along the glen)

Why it works:

Glen Etive is famous among wild campers because it’s legal, accessible, and stunning. The single-track road follows the river with dozens of informal parking spots. You’re camping on unenclosed land with no nearby houses.

I’ve stayed here four times. Once had six other campervans nearby (everyone spread out, everyone quiet). Never been disturbed. No facilities, no hassle, no problems.

What to know:

  • Gets busy in summer (15+ vans some nights)
  • Midges are brutal June-August
  • No facilities (pack out everything)
  • Some spots better than others (drive the whole glen)
  • Can be boggy after rain
  • Occasionally used by film crews (Skyfall was filmed here)

Best time: September-October (fewer midges, fewer vans, stunning colors)

Facilities: None. Nearest services in Glencoe village (20 min drive).


2. North Coast 500 Lay-bys (Scottish Highlands)

What it is: The NC500 route has dozens of suitable overnight spots, from forestry car parks to coastal passing places.

My favorites:

  • Achmelvich Beach car park (NC500, near Lochinver) – coastal, often has 3-4 vans
  • Bealach na Bà viewpoint (Applecross Pass) – dramatic mountain pass, gets cold
  • Clashnessie Beach – small parking area, stunning beach

Why it works:

The NC500 is designed for touring. Authorities know campervans use it. Discrete overnight parking is tolerated as long as you’re respectful.

I’ve used various NC500 spots eight times over two trips. Moved on once (private car park, I’d missed the sign). Otherwise fine.

What to know:

  • Some spots marked “no overnight parking” – respect this
  • Coastal spots get windy
  • Facilities are sparse (plan ahead)
  • Summer gets busy (50+ vans in some areas)
  • Locals sometimes tired of NC500 tourists (be extra respectful)

Best time: May or September (after/before peak, better weather than winter)

Facilities: Scattered. Fuel and shops in Ullapool, Durness, Lochinver, Applecross.


3. Loch Rannoch (Perthshire)

What it is: Quieter alternative to more famous Loch Lomond. Forestry Commission car parks and lochside access points.

GPS: Loch Rannoch, PH17 – multiple spots along south shore

Why it works:

Less famous than Loch Lomond means fewer vans and less enforcement. The south shore has several forestry car parks that tolerate overnight stays. It’s proper wild camping but accessible.

I’ve stayed here twice, both times completely alone. Once in October (freezing but beautiful), once in May (midges, less beautiful).

What to know:

  • South shore easier access than north
  • Some car parks have height barriers
  • Gets very cold in winter
  • Good hiking access (Schiehallion nearby)
  • Midges in summer

Best time: October-November (autumn colors, fewer midges)

Facilities: Village of Kinloch Rannoch has shop, pub. Limited.


4. Glenmore Forest Park (Cairngorms)

What it is: Forestry Commission managed forest with designated parking areas near Aviemore.

GPS: Glenmore Forest Park, PH22 1QU

Why it works:

The Forestry Commission tolerates discrete overnight parking in many locations. Glenmore has several car parks that work. You’re technically meant to move every 2 nights, but enforcement is light.

I stayed three nights here in January. Snowed in, -8°C, amazing. Saw four other vans over three days. No one bothered us.

What to know:

  • Some car parks better than others
  • Rangers occasionally check (polite, just ensuring compliance)
  • Good facilities nearby (Aviemore 15 min)
  • Busy in ski season (December-March)
  • Midges in summer

Best time: Winter for skiing, October for hiking

Facilities: Aviemore has everything (supermarkets, fuel, outdoor shops)


5. Isle of Skye Coastal Spots

What it is: Various coastal access points and forestry car parks across Skye.

My spots:

  • Staffin Beach car park – often has 2-3 vans
  • Elgol – parking area, stunning Cuillin views
  • Glenbrittle – beach access, climber’s paradise

Why it works:

Skye is touristy but tolerates van camping in many areas. Coastal access points are legal wild camping spots. Discrete parking is generally fine.

Used Skye spots six times. Moved on once (private land, I’d misread access). Otherwise successful.

What to know:

  • Gets very busy in summer (too busy)
  • Some areas have overnight parking bans (Fairy Pools, Quiraing)
  • Wind is constant and fierce
  • Facilities scattered
  • Midges are legendary in summer

Best time: May or October (avoid summer crowds)

Facilities: Portree has full services, other villages limited


England: The Tolerated Grey Area

England has no legal wild camping, but these spots work through toleration or obscurity.

6. Dartmoor National Park (Devon)

What it is: One of the few places in England with quasi-legal wild camping (for tents) that extends to discrete van parking in some areas.

GPS starting point: Dartmoor, Devon – various car parks

Why it works (sort of):

Dartmoor has backpacking wild camping rights on certain commons. While this doesn’t technically extend to vehicles, some car parks tolerate overnight stays. It’s a grey area.

I’ve stayed on Dartmoor five times. Moved on twice (wrong car park, private land). Three times fine. Success rate: 60%.

What to know:

  • Stick to larger forestry/national park car parks
  • Avoid private car parks (common near villages)
  • Rangers sometimes check (usually just informing, not moving on)
  • Gets boggy and cold
  • Ponies will investigate your van

Best spots:

  • Postbridge car park – popular, usually tolerated
  • Burrator Reservoir – forest car parks
  • Two Bridges – hit and miss

Best time: September-October (avoid summer tourists and winter weather)

Facilities: Villages on edge of moor (Princetown, Postbridge, Widecombe)


7. Forest of Dean (Gloucestershire)

What it is: Forestry Commission woodland with multiple car parks that mostly tolerate overnight parking.

GPS: Forest of Dean, GL16 – various car parks

Why it works:

Forestry Commission is generally tolerant of discrete overnight parking. Forest of Dean has dozens of car parks. Some officially prohibit overnight parking, others don’t mention it.

I’ve used Forest of Dean six times over three years. Never moved on. Multiple nights in same spot without issue.

What to know:

  • Check for “no overnight parking” signs
  • Some car parks have height barriers
  • Can be muddy after rain
  • Good cycling and hiking
  • Near Wales border (easy to combine)

Best spots:

  • Mallards Pike Lake – larger car park, usually fine
  • Beechenhurst – popular but tolerated
  • Cannop Ponds – scenic, often 1-2 other vans

Best time: Year-round (mild climate)

Facilities: Coleford and Cinderford have shops/services


8. Northumberland Coast (Northumberland)

What it is: Coastal access points, beach car parks, and forest car parks along relatively quiet coastline.

My spots:

  • Beadnell Bay – large car park, often has vans
  • Low Newton – small village car park
  • Druridge Bay – country park car parks

Why it works:

Northumberland is less touristy than Cornwall or Devon. Many coastal car parks tolerate overnight parking. It’s not explicitly legal, but enforcement is rare.

I’ve used Northumberland spots four times. Never moved on. Often alone or with 1-2 other vans.

What to know:

  • Some beach car parks have height barriers
  • Check for overnight parking signs
  • Can be very windy
  • Seals on some beaches (keep distance)
  • Cold even in summer

Best time: May-June (long daylight, before peak season)

Facilities: Small villages have basics, Alnwick for major shops


9. Kielder Forest (Northumberland)

What it is: Huge forestry commission forest with multiple car parks and forest tracks.

GPS: Kielder Forest, NE48 – various access points

Why it works:

Kielder is remote and massive. Forestry Commission tolerates discrete parking. Multiple suitable spots spread across huge area.

I’ve stayed here twice. Both times completely alone. No one checked on me. One of the most remote-feeling spots in England.

What to know:

  • Very remote (nearest services 30+ minutes)
  • Phone signal patchy/non-existent
  • Dark Sky Park (amazing stars)
  • Gets very cold at night
  • Forest tracks can be rough

Best time: Summer for warmth, winter for stars

Facilities: Kielder village has basics, but it’s remote. Stock up before arriving.


10. North York Moors (Yorkshire)

What it is: National Park with moorland roads, forest car parks, and coastal access.

My spots:

  • Hole of Horcum – popular viewpoint car park
  • Ravenscar – coastal village car park
  • Sutton Bank – large car park with views

Why it works:

North York Moors National Park is generally tolerant. Many car parks see overnight vans regularly. Enforcement is light.

I’ve used North York Moors three times. Moved on once (private car park near Whitby). Otherwise fine.

What to know:

  • Some spots get busy with other vans
  • Moorland spots can be very cold
  • Good hiking and cycling
  • Easier access than remote Scotland

Best time: September-October (heather in bloom, fewer tourists)

Facilities: Villages throughout (Helmsley, Pickering, Whitby)


Wales: Beautiful But Stricter

Wales has tightened wild camping enforcement recently, but discrete spots still work.

11. Snowdonia Forestry Car Parks (Gwynedd)

What it is: Forestry Commission car parks in Snowdonia National Park.

GPS: Snowdonia, LL – various car parks (Betws-y-Coed area)

Why it (sometimes) works:

Snowdonia has cracked down on overnight parking in popular spots, but forestry car parks away from main tourist areas still tolerate discrete camping.

I’ve stayed in Snowdonia five times. Moved on three times (popular spots like Pen-y-Pass). Successful twice (quieter forestry car parks).

What to know:

  • Many popular spots now have overnight parking bans
  • Enforcement increased significantly 2020-2023
  • Forestry car parks better than National Park car parks
  • Very wet climate
  • Success rate lower than Scotland

Better spots:

  • Beddgelert Forest – several car parks, quieter
  • Gwydyr Forest – near Betws-y-Coed, less touristy

Best time: September-October (avoid summer crowds)

Facilities: Betws-y-Coed, Llanberis, Beddgelert have services


12. Pembrokeshire Coast (Southwest Wales)

What it is: Coastal access car parks and clifftop spots along stunning coastline.

My spots:

  • Whitesands Bay – large car park, sometimes tolerated overnight
  • St Davids Head – remote car park
  • Newport Parrog – small coastal village

Why it works (sometimes):

Pembrokeshire is touristy but some spots tolerate overnight parking. It’s hit and miss. Enforcement varies by location and season.

I’ve used Pembrokeshire four times. Moved on twice (rangers checking popular spots). Successful twice (quieter beaches).

What to know:

  • Popular beaches enforce strictly
  • Quieter spots more tolerant
  • Coastal wardens patrol in summer
  • Beautiful but busy
  • Success rate: 50%

Best time: May or September (before/after peak)

Facilities: St Davids, Tenby, Fishguard have full services


Coastal Car Parks: The National Issue

Nearly every coastal area in the UK now has “no overnight parking” signs. But the reality is more nuanced.

Why the bans exist:

  1. Tourism overload (Cornwall, Pembrokeshire, Scotland)
  2. Local resident complaints (noise, rubbish)
  3. Campsite lobbying (losing business to free camping)
  4. Toilet waste dumping (some idiots ruin it for everyone)

What actually happens:

Many bans aren’t enforced overnight. Wardens work 9am-5pm. If you arrive at 8pm and leave by 8am, often no one checks. But this isn’t guaranteed.

My coastal parking strategy:

  1. Avoid obvious tourist spots (too much enforcement)
  2. Choose larger, less popular car parks
  3. Arrive late (after 8pm), leave early (before 8am)
  4. Move every night (don’t take the piss)
  5. Be prepared to move if asked
  6. Have backup spot identified

Coastal spots that still work (sometimes):

  • North Norfolk coast – several beaches tolerate overnight
  • Dungeness – isolated, often has vans
  • Scottish west coast – legal wild camping applies
  • Northumberland beaches – less enforcement

Coastal spots that don’t work:

  • Cornwall in summer – forget it, totally enforced
  • Pembrokeshire popular beaches – strict enforcement
  • Loch Lomond shores – camping management zones
  • Anywhere with clear signage and barriers

Lay-bys and Verges: The Last Resort

Lay-bys on A-roads and B-roads are legal to park in overnight (with restrictions). But they’re often noisy, unsafe, or unsuitable.

When lay-bys work:

  • Rural areas with low traffic
  • Larger lay-bys with space for multiple vehicles
  • Away from junctions and bends
  • Quiet B-roads, not A-roads

When they don’t:

  • A-roads (constant truck traffic)
  • Near population centers (noise, security)
  • Small lay-bys (blocking access)
  • Bends or junctions (unsafe)

My lay-by experiences:

I’ve stayed in lay-bys maybe 20 times. It’s always my last choice. The noise from trucks at night is miserable. I only use lay-bys when I’ve misjudged timing and need somewhere legal to stop.

Better alternatives:

  • Forestry car parks
  • Quiet village car parks (ask at pub first)
  • Farm tracks (ask permission)
  • Services with overnight parking (some Tesco car parks)

The Unwritten Rules That Matter More Than Law

Right, here’s what actually keeps you out of trouble. Follow these and you’ll rarely have issues.

Rule 1: Arrive Late, Leave Early

The golden timing:
Arrive: After 8pm
Leave: Before 9am

Most enforcement happens during working hours. Wardens, rangers, and busy landowners aren’t checking car parks at 10pm or 7am. Arrive after dark, leave at dawn, and you’re invisible.

I’ve used this timing hundreds of times. It transforms “no overnight parking” car parks into usable spots.

Example:

Popular Cornish beach car park. Sign says “no overnight parking 6pm-8am.” I arrive at 8:30pm (dark, empty, sign applies). I leave at 7:45am (before 8am deadline, before traffic starts).

Did I break rules? Technically. Did anyone care? No, because I was discrete and gone before anyone noticed.

Rule 2: Leave No Trace (Actually No Trace)

The absolute basics:

  • Take all rubbish with you (every scrap)
  • Don’t dump grey water or toilet waste
  • Don’t light fires (unless specifically permitted)
  • Don’t damage vegetation
  • Don’t leave marks (tyre ruts, furniture, anything)

Sounds obvious. Yet I’ve seen:

  • Toilet waste dumped in car parks
  • Rubbish left in bushes
  • Fire pits dug in moorland
  • Grey water dumped directly onto grass

These dickheads ruin spots for everyone. Don’t be them.

My zero-trace routine:

  1. Bag all rubbish (including recyclables)
  2. Grey water stored in tank or container
  3. Toilet chemicals properly disposed (dump stations only)
  4. Check ground for any dropped items before leaving
  5. Leave spot looking exactly as I found it

If everyone did this, wild camping wouldn’t be controversial.

Rule 3: Don’t Outstay Your Welcome

One night: Usually fine
Two nights: Pushing it
Three nights: Taking the piss

The Scottish Outdoor Access Code suggests 2-3 nights maximum. I stick to one night almost always. Move spots regularly.

Why this matters:

You’re not the only van user. If you occupy a spot for a week, you’re blocking it from others and attracting attention from authorities. Move on.

Exceptions:

  • Remote Scottish locations (truly remote, you can stay longer)
  • Private land with permission
  • Official overnight parking areas

Rule 4: Be Invisible

Tactics I use:

  • Park away from other vehicles when possible
  • No external lights after dark
  • Blackout curtains so interior light doesn’t show
  • Quiet (no music, loud conversations, generators)
  • Minimal external setup (no awnings, chairs, tables)

The goal: someone driving past shouldn’t notice you’re there.

Bad examples I’ve seen:

  • Vans with fairy lights strung outside
  • Awnings erected in car parks
  • Music playing at 11pm
  • BBQs and campfires
  • Groups of 4-5 vans partying

These people get moved on. And they cause problems for discrete campers.

Rule 5: Have an Exit Plan

Always know where you’ll go if moved on.

My approach:

Before settling for night, I identify:

  • Backup spot within 10 minutes drive
  • Second backup within 20 minutes
  • Worst-case option (24h services, truck stop, etc.)

Why this matters:

You’ll get knocked on sometimes. Having a plan means you can leave calmly without desperate 11pm driving looking for anywhere to park.


What Happens When You Get Moved On

It will happen. Here’s how to handle it based on my 14 experiences.

Scenario 1: Landowner in the Morning

What happened to me:

Woke up at 6:30am to loud knocking. Farmer standing outside. He asked what I was doing. I explained I’d arrived late, was leaving soon. He said “off my land within 30 minutes.”

I left in 15 minutes.

How to handle:

  • Be polite and apologetic
  • Don’t argue (you’re trespassing, legally wrong)
  • Leave immediately when asked
  • Don’t demand explanation or justification
  • Thank them and move on

Scenario 2: Police at Night

What happened to me:

Parked in what I thought was forestry car park. 11pm, two police officers knock. Turns out it’s private land, complaint from owner.

Police checked:

  • I wasn’t drunk
  • Van was insured/MOT’d
  • I wasn’t causing damage

Then asked me to move on. Gave me 30 minutes. I left in 20.

How to handle:

  • Be respectful (they’re doing their job)
  • Have documents ready (license, insurance, MOT)
  • Don’t argue or demand rights
  • Ask where they’d suggest parking (sometimes they’ll tell you)
  • Leave when asked

Police aren’t trying to ruin your night. They’re responding to complaints. Make it easy for them and they’ll be reasonable.

Scenario 3: Warden/Ranger During Day

What happened to me:

National park warden arrived at 9am. I was still parked (I’d overslept). He explained overnight parking wasn’t permitted. I apologized, said I was leaving. He said “just for future, there’s a campsite 5 miles away.”

No fine, no problem, just information.

How to handle:

  • Accept the information
  • Don’t debate the rules
  • Leave promptly
  • Ask for alternative suggestions

Scenario 4: Angry Confrontation

What happened to me:

Woke up to furious farmer at my window, 7am. He was screaming about “trespassers” and “taking the piss.” I’d parked on what I thought was moorland access but was actually his farm track.

I apologized repeatedly, started engine immediately, left within 2 minutes while he was still shouting.

How to handle:

  • Stay calm (don’t escalate)
  • Apologize even if they’re unreasonable
  • Leave immediately
  • Don’t try to explain or justify
  • Your safety matters more than the spot

I was rattled but safe. He was angry but I left fast enough that it didn’t escalate.


The Spots That Never Work (Don’t Waste Your Time)

Obvious car parks near popular attractions:

  • Fairy Pools, Skye (banned, enforced)
  • Durdle Door, Dorset (banned, enforced)
  • Loch Lomond shores (camping management zone)
  • Fistral Beach, Cornwall (banned, enforced)

These spots are Instagram-famous and heavily policed.

Residential areas:

Anywhere near houses. You’ll get complaints, you’ll get moved on, locals will hate van campers more.

Active farmland:

Fields with crops or livestock. Farmers will move you on. Don’t even try.

Private car parks with barriers:

If there’s a barrier that goes down at night, don’t try to sneak in before it closes. You’ll be trapped.

“No overnight parking” with cameras:

If there are ANPR cameras and clear signage, they’re serious about enforcement. Find somewhere else.


Seasonal Considerations

Wild camping works differently by season.

Summer (June-August)

Pros:

  • Longer daylight
  • Warmer weather
  • Better access to remote spots

Cons:

  • Very busy (20+ vans at popular spots)
  • Midges in Scotland (genuinely awful)
  • More enforcement (wardens work summer)
  • Harder to be discrete

Strategy: Go remote. Avoid coastal spots. Accept you’ll see other vans.

Autumn (September-November)

Best season for wild camping.

Pros:

  • Fewer vans
  • No midges
  • Beautiful colors
  • Less enforcement
  • Still decent weather

Cons:

  • Shorter days
  • Can be wet
  • Some high passes closed (Scotland)

Strategy: This is optimal time. Use it.

Winter (December-February)

Pros:

  • Very quiet (often alone)
  • Amazing scenery in snow
  • Zero enforcement
  • No midges

Cons:

  • Very cold (-5 to -15°C in Scotland)
  • Short daylight (7 hours in Scotland)
  • Roads can be impassable
  • Facilities closed

Strategy: Need proper heating (diesel heater). Stock up on fuel and food. Check weather forecasts. Have backup plans.

Spring (March-May)

Pros:

  • Warming up
  • Fewer tourists than summer
  • Longer days
  • Wildlife active

Cons:

  • Unpredictable weather
  • Midges start May
  • Some spots still boggy

Strategy: Good shoulder season. May is sweet spot before summer crowds.


The Equipment That Actually Matters

Essential:

  1. Blackout curtains/blinds: Being invisible is key. Full blackout so no interior light visible.
  2. Portable toilet: You will need to pee at night. Don’t go outside (neighbors notice, it’s illegal, it’s visible). Bucket-style toilet or cassette.
  3. Grey water container: Don’t dump on ground. Store and dispose properly at facilities.
  4. Rubbish bags: Take everything with you.
  5. OS Maps or app: Know where you are, what land you’re on, where exits are.

Helpful:

  1. 12V fan/vent: Stealth camping requires closed windows. Ventilation prevents condensation and stuffiness.
  2. Phone signal booster: Some remote spots have no signal. Booster helps for emergencies.
  3. Backup power: Solar or second battery. You’re not plugged in.
  4. Leveling blocks: Some spots aren’t flat. Sleeping on slope is miserable.

Don’t need:

  • External lights (draws attention)
  • Awning (too obvious)
  • Generators (loud, antisocial)
  • External kitchen setup (minimalist is better)

Apps and Resources That Help

Park4Night (app):

Crowdsourced wild camping spots. User reviews. Shows which spots work or have issues. €10/year subscription worth it.

I check Park4Night before trying new spots. Reviews warn about enforcement, facilities, or problems.

Search4Sites (app):

Similar to Park4Night. UK-focused. Includes campsites and wild spots. Free basic version.

OS Maps (app):

Essential for Scotland. Shows access land, footpaths, land ownership. £28/year subscription.

Forestry Commission website:

Lists car parks in FC land. Some tolerate overnight parking. Check individual forest pages.

Scottish Outdoor Access Code:

Official guidance for wild camping rights in Scotland. Read it before using Scottish access rights.

Google Maps satellite view:

Scout spots before arriving. See actual layout, nearby buildings, access routes. Street view shows signage.


The Ethical Wild Camping Framework

Beyond legality, there’s ethics.

The questions to ask:

  1. Am I harming this location?
    If your presence damages land, disturbs wildlife, or spoils it for others, you shouldn’t be there.
  2. Am I taking the piss?
    Staying multiple nights, setting up camp, being loud — you’re abusing tolerance.
  3. Am I being respectful to locals?
    Blocking access, parking near houses, leaving mess — you’re creating problems for residents.
  4. Would I want 50 people doing what I’m doing?
    If everyone camped where you’re camping the way you’re camping, would the spot survive? If no, you’re doing it wrong.
  5. Am I helping or hurting the wild camping community?
    Every bad camper makes it harder for future campers. Be the good example.

The line between wild camping and taking the piss:

Good:

  • One night, discrete, no trace, respectful, quiet
  • Remote spots, away from residents
  • Proper waste disposal
  • Contributing to local economy (shopping at local stores)

Taking the piss:

  • Multiple nights same spot
  • Groups of vans
  • Loud, visible, messy
  • Ignoring signage
  • Arguing when moved on
  • Not supporting local businesses

Be the former. Don’t be the latter.


What I’ve Learned After 300+ Nights

Success isn’t about finding secret spots.

Everyone’s sharing locations now (Park4Night, Instagram, YouTube). Secret spots don’t stay secret. Success is about behavior.

The vans that never get bothered:

  • Arrive late, leave early
  • Completely discrete
  • Leave no trace
  • Move regularly
  • Respect signage
  • Polite when questioned

The vans that always get moved on:

  • Arrive early, stay late
  • Lights and music
  • External setup
  • Rubbish left
  • Ignore signs
  • Argue when challenged

Be invisible. Be respectful. Move on.

My current approach:

I use Scotland extensively (it’s legal, enjoy it). In England/Wales, I rotate spots, never stay twice in same place within a month, arrive late, leave early, zero trace.

I get moved on maybe twice a year now (down from 5-6 times in first year). The difference? I learned the unwritten rules.

Is wild camping getting harder?

Yes. More enforcement, more bans, more complaints from locals. Instagram-famous vans and YouTube channels share locations, spots get overrun, authorities crack down.

The golden age (2010-2018) is over. It’s still possible, just requires more care.

Should you still do it?

Yes, if you do it right. Wild camping is brilliant. Waking up to Scottish mountain views beats any campsite. Just respect the rules, written and unwritten.


Frequently Asked Questions

Q: Is it legal to sleep in your car on the street?

In England/Wales, you can park legally on public roads (unless restrictions apply). Sleeping in your vehicle on a public road overnight is generally legal. However, some councils have bylaws restricting this. Check local rules.

Q: Can I wild camp in a rooftop tent?

Same rules as van camping. In Scotland, yes on appropriate land. In England/Wales, it’s trespassing without permission. Rooftop tents are more visible though, so more likely to attract attention.

Q: What if I’m on private land without knowing?

Trespassing is civil offense in England/Wales. If asked to leave, leave. No criminal prosecution unless you refuse or cause damage. Most landowners just ask you to move.

Q: Do I need landowner permission?

In England/Wales, technically yes. In practice, many spots tolerate discrete overnight parking. In Scotland, you have access rights on appropriate land (no permission needed).

Q: What about pub car parks?

Ask the pub. Many are fine if you’re a customer. Some explicitly welcome campervans. Don’t assume — ask permission.

Q: Can I light a fire?

Generally no. Prohibited in most places. Scotland allows fires in some circumstances but discouraged (leave no trace). Use a stove.

Q: What about National Trust land?

National Trust car parks usually prohibit overnight parking. Some tolerate it if discrete. Check signs.

Q: How do I find toilet facilities?

Plan ahead. Services, campsites, public toilets in towns. In remote areas, portable toilet is essential.

Q: What if I need to empty waste?

Designated dump stations (motorhome services). Many campsites let non-guests use facilities for fee (£3-5). Never dump grey water or toilet waste on ground.

Q: Can I stay multiple nights if discrete?

Scottish access code suggests 2-3 nights max. In England/Wales, one night is pushing tolerance, multiple nights is taking the piss.


The Realistic Expectations

You will get moved on.

Accept it. It happens. You’ll misjudge spots, miss signs, park somewhere that seemed fine but isn’t. Be gracious and move.

Most wild camping attempts work.

My success rate is about 90% now (down from 70% in first year). Most nights, no one bothers you. You’ll have successful nights far more often than problems.

It requires flexibility.

Can’t be precious about specific spots. Have backups. Be ready to adapt.

It’s not Instagram perfect.

You’ll park in lay-bys when ideal spots don’t work out. You’ll sleep near roads. You’ll compromise. Real wild camping is less glamorous than social media.

It’s worth the effort.

Despite hassles, wild camping is brilliant. Freedom, nature, cost savings, adventure. I wouldn’t change it.

The future is uncertain.

Enforcement is increasing. More bans coming. Enjoy it while it lasts, but accept it might get harder.


My Final Recommendations

If you’re starting wild camping:

  1. Start in Scotland (legal, easier, more tolerance)
  2. Use Park4Night to find tested spots
  3. Follow the unwritten rules religiously
  4. Expect to make mistakes (I did)
  5. Learn from being moved on (it’s education)

If you’re experienced:

  1. Rotate spots (don’t overuse favorites)
  2. Share good spots carefully (oversharing ruins them)
  3. Call out bad behavior (educate newbies)
  4. Adapt as enforcement increases
  5. Have backup plans always

If you’re considering a first wild camping trip:

Do it. It’s brilliant. Scotland in autumn. Follow the rules. Be discrete. You’ll love it.


Useful Resources

Apps:

  • Park4Night: www.park4night.com (€10/year)
  • Search4Sites: www.search4sites.co.uk (free basic)
  • OS Maps: www.osmaps.com (£28/year)

Information:

  • Scottish Outdoor Access Code: www.outdooraccess-scotland.scot
  • Forestry Commission: www.forestryengland.uk
  • National Parks: Individual park websites for current rules

Communities:

  • Wild Camping UK (Facebook group): Active community
  • Vanlife UK (Facebook group): General van living
  • UKCampsite forums: www.ukcampsite.co.uk/chatter

Emergency:

  • What3words app: For precise location in emergencies
  • 999: Emergency services (police, ambulance)
  • Coastguard: 999 (coastal emergencies)

Disclaimer: Wild camping laws and enforcement change. Verify current regulations before visiting. This guide is based on personal experience, not legal advice. Respect property, follow local rules, and accept responsibility for your own actions.


I spent £1,340 on my first work-from-van setup. Portable monitor, laptop stand, wireless keyboard, mouse, portable SSD, cable management system, desk lamp, premium laptop sleeve. It looked professional in photos.

I used the portable monitor exactly four times in six months before I sold it for £180.

The laptop stand created worse posture than just using the laptop on the table. The wireless keyboard’s batteries died constantly. The desk lamp drained my battery faster than my actual work. The cable management was pointless in a van where everything moves.

Real cost of useful equipment: About £420. Money wasted on things I thought I needed: £920.

After three years of trying to get a decent setup, I know exactly what’s essential versus what’s YouTube-influenced nonsense. I’ve worked through Scottish winters with no heating (laptop died from cold). I’ve worked through heatwaves (laptop overheated, lost two hours of work). I’ve blown my inverter. I’ve run my battery flat during a Zoom call.

Understanding the essentials of a work from van setup can significantly enhance your productivity and comfort while working remotely.

This isn’t another article showing you a beautiful desk setup with dual monitors and perfect lighting. This is the reality of working from a van in the UK — what actually works when you’re parked in a lay-by with patchy signal, 40% battery, and a deadline in three hours.

I’ll tell you what equipment is genuinely essential, what power setup you actually need (not the theoretical perfect system), and where to work when your van is too cold, too hot, or too depressing.

Let’s get into it.

My Work-From-Van Evolution: Three Setups, Three Lessons

Setup 1: The Instagram Dream (£1,340)

What I bought:

  • 15.6″ portable monitor: £240
  • Laptop stand (aluminum): £45
  • Wireless keyboard: £60
  • Wireless mouse: £35
  • 1TB portable SSD: £120
  • USB-C dock: £85
  • Cable management kit: £25
  • LED desk lamp: £40
  • Laptop sleeve: £35
  • External webcam: £55
  • Blue Yeti microphone: £110
  • Boom arm for mic: £35
  • Second laptop battery: £180
  • Laptop cooling pad: £55
  • Ergonomic seat cushion: £40
  • Noise-cancelling headphones: £280

Total: £1,440

What I actually used regularly:

  • Laptop (already owned)
  • Noise-cancelling headphones: £280
  • SSD: £120

Total useful: £400

Money wasted: £1,040

What went wrong:

The portable monitor was heavy, needed separate power, took up precious desk space, and created glare issues. Within a month, I realized the laptop screen alone was fine.

The laptop stand elevated the screen but then I needed external keyboard/mouse. This meant more devices, more batteries to charge, more things to store, worse ergonomics hunching over to type.

The Blue Yeti microphone sounded amazing but was massive, needed boom arm, and my laptop’s built-in mic was fine for Zoom calls. Nobody cared about audio quality that much.

The desk lamp drew 8W (0.7A at 12V) continuously. Sounds small until you realize that’s 16Ah per day just for lighting. My battery was 110Ah. The lamp consumed 15% of daily capacity for marginal benefit.

What I learned: You don’t need a “professional setup.” You need a functional one.

Setup 2: The Overcorrection (Just a Laptop)

What I had:

  • Laptop: Already owned
  • Phone for hotspot: Already owned
  • Nothing else

Cost: £0 (used what I had)

What I thought: The first setup was overkill. Let’s go minimal.

Reality after 3 months:

Neck pain from hunching over laptop on table for 6-8 hours daily. Developed persistent stiffness that lasted weeks.

Eye strain from small laptop screen (13.3″). Ended work days with headaches.

Audio issues on calls. Laptop speakers are quiet. Built-in mic picks up background noise (wind, traffic, van creaks).

No backup storage when laptop had issue. Lost a day’s work when laptop froze and hadn’t saved.

Cost of mistake:

  • Physiotherapy for neck: £180 (3 sessions)
  • Lost work time: Estimate 8 hours = £200 at my rates

Total: £380 in problems from going too minimal

What I learned: There’s a minimum functional setup. Going below it costs more in problems than the equipment would’ve cost.

Setup 3: Actually Right (Current Setup – £780)

What I have:

  • Dell Latitude 14″ laptop (2020 model, bought used): £420
  • Bose QC35 II headphones (bought used): £120
  • 1TB SSD external drive: £80
  • Simple tablet/laptop holder (adjustable angle): £18
  • USB power bank (20,000mAh): £35
  • Phone mount for calls: £8
  • Laptop cooling stand (passive, no fan): £12
  • Basic wireless mouse: £15
  • External phone battery pack: £25
  • Backup USB charging cables: £12
  • Small LED puck lights (battery, for evening): £18
  • Laptop screen protector (reduces glare): £8
  • Microfiber cloths (screen cleaning): £6

Total: £777 (call it £780)

Been using: 18 months, still perfect

What works:

Laptop holder (£18) angles screen to eye level but I still use built-in keyboard. No separate keyboard needed. Solves neck pain for minimal cost.

Headphones are essential. Block out van noise (rain, wind, traffic). Laptop speakers are rubbish. Mic is good enough for calls.

SSD backup saves work hourly (automated). When laptop died, I lost nothing. £80 well spent.

USB power bank charges laptop when main battery is low. Got me through several deadlines when I couldn’t charge from van battery.

Passive cooling stand is just an aluminum plate with raised sections for airflow. No power draw, keeps laptop cool, costs £12.

Puck lights (£18) are battery-powered LED lights that stick anywhere. Use them for evening work without draining van battery. Each lasts 4-5 hours, batteries last weeks.

Everything else: Either already owned or not needed.

What I learned: The sweet spot is £500-800 for work equipment. Below that, you create problems. Above that, you buy things you won’t use.


Laptop Choice: What Actually Matters

After using three laptops over three years in vans, here’s what matters:

Battery Life (Most Important)

Minimum acceptable: 6 hours real-world use
Good: 8-10 hours
Excellent: 12+ hours

Why it matters:

Van power is limited. If your laptop only lasts 3-4 hours, you’re constantly charging it, draining your van battery, or unable to work.

My Dell Latitude: 8-9 hours of actual work (Word, browser, Zoom). This means I can work a full day on laptop battery alone if van battery is depleted.

Testing battery life:

Ignore manufacturer claims. They test at 50% brightness with minimal load. Real battery life is 60-70% of claimed.

Dell claims 12 hours. Reality: 8-9 hours of my actual work.

Power Consumption

Check laptop wattage:

Most laptops: 45-65W (charging)
High-performance laptops: 85-150W (charging)
Gaming laptops: 150-300W (don’t even consider these)

Why it matters:

Your inverter must handle the wattage. A 300W inverter can’t charge a 150W laptop reliably.

My laptop: 45W charger. My inverter: 300W (pure sine wave). Works perfectly.

Screen Size vs Portability

13-14 inches: Best for vans (portable, adequate screen)
15-16 inches: Workable but bulkier
17+ inches: Too big for van work

My experience:

Started with 13.3″ (too small, eye strain). Upgraded to 14″ (perfect). Tried friend’s 15.6″ (noticeably heavier, doesn’t fit on small van tables well).

Sweet spot: 14 inches

Build Quality

Van life is harsh on laptops:

  • Temperature swings (-5°C to 35°C)
  • Humidity and condensation
  • Vibration while driving
  • Limited space (more likely to knock/drop)

Business laptops > Consumer laptops

Dell Latitude, Lenovo ThinkPad, HP EliteBook: Built tougher, better keyboards, more reliable.

MacBooks: Premium but fragile. I’ve seen three crack screens from van movement. Expensive repairs.

My recommendation: Used business laptop (2-3 years old) from eBay. £300-500 gets you excellent quality. Save money, get tougher build.

Operating System

Windows: Most compatible, most repair options
MacOS: Premium, less repairable, expensive
Linux: Lightweight, free, requires tech knowledge

I use Windows. Widest compatibility, easiest repairs, most software options.

Storage

Minimum: 256GB SSD
Recommended: 512GB SSD

SSD (not HDD) is essential. HDDs fail from van vibration. SSDs are solid-state, much more reliable.

Cloud storage helps. I use Google Drive (100GB, £1.59/month) for automatic backup.

RAM

Minimum: 8GB
Recommended: 16GB

More RAM = smoother multitasking. Video calls + documents + browser + Spotify = 8GB minimum.

My laptop: 16GB. Comfortable for everything I do.

Ports

Essential:

  • USB-A ports (3+)
  • USB-C (charging + data)
  • HDMI (if you use external monitor)
  • Headphone jack
  • SD card reader (nice to have)

More ports = less need for dongles/hubs = fewer things to lose/break.

What Doesn’t Matter

  • Touchscreen (gimmick, drains battery faster)
  • 4K screen (unnecessary, kills battery)
  • Dedicated graphics (unless you’re editing video)
  • RGB lighting (why?)
  • Ultra-thin design (more fragile)

The Portable Monitor Debate: Do You Need One?

Short answer: Probably not.

Long answer:

I Spent £240 on Portable Monitor

Asus MB16AC, 15.6″, 1080p, USB-C powered

Used it: 4 times in 6 months

Why I bought it:

YouTube videos showed “productivity” setups with dual screens. I thought more screen space = more productive.

Reality:

  1. Takes up space: Van tables are small. Laptop + monitor = no room for notebook, coffee, or anything else.
  2. Power consumption: USB-C powered monitors draw 5-8W constantly. That’s 120-192Wh per day (10-16Ah). Significant drain.
  3. Setup/packdown: Every time I moved van, I had to disconnect monitor, pack it, secure it. Then reverse at next spot. 5-10 minutes each time.
  4. Glare issues: Van windows create reflections. Monitor was almost unusable in bright conditions.
  5. Weight: 800g extra to carry, store, protect.
  6. Ergonomics: Having second screen to the side created worse neck posture than just using laptop.

When I actually used it:

  • Complex spreadsheet work (2 times)
  • Video editing (1 time)
  • Showing presentation to client (1 time)

Not worth £240 for 4 uses.

Sold it on eBay for £180. Loss: £60 + shipping

When Portable Monitors Make Sense

You might want one if:

  • You’re video editing daily (need timeline + preview)
  • You’re coding (need code + documentation)
  • You’re designing (need multiple windows constantly)
  • You have large van with permanent desk setup

You don’t need one if:

  • You’re writing (I write, one screen is plenty)
  • You’re doing basic office work (documents, email, spreadsheets)
  • Your van table is small
  • You move frequently

Most van workers don’t need one.

Alternative: Tablet as Second Screen

Cheaper option: iPad or Android tablet as second display

Apps: Duet Display, Sidecar (Mac), Space Desk (free)

Pros:

  • Tablet has other uses (reading, entertainment)
  • Lower power draw
  • Wireless connection option
  • More portable

Cons:

  • Smaller screen than portable monitor
  • Requires software setup
  • Can be laggy

Cost: £150-400 (if buying tablet specifically for this)

My verdict: Still not worth it for most people. Just use laptop screen.


Power Setup: What You Actually Need

This is critical. Without power, you can’t work.

My Power System

Components:

  • 110Ah AGM leisure battery: £140
  • 200W solar panel: £180
  • MPPT charge controller (20A): £85
  • 300W pure sine wave inverter: £65
  • Battery monitor: £35
  • Cabling/fuses/connectors: £45

Total: £550

Powers:

  • Laptop charging (45W × 2-3 hours/day = 135Wh = 11Ah)
  • Phone charging (10W × 2 hours/day = 20Wh = 1.7Ah)
  • LED lights (10W × 4 hours = 40Wh = 3.3Ah)
  • Fridge (40W average, but cycling = ~15Ah/day)
  • Laptop fan when needed (5W × 2 hours = 10Wh = 0.8Ah)

Total daily draw: ~32Ah

Battery capacity: 110Ah (usable ~55Ah at 50% discharge)

Days without sun: 1.7 days (55Ah ÷ 32Ah)

Solar generation: 200W panel generates 40-80Ah daily in summer, 15-30Ah in winter

Reality:

Summer: Never run low. Surplus power.
Winter: Close to limits on cloudy days. Occasionally need to drive to charge battery.

Would I change anything?

Yes: Upgrade to 200Ah battery (£280). Would give 3-4 days without sun. Better buffer for UK’s grey weather.

Minimum Power Setup for Laptop Work

If you’re on tight budget:

  • 110Ah leisure battery: £140
  • 100W solar panel: £90
  • PWM charge controller: £25
  • 150W modified sine inverter: £25

Total: £280

Limitations:

  • Less solar generation (need sunshine)
  • Modified sine wave less efficient (some laptops don’t like it)
  • Smaller buffer (can’t work multiple days without sun)

But it works for basic laptop charging if you’re careful about power usage.

What About Generators?

I don’t use one.

Pros:

  • Reliable power regardless of sun
  • Can charge battery quickly
  • Can run high-draw devices

Cons:

  • Loud (antisocial at wild camping spots)
  • Heavy (10-20kg)
  • Requires fuel (cost + storage)
  • Maintenance needed
  • Smell (petrol/diesel fumes)

Cost:

  • Quiet inverter generator: £300-600
  • Fuel: £10-20/month

Who needs generator:

People working from van full-time in winter who can’t compromise on power availability. Or those parking at sites where generator use is acceptable.

Most people: Solar + battery is sufficient and silent.

Power Banks: The Backup Solution

I have: Anker PowerCore 20,000mAh (74Wh)

Cost: £35

Laptop charges: 1.5 times (Dell 45Wh battery × 1.5 = 67.5Wh)

Why it’s brilliant:

When van battery is low and I have deadline, power bank charges laptop while I work. This has saved me multiple times.

Usage: Maybe 10-15 times per year when I’ve misjudged power availability.

Worth every penny.

Charging Laptop: Inverter vs DC-DC

Inverter method (what I use):

  • 12V battery → Inverter → 240V → Laptop charger → Laptop
  • Efficiency: ~80% (20% lost in conversions)

DC-DC method:

  • 12V battery → DC-DC converter → Laptop voltage → Laptop
  • Efficiency: ~90%

DC-DC is more efficient but requires laptop-specific voltage converter (£30-60) and compatibility checking.

I use inverter because:

  • Charges laptop, phone, and other devices
  • More flexible
  • Already had inverter for other purposes

If you’re only charging laptop: DC-DC more efficient, worth considering.


Internet: The Make-or-Break Factor

You can have perfect laptop setup but without internet, you can’t work.

My Internet Setup

Primary: Unlimited 4G data SIM (Three network)
Cost: £25/month (Smarty)
Speed: 15-30Mbps typically
Works: 85% of locations

Backup: EE PAYG SIM
Cost: £15 top-up lasts 2-3 months
Use: When Three has no signal

Total cost: ~£30/month

Coverage Reality

No network is 100% coverage.

Three: Good in cities/towns, patchy in rural areas
EE: Best rural coverage, expensive
O2: Middle ground
Vodafone: Similar to O2

My experience:

Scottish Highlands: EE essential (Three useless)
Cities: All networks fine
Coastal areas: Variable (Three often good)
Welsh mountains: EE best, still patchy

Having two networks (different operators) increases coverage to ~95% of locations.

Signal Boosters

Didn’t buy one because:

  • Expensive (£200-400)
  • Takes up space
  • Requires roof-mounted antenna
  • Doesn’t work with no signal (just amplifies weak signal)

Friends who have them: Report 20-40% improvement in weak signal areas. Not game-changing.

If you’re full-time remote worker in rural areas: Probably worth it. For me (mix of rural/urban), not necessary.

When There’s No Signal

Options:

  1. Drive somewhere with signal (most common solution)
  2. Use café/pub WiFi (buy coffee, use their internet)
  3. Library (free WiFi, quiet, warm)
  4. McDonald’s (reliable WiFi, free, open long hours)
  5. Campsite (if you’re staying there, usually has WiFi)

Reality check:

I work from non-van locations about 20% of time. Coffee shops, libraries, friends’ houses, campsites. Sometimes van just isn’t the right workspace.

Don’t force it. If signal is rubbish, lighting is bad, or it’s too cold, find better location.


Workspace Setup: Where to Actually Work

Inside Van

My desk: Fold-down table, 50cm × 40cm when open

Laptop position: Elevated on simple stand (£18), eye level when sitting

Seating: Van bench seat with cushion, or swivel driver seat

Lighting:

  • Daytime: Natural light through windows
  • Evening: Battery LED puck lights (£18 for 3)

Climate:

  • Summer: Fine (open windows for breeze)
  • Winter: Diesel heater running (costs ~£1/day fuel)

Noise:

  • Quiet locations: Headphones optional
  • Noisy locations: Noise-cancelling headphones essential

Reality:

Van workspace is functional but not comfortable for 8+ hour days. I do 4-6 hours in van, then move to café or library for afternoon.

Posture issues:

Even with laptop stand, van seating isn’t ergonomic. Develop neck/shoulder stiffness if working full days in van regularly.

Solution: Mix van work with proper desk work at libraries/cafés.

Outside Van (Weather Dependent)

Summer only: Fold-out table and chair outside van

Pros:

  • More space
  • Better posture (proper camping chair)
  • Natural light
  • Fresh air

Cons:

  • Weather dependent
  • Insects
  • People see you (less stealth)
  • Screen glare in bright sun

I do this: Maybe 30-40 days per year when weather is perfect (15-25°C, dry, not windy, not too bright).

Alternative Workspaces

Libraries (my favorite):

  • Free
  • Quiet
  • WiFi
  • Warm/cool
  • Toilets
  • Professional atmosphere
  • Power sockets

I work from libraries: 2-3 days per week. Get van membership (need permanent address) and use as office.

Cafés:

  • Cost: £3-5/day (coffee + snack)
  • WiFi usually good
  • Can be loud
  • Time limits (some places)
  • Social atmosphere (can be distracting or motivating)

Coworking spaces:

  • Professional workspace
  • Fast internet
  • Meetings rooms
  • Networking opportunities
  • Cost: £50-200/month

I considered coworking but £100/month is steep when libraries are free and cafés are £15-20/week.

Friends’ houses:

  • Free
  • Comfortable
  • Reliable internet
  • Social breaks
  • Contribute somehow (bring wine, cook dinner, etc.)

I work from friends’: Maybe 1-2 days per month. Good for intensive deadline work.


Power Consumption: Real Numbers

I measured everything with power meter over 2 weeks:

Laptop (Dell Latitude 14″)

Working (no charging): 15-25W (1.3-2.1A at 12V)
Charging: 45W (3.75A at 12V via inverter)
Sleep mode: 2-5W
Off: 0W

Daily usage:

  • 6 hours working (not charging): 15W × 6 = 90Wh = 7.5Ah
  • 2 hours charging: 45W × 2 = 90Wh = 7.5Ah via inverter (÷ 0.8 efficiency = 9.4Ah)
  • Total: 16.9Ah/day

Phone (Charging)

Charging: 10W (0.8A at 12V)
Time: 1.5 hours/day

Daily: 15Wh = 1.25Ah

Headphones (Charging)

Charging: 5W (0.4A at 12V)
Time: 2 hours/week

Daily average: 1.4Wh = 0.12Ah (negligible)

LED Lights (Evening Work)

3× LED puck lights: 3W total
Time: 3 hours/evening (winter, when dark early)

Daily (winter): 9Wh = 0.75Ah

Total Daily Draw (Work Only)

Summer: ~18Ah (no lights needed)
Winter: ~19Ah (includes lights)

This is manageable with 110Ah battery + 200W solar.

But add fridge (15Ah), diesel heater fan (5Ah winter), phone usage (2Ah), and total daily draw is 40-45Ah.


The Work-From-Van Reality Check

What YouTube Doesn’t Show

The uncomfortable truth:

  1. Posture suffers: Even best van setup isn’t as ergonomic as proper desk
  2. Eye strain: Laptop screens in vans create more eye fatigue (reflections, position, lighting)
  3. Productivity drops: Van distractions (weather, people, view) reduce focus
  4. Cold winters are miserable: Hands get cold, laptop slow, heating costs money
  5. Hot summers are worse: Laptop overheats, you sweat, screen washes out in sun
  6. Internet fails: At crucial moments, signal drops
  7. Power anxiety: Constantly monitoring battery levels
  8. No separation: Work-life balance harder when workspace = living space

My actual productivity:

Van workspace: 70-80% of office productivity
Library/café: 90-95% of office productivity
Friend’s house: 100% productivity

I now work:

  • 50% from van (when weather is good, location has signal, power is fine)
  • 30% from libraries (consistent workspace)
  • 20% from cafés/friends’ houses

Pure van working is romantic idea but mixed locations is better reality.

When Van Working Actually Works Well

Best scenarios:

  • Short work sessions (2-4 hours)
  • Writing/creative work (less screen-intensive)
  • Asynchronous work (can pause for conditions)
  • Summer months (comfortable temperature)
  • Parked in good location (signal, level, quiet)

Worst scenarios:

  • Video calls (battery drain, connection issues, background noise)
  • Deadline-intensive work (stress + van limitations = bad)
  • Winter evenings (cold, dark, limited power)
  • Complex tasks requiring focus (van has too many distractions)

Budget Breakdown: Three Work Setups

Minimal Work Setup (£450)

For: Occasional remote work, weekend work, light laptop use

Equipment:

  • Used laptop (3-4 years old): £300
  • USB power bank: £35
  • Basic headphones: £25
  • External backup drive: £60
  • Charging cables: £12
  • Laptop sleeve: £18

Power:

  • 100Ah battery: £140
  • 100W solar: £90
  • PWM controller: £25
  • 150W inverter: £25

Total: £730

Limitations:

  • No extended work sessions
  • Basic power buffer
  • No backup equipment

Standard Work Setup (£1,200)

For: Regular remote work, full days occasionally

Equipment:

  • Good used laptop (2-3 years): £450
  • Quality headphones: £120
  • 1TB backup drive: £80
  • Power bank: £35
  • Laptop stand: £18
  • Wireless mouse: £15
  • Screen protector: £8
  • Microfiber cloths: £6
  • LED lights: £18
  • Carrying case: £25

Power:

  • 110Ah battery: £140
  • 200W solar: £180
  • MPPT controller: £85
  • 300W inverter: £65
  • Battery monitor: £35
  • Cabling: £45

Internet:

  • Two SIM cards: £0 upfront
  • Monthly: £30

Total setup: £1,325 (round to £1,200 excluding monthly costs)

This is what I have. Works well for full-time remote work.

Premium Work Setup (£2,500+)

For: Full-time professional remote work, no compromises

Equipment:

  • New/nearly-new laptop: £800-1,200
  • Premium headphones: £280
  • Portable monitor: £240
  • Ergonomic setup: £100
  • Full backup system: £200
  • Professional peripherals: £150

Power:

  • 200Ah lithium battery: £900
  • 400W solar: £400
  • 30A MPPT: £120
  • 1000W inverter: £180
  • Professional monitoring: £80
  • Installation: £300

Internet:

  • Signal booster: £300
  • Premium data plans: £50/month

Coworking:

  • Monthly membership: £100/month

Total: £3,800 setup + £150/month running

Who needs this:

Full-time remote workers earning £40k+ where work reliability is critical. The investment pays for itself in professional capability.

Most van workers don’t need this. Standard setup works fine.


Common Mistakes and Costs

Mistake 1: Buying Portable Monitor (Me)

Cost: £240
Used: 4 times
Sold for: £180
Loss: £60 + shipping

Mistake 2: Wrong Laptop (Friend)

Bought: Gaming laptop (powerful but power-hungry)
Cost: £1,200
Problem: 150W charger, 2-hour battery life
Solution: Sold for £800, bought business laptop for £450
Loss: £350

Mistake 3: Modified Sine Wave Inverter (Me)

First inverter: £18 modified sine wave
Problem: Laptop charger buzzed loudly, charged slowly, eventually killed charger
Replacement charger: £45
Replacement pure sine inverter: £65
Total cost: £128 vs £65 if I’d bought right initially

Mistake 4: Undersized Battery (Friend)

Initial: 75Ah battery
Problem: Couldn’t work full day without depleting battery
Upgrade: 110Ah battery (£140) + fitting (2 hours)
Should’ve just bought 110Ah initially

Mistake 5: No Backup Storage (Me)

Cost: £0 (didn’t buy backup drive)
Result: Laptop water damage, lost 2 days work
Re-doing work cost: 2 days = £400 at my rates
Backup drive costs: £80

Lost £320 by not spending £80

Mistake 6: Cheap Headphones (Me)

Bought: £12 Amazon basics headphones
Lasted: 3 months (broke)
Bought: Another pair £15
Lasted: 2 months
Eventually bought: Bose QC35 II (used) £120
Lasted: 2+ years, still perfect

Total spent on cheap ones: £27 over 5 months
Should’ve bought quality from start


Ergonomics: The Uncomfortable Truth

After 3 years, I’ve developed:

  • Neck stiffness (from laptop height)
  • Shoulder tension (from hunching)
  • Lower back issues (from van seating)
  • Eye strain (from screen position)

The fixes:

  1. Laptop stand (£18): Raises screen to eye level. Massive difference.
  2. External mouse (£15): Reduces shoulder strain vs trackpad.
  3. Posture breaks: Every 45 minutes, stand up, stretch, walk. Essential.
  4. Mix locations: 3-4 hours in van max, then move to proper desk (library/café).
  5. Physiotherapy: £180 for 3 sessions taught me proper stretches and posture corrections.

Reality: Van working will cause ergonomic issues unless you’re careful. Budget for physio.


The Honest Assessment After 3 Years

Total spent on work setup over 3 years:

  • Equipment: £1,120 (including mistakes)
  • Physio for posture issues: £180
  • Power system upgrades: £380
  • Coworking/café costs: £1,560 (£40/month average)
  • Internet: £1,080 (£30/month)

Total: £4,320 over 3 years = £120/month

Compared to office:

  • Office rent: £0 (work from home/van)
  • Commuting: £0 (saved)
  • Office clothes: £0 (saved)
  • Lunch out: Minimal (cook in van)

Net financial position: Saved £400-600/month vs office working + commuting + office wardrobe

But:

  • Productivity slightly lower (5-10%)
  • More physical strain (ergonomics)
  • More complexity (power, internet, finding workspace)
  • Less separation (work-life balance harder)

Worth it?

Financially: Yes, saving significant money
Lifestyle: Yes, freedom to work anywhere
Professionally: Mostly yes, with compromises
Physically: No, ergonomics are worse

Would I do it again? Yes, but with better expectations and more use of libraries/cafés from the start.


Frequently Asked Questions

Q: Can I really work full-time from a van?

Yes. I do it. But it’s not as comfortable as YouTube suggests. Mix van working with libraries/cafés for best results.

Q: What’s the minimum power setup?

110Ah battery + 100W solar + inverter = ~£280. This works for basic laptop charging if you’re careful about power usage.

Q: Do I need portable monitor?

Probably not. I wasted £240 on one. Used it 4 times. Laptop screen is fine for most work.

Q: How do I handle video calls?

Headphones with mic (essential), stable internet (find reliable spot), background (plain wall or outside). Park before call to avoid movement. Warm up van first in winter (cold breath visible on camera).

Q: What about internet reliability?

Get two SIM cards (different networks). Covers 95% of locations. For critical calls, use café/library with known good WiFi.

Q: Can I use gaming laptop?

No. Power consumption too high (100-200W). Battery life too short (2-3 hours). Get business laptop instead.

Q: What if my battery dies mid-work?

USB power bank is backup. Charges laptop 1-2 times. Has saved me multiple times during deadlines.

Q: How do you stay focused?

Harder than office. Set timer (45 min work, 15 min break). Use headphones (blocks distractions). Work in libraries when serious focus needed.

Q: What about phone calls?

Find quiet spot. Use headphones with mic. Car parks, quiet streets, fields all work. Don’t make calls from noisy locations (clients notice).

Q: Winter working – how cold is too cold?

Below 5°C, laptop is cold to touch, typing is uncomfortable. Run heater for 30 min before work. Below 0°C, laptop can refuse to charge. Warm it up first.

Q: Summer working – how hot is too hot?

Above 28°C, laptop overheats. Park in shade. Use cooling stand. Work early morning or evening. Sometimes use café for air conditioning.

Q: How do you separate work and life?

Hard. Van is bedroom, office, kitchen, everything. Set work hours (9am-5pm). “Close” laptop at end of day. Sometimes walk away from van for evening.

Q: What about insurance for work equipment?

Check van insurance covers equipment. Mine covers £500 of equipment. Laptop worth £420 so covered. For expensive kit, get specific insurance.

Q: Can two people work from one van?

Possible but tight. Need quiet time for calls (take turns). Need enough power (double laptop charging). Need table space (only one can work at van table). Most couples take turns or one uses café.


Equipment Checklist: What You Actually Need

Essential (Don’t Skip)

  • [ ] Laptop with 6+ hours battery life
  • [ ] Good headphones (blocks noise, decent mic)
  • [ ] External backup drive (1TB minimum)
  • [ ] USB power bank (20,000mAh+)
  • [ ] Charging cables (including backups)
  • [ ] 110Ah+ battery in van
  • [ ] 100W+ solar panel
  • [ ] Pure sine wave inverter
  • [ ] Two SIM cards (different networks)

Cost: £600-800

Highly Recommended

  • [ ] Laptop stand (adjustable angle)
  • [ ] External mouse
  • [ ] Screen protector (anti-glare)
  • [ ] LED task lights (battery powered)
  • [ ] Laptop cooling stand (passive)
  • [ ] Microfiber screen cloth
  • [ ] Surge protector
  • [ ] Phone mount (for calls)

Additional cost: £80-120

Nice to Have

  • [ ] Wireless keyboard
  • [ ] Second monitor (if you genuinely need it)
  • [ ] Tablet (backup device)
  • [ ] External webcam
  • [ ] Better microphone

Additional cost: £150-400

Skip (Waste of Money)

  • ❌ Fancy laptop stands (>£40)
  • ❌ USB hubs with 10+ ports
  • ❌ Monitor arms
  • ❌ Desk lamps (battery drain)
  • ❌ Wrist rests
  • ❌ Gaming peripherals
  • ❌ Cable management systems

The Bottom Line

Realistic work-from-van setup costs: £700-1,200

That includes:

  • Laptop (used but good): £300-500
  • Essential peripherals: £150-250
  • Power system: £250-450

Monthly running costs: £30-50

  • Internet: £25-30
  • Café work sessions: £15-20
  • Equipment replacement fund: £10

It’s cheaper than renting office/coworking (£100-200/month) but requires compromises on comfort and ergonomics.

The reality:

  • Van working is functional, not perfect
  • Mix van work with libraries/cafés for best results
  • Portable monitors are usually unnecessary
  • Power management is critical
  • Internet can be unreliable
  • Ergonomics will suffer unless careful

After £4,320 spent over 3 years, I can say: van working is viable but YouTube oversells the comfort. It’s a tool for location independence, not a replacement for proper office ergonomics.

Build what you’ll actually use, not what looks good on Instagram. Test basic setup first, upgrade if needed, avoid equipment you “might” use.

Now stop reading and go work from your van. You’ll learn more in one week of actual work than from any guide.


So when we started trying out vanlife we sat in lay-bys eating supermarket sandwiches, watching Netflix on my phone, wondering if this was actually the freedom we’d signed up for or just expensive isolation with a better view. This is part of what we call Living The Vanlife Real Stories.

Then one night in the Cairngorms, a bloke knocked on our door. He’d seen my bike rack and wanted to know where the good trails were. We ended up having a brew together. Turned out he’d been full-timing for two years. Knew all the spots. All the tricks. Had a whole community of vanlife friends.

He invited us to a meet-up the following week. Twenty vans in a field in Perthshire. Campfire. Music. Stories. People who understood exactly why we wanted to be part of this life.

That night changed everything.

Here’s what UK vanlife community actually looks like — beyond the Instagram feeds and hashtag nonsense.

The Reality of UK Vanlife Community

What people think it is:

  • Constant gatherings at stunning locations
  • Instant friendships with attractive people
  • Coffee by the beach every morning with your van neighbours
  • A tight-knit tribe all travelling together

What it actually is:

  • Occasional chance meetings in car parks
  • Awkward waves to other vans, wondering if you should say hello
  • Long periods alone, by choice or circumstance
  • A loosely connected network that ebbs and flows
  • Seasonal patterns where you see the same faces
  • Online groups that are more active than real-world meetings

Both versions exist. But the reality is messier, less photogenic, and somehow more meaningful than the curated version.

Types of UK Vanlifers You’ll Meet

The community isn’t homogeneous. It’s a weird mix of people who’ve chosen alternative lifestyles for completely different reasons.

The Digital Nomads

Usually under 35, working remotely, decent vans with good solar setups. They’re chasing 4G signal more than sunsets.

We met Sarah in the Lake District. She’d been living in her Transporter for eighteen months, working in web design. Parked near libraries and cafes for WiFi. Earned more than I did in my old office job. Used vanlife to save money while seeing the country.

Her reality: Brilliant when the sun’s out. Miserable when it’s pissing down and she’s got a deadline and her mobile hotspot keeps dropping.

The Retirees

Sold the house, bought a motorhome, spending their kids’ inheritance travelling the UK.

John and Margaret in their Autotrail. Met them in Cornwall. They’d been touring for three years. Knew every good pub, every free parking spot, every coastal walk worth doing.

Their wisdom: “We spent forty years waiting for retirement. Now we’re doing what we should’ve done earlier. Don’t wait.”

Living the Vanlife : Real Stories has taught us that community can take many forms, often surprising and always enriching.

They’d park up for weeks in one spot, become part of the local community, then move on. Slower, more settled vanlife.

The Seasonal Workers

Follow the work. Fruit picking, festival season, winter ski resorts. Live in their vans because accommodation would eat their wages.

Met a crew of them in Wales during lambing season. Living in battered old vans that barely ran but cost them nothing. They weren’t doing vanlife for Instagram. They were doing it because rent is insane and this way they could save money.

Respect: They’re the ones keeping the dream alive for those of us with less money. No fancy conversions. Just making it work.

The Weekenders

Nine-to-five during the week, van escapees on weekends. Biggest growing segment of UK vanlife.

They’re not full-timers but they’re part of the community. Some of the best advice I’ve gotten has been from weekenders who’ve refined their setup through years of trial and error.

The Hardcore Off-Gridders

Living completely off-grid. No job, no fixed plans. Hunting, foraging, minimal consumption.

Through Living The Vanlife Real Stories, we’ve learned that community can take many forms, often surprising and always enriching.

I’ve met maybe three people actually living this way. It’s much rarer than Instagram suggests. And it’s bloody hard work.

One guy in the Highlands had been doing it for five years. Most knowledgeable person about wild camping I’ve ever met. Also hadn’t spoken to his family in three years. That lifestyle has costs.

The Families

Parents with kids, homeschooling on the road. Absolute respect for them because it’s ten times harder with children.

Met a family in Devon with three kids under ten. Their van was organised chaos. Educational trips disguised as adventures. The kids were confident, capable, and knew more about British wildlife than I did.

Mum’s honesty: “Some days are magical. Some days I’m hiding in the front seat eating chocolate while they fight. Just like normal parenting but in smaller space.”

The Escape Artists

Running from something. Bad breakup, job burnout, family drama, debt, trauma.

You can usually tell. They’re the ones who seem relieved rather than excited. Who don’t want to talk about their past. Who are literally using vanlife as escape velocity from their old life.

I was one of these. My van was my escape pod from a life I’d built but didn’t want. Took me a year to admit that to anyone.

Where the UK Vanlife Community Actually Gathers

The Unofficial Spots

These are the places where you’ll consistently find other vans. Not organised meets. Just natural gathering spots.

Scottish Highlands (April-October):

  • Glen Nevis car park
  • Applecross peninsula
  • Glenelg
  • North Coast 500 route (too many vans now, honestly)

You’ll see the same faces cycling through. Quick chats while making breakfast. Shared intel about where the midges are bad.

Cornwall (year-round, but manic in summer):

  • Sennen Cove
  • Prussia Cove
  • Various clifftop car parks (until you get moved on)

Surf culture overlaps heavily with vanlife here. Everyone’s chasing waves and comparing wetsuit brands.

Lake District (spring and autumn):

  • Great Langdale
  • Borrowdale
  • Newlands Valley

Walking and climbing crowd. More serious outdoors people. Less Instagram, more muddy boots and Ordnance Survey maps.

Pembrokeshire Coast:

  • Freshwater West
  • Broad Haven
  • Whitesands

Quiet in winter, perfect for escaping crowds. Wind will blow your van over but the beaches are stunning.

North York Moors:

  • Hutton-le-Hole
  • Rosedale Abbey
  • Various moorland car parks

Underrated. Fewer vans, beautiful landscapes, friendly locals who are used to campers.

Organised Meets and Gatherings

Vanfest (May, usually Malvern):

  • Biggest UK vanlife gathering
  • 1,000+ vans
  • Trade stands, talks, workshops
  • Fun but very commercial now
  • £40-£80 ticket depending on days

I went twice. First time was brilliant. Second time felt too corporate. But if you’re new to vanlife, it’s worth going once just to see the variety of builds and meet loads of people.

Busfest (various locations):

  • VW-focused but everyone’s welcome
  • Smaller, more community-focused than Vanfest
  • Better vibe in my opinion
  • £30-£50 entry

Wild camping meets (informal, organised through Facebook):

  • Someone posts a location
  • 10-30 vans show up
  • Campfire, shared food, stories
  • No tickets, no organisation, pure community

These are my favourite. Raw vanlife. Everyone brings firewood and something to share. I’ve met my best vanlife friends at these.

Regional meets:

  • Scottish Vanlife groups
  • Cornish Van Dwellers
  • Peak District Van Camping
  • Various regional Facebook groups

Usually monthly or quarterly meet-ups. Pub gardens, country parks, someone’s farm. Low-key, friendly, free.

The Unwritten Rules of Van Spots

When you rock up somewhere and there’s already vans:

Do:

  • Park at a respectful distance (at least 20-30 metres unless it’s a tight spot)
  • Wave or nod acknowledgment
  • Be quiet after 10pm
  • Take your rubbish with you
  • Share knowledge if asked (good walks, where to get water, etc.)
  • Defend the spot together if someone’s causing trouble

Don’t:

  • Park right next to someone when there’s loads of space (creepy)
  • Loud music late at night
  • Generator use unless unavoidable (and never overnight)
  • Leave a mess
  • Bring the spot to wider attention (social media “spot burning”)
  • Assume everyone wants to be social (some people want solitude)

The morning acknowledgment:

If you’re both making coffee at the same time, a “Morning, nice spot” is standard. If they want to chat, they’ll continue the conversation. If they don’t, they’ll give a friendly response and go back to their van.

Read the room. Some people are here to get away from people.

Stories from the Road: The Good, the Bad, the Real

The Magic Moments

Glen Etive, 2am, March 2023:

Parked alone by the river. Clear sky. Aurora forecast was promising. Set my alarm for 2am.

Woke up. Stepped outside. And there it was. Northern Lights dancing above Glen Etive. Green ribbons across the sky. Just me and the Wife, the river, the mountains, and this impossible natural light show.

No photo captures that. No Instagram post conveys what it felt like. Just pure, solitary awe.

Those moments? That’s why we do this.

Random kindness, Scottish Borders:

My clutch went in the middle of nowhere. I was parked in a lay-by, googling mechanics, dreading the cost.

A farmer stopped. Asked if I was okay. I explained the situation.

He hitched my van to his tractor and towed me three miles to his farm. Let me park in his yard for four days while I waited for parts. Invited me in for dinner with his family. Refused payment.

“That’s what neighbours do,” he said.

I wasn’t even his neighbour. I was just someone broken down on his road.

Community saves the day, Wales:

Parked in a Tesco car park. Came back to find someone had reversed into my van. Proper damage. And they’d driven off.

But another vanlifer had seen it. Taken photos. Got the reg plate. Left a note on my windscreen with all the details and his phone number as witness.

Didn’t know him. Never saw him again. But that act of community saved me £1,200 in excess on insurance.

The comparison trap:

Everyone’s Instagram shows sunrise at stunning locations. Nobody posts the Tuesday afternoon in a retail park car park while it pisses down and you’re doing admin on your laptop.

I’ve had weeks where I haven’t spoken to another human beyond “contactless please” at shop checkouts.

Freedom is brilliant. But loneliness is the price you sometimes pay for it.

When the community isn’t there:

You break down. Or get sick. Or just need help. And you’re alone in a lay-by in the middle of nowhere with no signal and no nearby friends.

I’ve been there. Food poisoning in the Highlands. Couldn’t drive. Could barely move. Took me three days to feel human again. I could’ve died and nobody would’ve noticed for a week.

The hard truth: Vanlife isolation is real. Social media shows the highlights. They don’t show the 2am existential crises or the moments you regret this choice.

The Difficult Conversations

Mental health in a metal box:

Depression doesn’t care that you’re living your dream. Anxiety doesn’t stop at the van door.

I met someone in Wales who’d started vanlife to escape anxiety. Turned out being alone in a van with no structure or routine made it worse. They ended up moving back into a flat after six months.

This isn’t a magic cure for mental health issues. Sometimes it helps. Sometimes it makes things harder.

Relationships under pressure:

Couples vanlife is romanticised. The reality is that you’re in a tiny space together 24/7.

Fortunately my Wife and I are adept at ignoring one anothers annoying habits , well most of the time.

I’ve watched couples implode on the road. Arguments over navigation. Over whose turn it is to empty the toilet. Over nothing and everything because you can’t get space from each other.

I’ve also watched couples become stronger because they’re forced to communicate and compromise constantly.

It’s a pressure test. You’ll find out fast if your relationship works.

The privilege question:

Let’s be honest. Most UK vanlifers have choices. We’re not homeless. We’re not truly living on the edge.

We’re often educated, middle-class people cosplaying poverty while having backup plans and family safety nets.

Someone once called me out on this. Said my “vanlife journey” was bullshit because I could always go back to my house if things got hard.

They were right. And it was uncomfortable to admit.

Real poverty isn’t instagrammable. Real housing insecurity isn’t a lifestyle choice.

Most of us need to check our privilege.

Finding Your People: Practical Community Building

Online Communities (The Gateway)

Facebook groups:

  • UK Vanlife and Stealth Camping (40k+ members)
  • Scottish Wild Camping (20k+)
  • Van Conversion Solutions UK (35k+)
  • Regional groups for your area

What they’re good for:

  • Asking questions
  • Finding meet-ups
  • Buying/selling gear
  • Spot recommendations
  • Weather warnings
  • Safety alerts

What they’re terrible for:

  • Actually making friends (online isn’t real connection)
  • Comparison culture (everyone’s flex posting)
  • Drama (always someone arguing about legality of wild camping)

Use them as tools. Not as substitutes for real community.

Instagram:

Look, I’m conflicted about Instagram and vanlife. It’s created impossible standards and turned wild spots into influencer car parks.

But it’s also how I found some of my vanlife friends. Through comments. Through DMs. Through recognising usernames and then meeting them in real life.

Just… be real on there. Post the messy stuff. The rain days. The failures. People connect with honesty, not perfection.

Real-World Connection Tips

The campfire law:

If you’ve got a campfire going and there’s other vans nearby, they’re welcome to join. That’s the unspoken rule.

I’ve met dozens of people this way. Fire is magnetic. People wander over with a beer or a chair. Suddenly you’re having deep conversations with strangers about why we all chose this life.

The breakdown bond:

Help someone whose van is broken. Jump-start them. Tow them. Share your tools.

Those connections last. You’ve proven you’re solid. That’s currency in this community.

Regular spots:

If you return to the same spots seasonally, you’ll start seeing familiar faces. That familiarity builds community over time.

I see the same people in Scotland every summer. We don’t keep in touch between. But when we meet again, it’s like coming home.

Skill sharing:

Got a skill? Offer it. I can fix bike mechanicals. I’ve built community by helping people sort their gears in car parks.

Others share electrical knowledge, cooking skills, local knowledge, wild swimming spots.

Contributing builds connection.

The Vanlife Friend Test

You know you’ve made a real vanlife friend when:

  • You’ll share your secret parking spots with them
  • You’re comfortable saying “I’m having a shit day and need space”
  • They’ve seen your van when it’s a complete mess
  • You’ve solved problems together (breakdowns, parking tickets, finding water)
  • You know their real story, not just their Instagram version
  • You can sit in comfortable silence together
  • They’ve got your back when things go wrong

I’ve got maybe five people who pass that test. That’s enough.

Seasonal Rhythms of UK Vanlife

Summer (June-August): The Chaos

Where everyone is: Cornwall, Scottish Highlands, Lake District, Welsh coast

The reality: Overcrowded. Wild camping spots burnt. Locals getting fed up. Parking restrictions increasing.

Community vibe: Busy. Lots of weekend warriors and holiday vanners. Harder to find solitude but easy to meet people.

My strategy: Avoid the honey pots. Head to less obvious places. North York Moors, Scottish Borders, mid-Wales.

Autumn (September-October): The Sweet Spot

Where to be: Peak District, Scottish Highlands (September), Northumberland, anywhere with trees

Why it’s best: Crowds thin. Weather’s still decent. Landscapes are stunning. Locals are friendlier again.

Community vibe: More full-timers, fewer tourists. Better quality interactions.

This is my favourite time on the road. Everything feels possible. The summer burnout hasn’t hit yet.

Winter (November-March): The Test

Where the hardcore go: Scotland (if you’re brave), Cornwall and Devon (milder), Spanish coast (if you can afford to escape)

Who’s left: Full-timers, retirees, people with no other option, and the stubborn ones who refuse to stop.

Community vibe: Tighter. You’re all surviving together. More supportive. More honest.

The reality check: UK winter vanlife is brutal. It’s dark by 4pm. It’s cold. It’s wet. Your van becomes very small.

But there’s something special about the people still doing it in January. They’re committed. They’re real.

Spring (April-May): The Renewal

Where to emerge: Scotland (as the snow clears), anywhere with wildflowers, the coast

Energy: Optimistic. People have survived winter and feel victorious. New vanners are arriving for their first season.

Community vibe: Welcoming. Experienced people helping newbies. Shared relief that winter’s over.

This is when I remember why I chose this life.

The Dark Side Nobody Posts

Vanlife Burnout

It’s real. Im nowhere near full time yet but i find it totally exhausting. Think im still settling into the idea of having the freedom but not quite got to grips with slowing things down to take it all in.

Exhausted from:

  • Never having a fixed address
  • Constantly moving
  • Always planning where to park
  • Living in 10 square metres
  • Never having privacy
  • Bad sleep
  • Living in public view
  • The admin (mail forwarding, insurance, MOT, etc.)

Some people quit vanlife entirely from burnout. It’s not failure. It’s just recognising this life isn’t forever for everyone.

The Instagram Lie

Vanlife influencers make money from sponsorships and affiliate links by showing paradise.

The reality behind those shots:

  • Arrived at 11pm, parked sketchy
  • Up at 5am for sunrise photo
  • Took 50 shots to get the one perfect image
  • Immediately drove away because the spot was actually terrible
  • Spent next six hours in a supermarket car park editing photos

I know someone who was “sponsored” by a gear company. They got about £200 worth of free stuff and had to post constantly about it. Wasn’t worth the pressure.

The question to ask: Are they showing vanlife or selling vanlife fantasy?

When Community Turns Toxic

Not everyone in vanlife is sound. You’ll meet:

The freeloaders: Who take knowledge, help, resources but never contribute back.

The entitled: Who think wild camping is their right and get aggressive about access.

The spot burners: Who post secret locations to their 50k followers and ruin them.

The preachers: Who’ve been doing it for six months and now think they’re experts telling everyone else they’re doing it wrong.

The sketchy ones: Occasionally you meet people who make you uncomfortable. Trust that feeling.

I’ve had to cut people off. Set boundaries. Leave situations that felt wrong.

Community doesn’t mean you have to accept everyone.

The Question Everyone Asks: Is It Worth It?

After four van builds and a lot of nights on the road, heres my take on it.

Worth it when:

  • You wake up somewhere stunning
  • You meet someone and have a real, unfiltered conversation
  • You successfully park somewhere perfect for free
  • You’re exactly where you want to be with total flexibility
  • You’ve solved a problem with duct tape and ingenuity
  • You’re reading in bed while rain hammers the roof and you’re cosy
  • You’ve got a community moment that reminds you why you chose this

Not worth it when:

  • You’re parked in a retail park at 2am unable to sleep because of street lights
  • Your van’s broken down and you can’t afford repairs
  • You’re lonely and isolated with no one to call
  • You’re doing it for Instagram validation rather than actual life satisfaction
  • It’s January and you’re freezing and questioning everything
  • You realise you’re spending more time finding places to park than actually enjoying those places

The truth: It’s neither paradise nor hell. It’s a daily choice with trade-offs.

Some days the freedom is intoxicating. Some days you’d trade it all for a hot bath and your own front door.

Where the UK Vanlife Community Is Heading

Increasing restrictions: Councils are cracking down. More parking bans. More enforcement. The golden age of easy UK vanlife might be ending.

Rising costs: Fuel, insurance, diesel heaters, solar, everything’s more expensive. Vanlife is becoming less accessible.

More weekend warriors, fewer full-timers: Economic reality. Most people can’t afford to not work, and remote work isn’t as flexible post-COVID as it seemed.

Better infrastructure: More official aires and campsites with facilities. Double-edged sword. Costs money but might preserve access.

Aging demographic: More retirees, fewer young people (who can’t afford the van in the first place).

Community splitting: The Instagram vanlifers vs the actual vanlifers. Two different worlds now.

My prediction: UK vanlife will become more expensive, more restricted, and more professionalised. The scrappy DIY era is fading. But the core community — the people actually living it — will remain.

My Advice for Finding Your Community

Show up: Online communities don’t replace real faces around a campfire.

Be genuine: People smell bullshit. Be honest about your struggles as well as your highlights.

Contribute: Share knowledge. Help others. Build the community you want to be part of.

Give it time: You won’t find your people immediately. I was three months solo before I found my first real connection.

Accept loneliness: Sometimes you’ll be alone. That’s okay. Solitude isn’t failure.

Trust your instincts: Not everyone deserves your trust or friendship. Be selective.

Lower your expectations: Most interactions are brief. Deep friendships are rare. That’s normal.

Stay humble: However long you’ve been doing this, someone’s been doing it longer and knows more.

The Stories Worth Telling

There’s a story I return to when I’m questioning this life.

I was parked in the Cairngorms. Another van pulled up. Older couple. They made tea. Invited me over.

Turned out they’d been married forty years. Had just sold everything to travel in their van.

“Why now?” I asked.

The husband got quiet. Then said: “My best mate died last year. Sixty-two. Spent his whole life planning for retirement. Booked a trip around Scotland for his retirement month. Had a heart attack two weeks before he was meant to leave.”

His wife took over: “We realised we were doing the same thing. Waiting for permission to live. So we stopped waiting.”

We sat there, three people in vans in the Scottish mountains, drinking tea, talking about mortality and freedom and why we choose what we choose.

That’s the community.

Not the Instagram posts. Not the festivals. Not the hashtags.

The real moments. The real conversations. The real recognition that we’re all trying to figure out how to live before we die.

That’s worth everything.

Final Thoughts

UK vanlife community isn’t perfect. It’s fragmented, complicated, sometimes disappointing.

But it’s also some of the most genuine human connection I’ve experienced.

Because we’ve all chosen something different. Something difficult. Something that most people don’t understand.

And when you meet someone else who gets it — who understands why you’d rather be in a cold van than a warm house — that recognition is profound.

You don’t need a huge community. You need a real one.

Find your people. Build your tribe. Contribute more than you take.

And maybe, if you’re lucky, you’ll have your own stories worth telling.

The door’s open. The fire’s going. There’s space around it.

Come find us.

My journey towards full time vanlife is just at the beginning so as i learn, i’ll pass whatever i learn along the way.

I burnt pasta. Not just overcooked it — actually burnt it. To the bottom of my pan. While it was still full of water.

Don’t ask me how that’s physically possible but let’s say its not good to get distracted. The smell lingered for three days.

That was year one of vanlife, when I thought I’d be cooking elaborate meals on my tiny stove like some sort of mobile Jamie Oliver. The reality? Most nights I ate beans on toast. Or just beans. Sometimes not even heated up.

Four years later, I’ve worked out how to actually cook decent food in a van without losing my mind, spending hours on prep, or setting anything on fire. This isn’t about Instagram-worthy meals. It’s about eating well, staying healthy, not bankrupting yourself, and doing it all in a space smaller than most people’s bathrooms.

Cooking And Eating on the Road can be an adventure, and I’ve learned to make it enjoyable.

The Reality of Cooking And Eating on the Road (Not What Instagram Shows)

Let’s start with honesty: cooking in a van is a pain in the arse. Your counter space is measured in inches. Your hob probably has one or two burners. Your fridge is the size of a shoebox. You’re doing washing up with a water container that holds 10 litres if you’re lucky.

Those Instagram photos of van dwellers making sourdough bread and three-course meals? They’re either parked up with full hookups, cooking outside with a full camping setup, or they’re lying. Probably all three.

Most of my meals take 15 minutes or less. Because:

  • I’ve got limited gas/power
  • I can’t be arsed spending my evening cooking
  • Washing up uses precious water
  • I’m usually cold, tired, or both

And you know what? That’s fine. You don’t need to be a chef. You need to not starve, not spend a fortune on takeaways, and ideally not eat utter shite every night.

Your Van Kitchen Setup: What You Actually Need

Before we get to recipes, let’s talk equipment. Because you can’t make anything if you haven’t got the basics sorted.

Essential Cooking Gear

Two-burner stove: This is your primary tool. I’ve got a basic Campingaz camping stove as a backup (about £45) but my go to is a two burner fitted gas hob. Two burners means you can boil pasta while heating sauce. Revolutionary.

Budget option: Single burner for £15-20, but you’ll hate your life when you want to cook two things at once.

Fancy option: Fitted LPG hob connected to an underslung tank. More permanent, looks nicer, costs £150-300 for the hob plus installation. I’ll probably do this on my next van. Probably.

Two good pans: One large (for pasta, stir-fries, anything bulky) and one small (for heating soup, making scrambled eggs). I’ve got cheap Tesco ones that cost £8 each and they’re fine. Non-stick is essential because scrubbing burnt food with limited water is miserable.

A decent kettle: Not for cooking, but because tea is life. I’ve got a basic stainless steel one from Wilko (£8) that works on the stove. Electric kettles use too much power unless you’re on hookup.

Sharp knife: One proper chef’s knife. Cutting veg with a blunt knife in a moving van is how you lose fingers. I spent £20 on a Victorinox one and it’s been brilliant.

Learning the art of Cooking And Eating on the Road has transformed my approach to meals.

Chopping board: Small, plastic, easy to clean. £3 from IKEA.

Can opener: Obvious, but you’ll forget until you can’t open your beans. Keep it in the cutlery drawer.

Wooden spoon and spatula: For stirring and flipping. Plastic spatulas melt. I learned this the expensive way.

Two bowls, two plates, two mugs, cutlery: Unless you’re living with someone, in which case double it. I bought a cheap camping set from Decathlon (£15) and it’s lasted three years.

Storage containers: For leftovers. I’ve got three Tupperware boxes that stack. Keeps the fridge organised and stops everything smelling of everything else.

Nice to Have (But Not Essential)

  • Collapsible colander: For draining pasta. Mine cost £6 from Amazon and folds flat.
  • Kettle toaster bags: Weird but brilliant. You can make toasties in boiling water. £4 for a pack of 100.
  • Small grater: For cheese. You can buy pre-grated but it’s more expensive and goes off faster.
  • Tin foil and cling film: For wrapping food or covering pans.
  • Herbs and spices: Make everything taste less depressing. I keep salt, pepper, mixed herbs, chilli flakes, and garlic powder. That’ll sort most meals.

Cooking Methods: What Works in a Van

Gas Stove (Most Common)

This is what most people use. Portable, reliable, doesn’t drain your electrics.

The good: Works everywhere, boils water fast, cheap to run (£5-8 for a gas canister that lasts 2-3 weeks of regular cooking).

The bad: Produces moisture and CO2, so you need ventilation. And if you run out of gas at 9pm in rural Scotland, you’re eating cold beans.

Pro tip: Always carry two gas canisters. One in use, one spare. Running out of gas is the van equivalent of forgetting to charge your phone, but worse because now you can’t even have a brew.

Diesel Heater + Cook Plate (Advanced)

Some people use a diesel-powered cooker. Haven’t tried this myself because I’m not that committed, but apparently they’re efficient and use the same fuel as your heater.

The good: One fuel source, works in cold weather, efficient.

The bad: More expensive (£200+), tricky to install, slower than gas.

Electric Induction Hob (Hookup Only)

If you’ve got solar and batteries, you can run an induction hob. I’ve used one when parked at campsites with hookup.

The good: Fast, precise, no naked flame, easy to clean.

The bad: Uses 1500-2000W, so forget it unless you’re plugged into mains. Even with big solar setups, that’s a huge power drain.

Camping Stove Outside

When weather permits, cooking outside is brilliant. More space, no condensation in the van, and you can use bigger pots.

I’ve got a fold-out table (£25 from Decathlon) that I set up next to the van. Cook outside, eat inside. Best of both worlds.

The catch: British weather. You’ll be cooking outside maybe 60-70 days a year if you’re optimistic.

Shopping & Meal Planning (Without Losing Your Mind)

I used to shop daily. Just grab whatever I fancied. This was stupid for three reasons:

  1. Expensive
  2. Time-consuming
  3. Led to buying random stuff that didn’t work together

Now I plan loosely for 3-4 days at a time. Not a strict meal plan — more like “I’ll need pasta, tomatoes, some protein, veg, and breakfast stuff.”

Smart Shopping for Van Life

Buy from budget supermarkets. Aldi and Lidl are your friends. You’ll save £20-30 a week compared to shopping at Tesco or Sainsbury’s.

Focus on versatile ingredients. Things that work in multiple meals. Pasta, rice, tinned tomatoes, onions, garlic, eggs — the building blocks of loads of different dishes.

Don’t bulk buy fresh veg. Your fridge is tiny. Buy what you’ll eat in 2-3 days, then restock. I learned this after binning a bag of salad that turned to slime in 48 hours.

Tinned and dried is your friend. Tinned tomatoes, beans, chickpeas, tuna. Dried pasta, rice, lentils. They don’t go off, they’re cheap, and they’re light on fridge space.

Buy meat on the day you’ll cook it. Unless you’ve got a good fridge/freezer setup. Meat goes off fast in a small van fridge, especially in summer.

Meal overlap strategy: Cook things that can be repurposed. Make a big batch of rice — use it for stir-fry one night, fried rice the next, or in a burrito bowl the day after. Same with pasta, cooked chicken, roasted veg.

My Typical Weekly Shop (£30-40)

  • Pasta (500g) — £0.60
  • Rice (1kg) — £1.00
  • Tinned tomatoes (4 tins) — £1.60
  • Onions (bag) — £0.90
  • Garlic (bulb) — £0.30
  • Eggs (12) — £2.50
  • Cheese (400g block) — £2.50
  • Bread — £0.95
  • Butter — £1.75
  • Tinned beans (3 tins) — £1.50
  • Chicken breasts (2) — £3.50
  • Bacon (pack) — £2.00
  • Tinned tuna (2) — £1.80
  • Veg mix (peppers, courgette, mushrooms) — £4.00
  • Milk — £1.30
  • Tea bags — £1.00
  • Porridge oats — £1.20
  • Peanut butter — £1.80
  • Random snacks/fruit — £5.00

Total: £35.20

This feeds me well for about 4-5 days. Not fancy, but definitely not beans on toast every night.

Simple Recipes That Actually Work in a Van

Right, let’s get to the food. These are all meals I cook regularly. Nothing takes longer than 20 minutes. Nothing needs complicated techniques. Everything’s been tested in actual van conditions (i.e., with minimal space, dodgy lighting, and sometimes in the rain).

Breakfast Options

1. Porridge (The Boring Staple)

Time: 5 minutes
Cost per serving: £0.30

Dead simple. Works every day. Fills you up until lunch.

Ingredients:

  • 50g porridge oats
  • 200ml milk (or water if you’re out of milk)
  • Handful of raisins or a chopped banana
  • Spoonful of honey or sugar

Method: Put oats and milk in a pan. Heat on medium, stirring occasionally. When it’s thick and creamy (about 5 minutes), chuck in your toppings. Done.

I make this probably 5 days a week. It’s dull, but it’s cheap, filling, and you can make it without being fully awake.

2. Scrambled Eggs

Time: 5 minutes
Cost per serving: £0.70

Actual hot breakfast that feels like you’re making an effort.

Ingredients:

  • 2-3 eggs
  • Splash of milk
  • Knob of butter
  • Salt and pepper
  • Optional: cheese, chopped tomatoes, spring onions

Method: Crack eggs into a bowl, add milk and seasoning, whisk with a fork. Melt butter in pan on medium-low heat. Pour in eggs. Stir gently with a wooden spoon, scraping the bottom as it cooks. Takes about 3-4 minutes. Don’t overcook — slightly runny is better than rubber.

Chuck it on toast. Add cheese if you’re feeling fancy.

3. Bacon Butty

Time: 10 minutes
Cost per serving: £1.20

For when you need comfort food or you’re hungover.

Ingredients:

  • 3-4 rashers of bacon
  • 2 slices of bread
  • Butter
  • Ketchup or brown sauce

Method: Fry bacon in a pan until crispy. Butter your bread. Bacon in the middle. Sauce on top. Eat immediately while questioning your life choices.

Works just as well with sausages if you prefer.

Lunch Ideas

Most days I just have a sandwich or leftovers from dinner. But here’s a couple of options that are quick:

4. Tuna Pasta Salad

Time: 10 minutes (if pasta’s already cooked)
Cost per serving: £1.50

Ingredients:

  • Cooked pasta (from last night’s dinner)
  • Tin of tuna, drained
  • Sweetcorn (handful, tinned or fresh)
  • Cherry tomatoes, halved
  • Mayo or salad cream
  • Salt and pepper

Method: Chuck everything in a bowl. Mix. Eat. If you want to feel healthy, add some lettuce or cucumber.

I make this when I’ve got leftover pasta. It’s better than eating plain cold pasta like a savage, which I’ve also done.

5. Cheese Toastie

Time: 10 minutes
Cost per serving: £0.80

Ingredients:

  • 2 slices of bread
  • Grated cheese (or sliced)
  • Butter

Method: Butter the outside of both bread slices. Cheese in the middle. Fry in a pan on medium heat, pressing down with the spatula. Flip when golden brown. Other side golden? Done.

Add ham, tomato, or onion if you want to get creative.

Dinner Recipes (The Main Event)

6. One-Pot Pasta with Tomato Sauce

Time: 15 minutes
Cost per serving: £1.20

This is my go-to meal. One pot, minimal washing up, actually tastes good.

Ingredients:

  • 100g pasta (spaghetti, penne, whatever)
  • 1 tin chopped tomatoes
  • 1 onion, chopped
  • 2 cloves garlic, chopped (or squirt of garlic paste)
  • Dried mixed herbs
  • Salt, pepper, chilli flakes
  • Olive oil
  • Optional: grated cheese on top

Method: Fry onion in olive oil until soft (5 minutes). Add garlic, cook for 1 minute. Chuck in tinned tomatoes, herbs, and seasoning. Add pasta straight into the sauce with enough water to just cover it (about 250ml). Stir occasionally. Cook for 10-12 minutes until pasta’s done and sauce has thickened. Add more water if it gets too thick.

Grate cheese on top if you have it.

Variations:

  • Add tinned tuna for protein
  • Chuck in chopped courgette or mushrooms with the onions
  • Crumble in some cooked bacon
  • Use different pasta shapes to keep it interesting

7. Fried Rice

Time: 15 minutes
Cost per serving: £1.80

Perfect for using up leftover rice. Actually better with day-old rice than fresh.

Ingredients:

  • 200g cooked rice (cold)
  • 2 eggs
  • Handful of frozen peas (or any veg you have)
  • 2 spring onions, chopped (or normal onion)
  • Soy sauce
  • Oil
  • Optional: cooked chicken, bacon, prawns

Method: Heat oil in pan on high heat. Scramble the eggs quickly, remove from pan. Add more oil if needed, chuck in veg, cook for 2 minutes. Add cold rice, break up any clumps, fry for 5 minutes until it’s starting to crisp up. Add eggs back in, pour over soy sauce, stir everything together. Cook for another 2 minutes.

This is probably my favourite van meal. Uses leftovers, tastes better than the sum of its parts, and feels like proper cooking even though it’s dead easy.

8. Chilli Con Carne

Time: 20 minutes
Cost per serving: £2.50

Makes enough for two meals, which is the whole point.

Ingredients:

  • 400g beef mince (or turkey mince, cheaper)
  • 1 onion, chopped
  • 1 tin kidney beans, drained
  • 1 tin chopped tomatoes
  • 2 cloves garlic
  • Chilli powder (1-2 tsp, depending how brave you are)
  • Cumin (1 tsp)
  • Salt and pepper
  • Oil

Method: Brown the mince in a pan (8-10 minutes), breaking it up as it cooks. Remove mince, fry onion in the same pan until soft. Add garlic and spices, cook for 1 minute. Add mince back in with tomatoes and beans. Simmer for 10 minutes, stirring occasionally. Add water if it’s too thick.

Eat with rice, wrap it in a tortilla, or just eat it on its own with cheese on top. Keeps well in the fridge for 2-3 days, so make the full batch and reheat half tomorrow.

9. Stir-Fry Whatever’s in the Fridge

Time: 15 minutes
Cost per serving: £2.00

This isn’t really a recipe, more of a technique. But it’s how I use up random veg before it goes off.

Basic method: Heat oil in pan on high. Add protein (chicken, prawns, tofu, whatever — cut into small pieces). Cook until done, remove from pan. Add veg (onions, peppers, courgette, mushrooms, broccoli — whatever you’ve got). Fry hard for 5 minutes, stirring constantly. Add protein back in. Pour over soy sauce and a splash of water. Cook for another 2 minutes.

Eat with rice or noodles.

The key is high heat and keep everything moving. You’re not boiling veg, you’re frying it fast so it gets a bit of colour.

10. Jacket Potato with Toppings

Time: 60 minutes (but mostly hands-off)
Cost per serving: £1.50

Only really practical if you’ve got time to kill or you’re doing other stuff while it cooks.

Ingredients:

  • 1 large baking potato
  • Butter
  • Toppings: cheese, beans, tuna mayo, coleslaw, whatever

Method: Wrap potato in foil. Bury it in the coals if you’ve got a campfire going. Or wrap it in foil and stick it on the stove on very low heat, turning every 15 minutes (this works but uses a lot of gas). Or if you’re on hookup, cook it in a portable oven or air fryer.

Honestly? Jacket potatoes are a faff in a van. But they’re filling and cheap, so I’m including them. I make them maybe once a month when I can’t be arsed to cook properly and I’m parked up for the day.

11. Sausage and Veg Traybake (Campfire/Outside Cooking)

Time: 30 minutes
Cost per serving: £2.50

This only works if you’re cooking outside with a campfire or on a BBQ grill. But it’s brilliant when you can do it.

Ingredients:

  • 4 sausages
  • 2 peppers, chopped
  • 1 red onion, chopped into wedges
  • 1 courgette, chopped
  • Cherry tomatoes
  • Olive oil, salt, pepper, mixed herbs

Method: Get a foil tray (or make a bowl out of foil). Chuck everything in, drizzle with oil, season well. Put it over the campfire or on a BBQ grill. Let it cook for 30 minutes, stirring occasionally. Everything should be charred and the sausages cooked through.

This tastes about 400% better than the same meal cooked inside. Something about the smoky flavour and being outside.

Quick Snacks & Extras

  • Hummus and veg sticks: Cheap, healthy, no cooking
  • Peanut butter on toast: High protein, high calories, tastes good
  • Instant noodles: For when you can’t be arsed. Add an egg and some frozen veg to make it less depressing
  • Beans on toast: The classic. Gets boring after a while but it’s quick and filling
  • Cheese and crackers: Not really a meal, but I’ve definitely eaten this for dinner before

Keeping Food Fresh (The Van Fridge Reality)

Your van fridge is not like a house fridge. It’s smaller, less efficient, and probably doesn’t maintain a consistent temperature.

Fridge Tips

Temperature matters. Aim for 0-5°C. Most 12V compressor fridges can do this, but check with a thermometer. If it’s running warmer, your food will go off faster.

Don’t overpack it. Cold air needs to circulate. A packed fridge works harder and struggles to stay cold.

Put meat at the bottom. If it leaks (which it sometimes does), you don’t want it dripping on everything else.

Use containers. Stops smells transferring between foods and makes things last longer.

Keep doors closed. Obviously. But when it’s hot and you’re in and out of the fridge, the temperature climbs fast.

What goes off fast:

  • Salad leaves (2-3 days)
  • Fresh meat/fish (1-2 days)
  • Milk (3-5 days in a van fridge)
  • Soft cheese (5-7 days)

What lasts ages:

  • Hard cheese (weeks)
  • Root veg (weeks)
  • Eggs (2-3 weeks)
  • Butter (weeks)
  • Tinned/jarred stuff once opened (check the label)

No-Fridge Alternatives

If you don’t have a fridge, you can still eat well. Just need to be smarter about it.

Shelf-stable proteins: Tinned tuna, beans, chickpeas, cured meats (salami, chorizo).

Veg that doesn’t need chilling: Potatoes, onions, garlic, carrots, tinned tomatoes.

UHT milk: Tastes a bit different, but it doesn’t need a fridge until opened.

Buy daily: Fresh stuff like meat and salad, just buy what you need for that day’s meal.

I did six months without a fridge when my first one died. It’s doable, just less convenient.

Washing Up Without Losing Your Mind

This is the worst part of van cooking. The actual worst.

My System

Washing up bowl: I use a small plastic bowl (£3 from Wilko). Fill it with hot water and a squirt of washing up liquid.

Order matters: Glasses first, then plates, then cooking pots, then anything greasy like frying pans. This way the water stays clean longer.

Rinse with minimal water: I’ve got a spray bottle with clean water for rinsing. Uses way less water than pouring.

Dry immediately: Use a tea towel, get things dry and put away. Leaving stuff wet just encourages mould and attracts flies.

Water Conservation

I’ve got a 25-litre water tank. Washing up uses about 3-5 litres depending on how much cooking I’ve done. That’s not loads, but it adds up.

Ways to save water:

  • One-pot meals (less washing up)
  • Paper plates for messy stuff (not environmentally great, but sometimes practical)
  • Clean as you go (wipe pans immediately after cooking, before stuff’s stuck on)
  • Reuse pots (cook pasta, drain it, use same pot for sauce)

What About Eating Out?

I eat out more than I probably should. Breakfast at a cafe costs £6-8. Pub lunch costs £10-15. Takeaway costs £8-12.

That adds up fast if you’re doing it multiple times a week. But sometimes you need:

  • A break from cooking
  • To work somewhere with WiFi and heating
  • Proper human contact
  • A meal you didn’t make yourself

I budget about £40-50/week for eating out. That gets me 2-3 cafe breakfasts or one decent pub meal plus a few coffees. More than that and I’m spending too much.

Cheap eating out:

  • Greggs: Sausage roll and a coffee for £3
  • Wetherspoons: Full breakfast for £4-5, decent pub food for £6-8
  • Supermarket cafes: Morrisons and Asda do cheap cooked breakfasts
  • Fish and chips: £6-7 for a proper meal

Common Cooking Mistakes (I Made Them All)

Trying to cook complicated stuff. You’re in a van. You don’t have five different pots or unlimited counter space. Stick to simple meals.

Not securing stuff before driving. I once forgot to put the lid on my rice container. Drove over a speed bump. Rice everywhere. Still finding grains six months later.

Running out of gas mid-meal. Always have a spare canister. Always.

Leaving food out in summer. Things go off faster than you think in a hot van. Anything with mayo or dairy? In the fridge immediately.

Buying food you can’t store. I bought a watermelon once. It took up a quarter of my fridge. Stupid.

Not cleaning the hob. Built-up grease is a fire hazard and makes everything smell. Wipe it down after every cook.

Cooking without ventilation. Especially gas stoves — you’re producing moisture and CO2. Crack a window or turn on your roof vent.

Meal Prep Strategy

I don’t do proper meal prep like bodybuilders with their Tupperware boxes of chicken and rice. But I do cook things that make the next day easier.

Make extra rice/pasta. Takes the same time to cook 100g or 200g. Tomorrow you’ve got instant fried rice or cold pasta salad.

Batch cook chilli or curry. Make enough for 2-3 meals. Keeps well in the fridge, tastes better the next day anyway.

Prep veg in advance. Chop onions and peppers when you buy them. Store in a container. When you’re cooking later, half the work’s done.

Boiled eggs. Cook 4-6 at once. They keep for a week in the fridge and you can eat them as snacks or chuck them in salads.

What I Spend on Food (Monthly Reality)

This varies massively depending on where I’m parked and how often I eat out.

Budget month (mostly cooking):

  • Groceries: £120-150
  • Eating out: £40-60
  • Total: £160-210

Typical month:

  • Groceries: £150-180
  • Eating out: £80-120
  • Total: £230-300

Expensive month (travelling, eating out lots):

  • Groceries: £100-120
  • Eating out: £150-200
  • Total: £250-320

For comparison, I was spending £400/month on food when living at home. So van living actually saves me money on food, mostly because I’m forced to cook more and can’t just order Deliveroo every night.

Final Thoughts

Cooking in a van will never be as easy as cooking in a house. You’ve got less space, less equipment, and less patience because you’re probably cold and tired.

But it’s definitely doable. You can eat well without spending hours cooking or bankrupting yourself on takeaways. The trick is keeping it simple, using versatile ingredients, and not trying to be a Michelin-starred chef.

Most nights I’m eating some variation of pasta, rice, or stir-fried veg with protein. It’s not exciting. But it’s hot, it’s nutritious, and it doesn’t require 14 ingredients I’ll never use again.

Start with the recipes in this guide. Master those. Then branch out once you’ve got the basics down. And for God’s sake, keep a spare gas canister in the van.

Your stomach will thank you.


My van was broken into twice in the same year. The first time they smashed the passenger window and stole my laptop. The second time they tried to drill the door lock at 3am while I was sleeping inside.

That second one was terrifying. Not Instagram-friendly. Not part of the vanlife dream. Just me, alone in a Tesco car park in Manchester, listening to someone trying to break into my home while I held a hammer and dialled 999.

Police arrived in twelve minutes. The scrotes legged it. But I didn’t sleep properly for a month afterwards.

So here’s everything I’ve learned about keeping yourself and your van safe. Not paranoid. Not fearful. Just prepared. Because the vanlife dream includes some grim realities nobody posts about.

Understanding Campervan Security And Safety is essential for every van owner.

The Reality of Campervan Crime and the Importance of Campervan Security And Safety

Let’s start with the uncomfortable truth: campervans are targets.

Why?

  • Expensive vehicles (£15,000-£80,000)
  • Often contain thousands in equipment (solar panels, batteries, bikes, surfboards)
  • Usually parked in isolated spots
  • Owners might be inside (vulnerable)
  • Easy to identify and track

What actually gets stolen:

My insurance broker told me the top claims are:

  1. Catalytic converters (diesel vans, takes 2 minutes to cut out)
  2. Bikes and roof boxes
  3. Power tools left in vans
  4. Sat navs and electronics
  5. Entire vehicles (older VWs especially)

Where it happens:

Not where you’d think. My break-ins? One in Manchester city centre, one in a “nice” area of Birmingham. Both supposedly safe car parks.

The dodgiest wild camping spots I’ve used? Never had an issue.

Crime is opportunistic and urban. Thieves want quick access and escape routes, not isolated moorland car parks.

Physical Security: What Actually Works

I’ve spent about £1,200 on security over five years. Some of it was essential. Some was expensive theatre that made me feel safer but didn’t actually help.

Door Locks & Deadlocks

Your factory van locks? Shockingly easy to defeat.

The problem: Most panel vans use the same lock mechanism. Thieves have master keys. Or they drill the lock cylinder in about 30 seconds.

Solutions that work:

Deadlocks (£150-£250 per door, professionally fitted):

I use Armourshell or Mul-T-Lock deadlocks on both side doors and rear doors. They’re mechanical, secondary locks that engage separate lock points.

Saved me during that second break-in attempt. They tried drilling the main lock, got through it, but the deadlock held. Bought me enough time for the police to arrive.

Slamlocks (£120-£200 per door):

These lock automatically when you close the door. Great if you’re constantly in and out. I use them on my rear doors.

Brands I trust: Armourshell, Mul-T-Lock, Locks 4 Vans, Thatcham-approved options

DIY or professional? Professional. This isn’t the time to bodge it. Find a mobile locksmith who specialises in van security. Costs more but they’ll fit it properly and give you insurance-friendly certification.

Steering Locks & Pedal Boxes

Steering wheel locks: I use a Disklok (£120-£180 depending on size). It’s massive, bright yellow, obvious.

Does it actually stop theft? No. A determined thief can cut through your steering wheel in 60 seconds.

But it’s a visual deterrent. Thieves see it and move to an easier target.

Pedal boxes (£100-£150): Metal box that covers your pedals. Makes it harder to drive even if they get in.

I don’t use one. Too much faff for daily life. But if you’re parking in dodgy areas regularly, consider it.

Gear stick locks: Waste of money in my experience. Too easy to defeat.

Alarms & Immobilisers

Factory alarms: Usually rubbish on converted vans. They don’t cover the living space and can be defeated easily.

Aftermarket alarms (£200-£600 fitted):

I use a Thatcham Category 1 alarm with:

  • Perimeter sensors (detects door/window opening)
  • Movement sensors (detects someone inside)
  • Tilt sensors (detects the van being lifted/towed)
  • Battery backup (still works if main battery disconnected)

Does it work?

The movement sensor saved me once. Someone smashed my window in Bristol, reached in, alarm went off, they ran. Didn’t get anything.

But alarms have limitations. They’re loud and annoying for everyone nearby. In urban areas, people ignore them. And you’ll set it off yourself constantly if you’re moving around inside.

Immobilisers: Most modern vans have factory immobilisers. But trackers are better for recovery.

GPS Trackers

This is the big one for actually recovering your van if it’s stolen.

I use a Smartrack S5 D-iD (£350 + £120 annual subscription):

  • Live GPS tracking
  • Alerts if van moves without my phone present
  • Insurance-approved (some insurers insist on trackers for expensive conversions)
  • Police can track it in real-time if stolen

Alternatives:

  • Thatcham Category 5 trackers (£250-£500 + annual fees)
  • Apple AirTags (£29 each) — hidden in multiple locations as backup (they’re not insurance-approved but cheap and effective)
  • Budget option: Rewire Tracker (£35 one-time, no subscription, basic but works)

Real world effectiveness:

A mate had his VW T5 stolen from his driveway. Tracker located it within 45 minutes. Police recovered it before they could strip it. Saved him £30,000.

Another friend? No tracker. Van stolen. Never seen again.

For me, it’s non-negotiable now.

Window Protection

Security film (£100-£200 for DIY installation):

Transparent film applied to windows. Makes them harder to smash. Won’t stop a determined thief but slows them down.

I’ve got it on my side windows. Rear windows I use blackout panels at night anyway.

Mesh grilles: Some people fit internal mesh grilles. They work but make the van feel like a prison.

The reality: If someone wants through your window, they’re getting through. The goal is making it take long enough that they give up or get noticed.

Catalytic Converter Protection

This is huge right now. Cat theft is rampant.

Why they’re targeted: Contains precious metals (platinum, palladium, rhodium). Worth £50-£400 to scrap. Takes 2 minutes to cut out.

Protection options:

Catloc or similar cage (£200-£400 fitted): Metal cage welded around the cat. Makes it much harder to cut.

I had one fitted after my neighbour’s van got hit three times in six months.

Cat marking: Police offer free marking with forensic spray. Makes it traceable and harder to sell.

Park smart: Cats are stolen when you’re parked on the street overnight. Use lit areas, close to windows, or park with the cat against a wall/kerb.

What Doesn’t Work (Security Theatre)

Cheap window etching: “This van is tracked” stickers. Thieves ignore them.

Dummy cameras: They know. The real ones have visible wiring and power sources.

“Beware of the dog” signs when you clearly don’t have a dog: Again, they’re not stupid.

Cable locks for bikes on a roof rack: Cut in 10 seconds with bolt cutters.

Over-reliance on one security measure: Layers work. Single solutions don’t.

Valuables: What to Secure and How

Rule one: Don’t leave stuff visible. Not even rubbish bags or old clothes. Anything visible suggests there’s valuable stuff hidden.

What I Keep Hidden

Bikes: I keep mine inside the van. Roof racks get targeted constantly. If you must use external racks, use serious locks (Kryptonite New York chain, £80-£120) and take the bikes inside overnight.

Laptops/tablets/phones: Never left in the van when I’m out. Ever. They’re in my backpack or locked in a hidden safe.

Power tools: If you carry them, hidden storage or take them out when parked anywhere dodgy.

Solar panels/roof equipment: Can’t really hide these but make sure they’re bolted securely (security bolts with unique heads, £15 for a set).

Hidden Safes

I’ve got a small safe bolted to the van chassis, hidden inside a cupboard (£80 for a decent one).

In it:

  • Passport copies
  • Emergency cash (£200)
  • Spare bank card
  • Important documents
  • USB backup drive

Where NOT to hide a safe: Under the bed (first place they look), in obvious cupboards, anywhere easily accessible.

Good hiding spots: Behind interior panels, in fake floor sections, inside false furniture bottoms.

Decoy Tactics

This sounds paranoid but it works.

I keep a cheap old phone (£20) in the centre console. If someone smashes the window, they grab it and run. They think they’ve won. My actual phone is hidden.

Same with a decoy wallet with expired cards and a tenner in it.

Real thieves will take the obvious stuff and leave quickly. They’re not doing forensic searches.

Personal Safety: The Bit Nobody Talks About

This is harder to quantify than physical security. But it’s arguably more important.

Parking Location Safety

Red flags that I avoid:

  • Completely isolated spots with no phone signal (can’t call for help)
  • Urban areas with groups of people hanging around
  • Places with lots of litter/dumped rubbish (indicates nobody cares what happens there)
  • Anywhere that feels wrong (trust your gut)

Green flags I look for:

  • Other motorhomes/campervans present (safety in numbers)
  • Nearby houses (witnesses)
  • CCTV visible (even fake ones deter)
  • Decent phone signal
  • Easy escape route (not blocked in)

The late-night arrival test: If I arrive somewhere after dark and it feels dodgy, I drive somewhere else. Even if that’s a 24-hour supermarket car park.

Pride isn’t worth getting attacked for.

Solo Travel Safety (Especially Solo Women)

I’m a bloke. So I asked my partner (who’s done solo vanlife) what she wishes she’d known:

Her advice:

  • Tell someone where you’re parking every night (she texts her sister her location)
  • Keep your phone charged with a backup power bank
  • Have a personal alarm (£8-£15, proper loud ones)
  • Learn where your nearest safe spaces are (police stations, hospitals, 24hr petrol stations)
  • Don’t advertise you’re alone (park with curtains closed, no “solo traveller” stickers)
  • Trust your instincts ALWAYS — feeling unsafe is reason enough to leave

Creepy situations she’s dealt with:

  • Men knocking on her van at night asking if she’s “okay” (she wasn’t in distress, they were being creepy)
  • Being followed from a parking spot after someone watched her arrive
  • Unwanted attention at campsites from men who see a solo woman as vulnerable

Her responses:

  • Fake phone calls to “boyfriend” when people are around
  • Move immediately if anyone makes her uncomfortable
  • Keep her keys in her hand while sleeping (quick escape if needed)
  • Uses a door wedge alarm (£12, screams if door is opened)

Is solo travel safe for women?

Yes. But requires more awareness and preparation. Most vanlife women do it and are fine. But the risks are real.

What to Do If You Feel Threatened

If someone’s trying to break in while you’re inside:

  1. Make noise. Shout “I’m calling the police” loudly
  2. Actually call the police (999 in emergencies)
  3. Turn on all lights, make it obvious you’re awake and aware
  4. If you have an alarm, set it off manually
  5. Don’t confront them directly unless you absolutely have to
  6. Video record if safe to do (evidence for police)
  7. Be ready to drive away if possible

If someone’s acting aggressively:

  • Don’t engage or escalate
  • Get back in your van, lock doors, drive away
  • Note vehicle descriptions, people descriptions
  • Report to police (101 for non-emergency)

If you’re being followed:

  • Drive to a police station, fire station, or 24hr petrol station
  • Don’t drive home or to your regular parking spot
  • Call police while driving (hands-free)
  • Note the vehicle registration

Keeping Your Wits About You

I carry:

  • Personal alarm on my keychain (£10)
  • Torch (also useful for general life, £20 for decent one)
  • Mobile phone always charged
  • Emergency whistle (£3, ridiculous but effective at attracting attention)

I don’t carry:

  • Weapons (illegal in UK, can be used against you)
  • Anything I’d be tempted to use in anger (you’ll end up in more trouble than the attacker)

Self-defence:

If you want proper self-defence training, do it. But the reality is: avoid confrontation, run away, call for help. That’s the safest strategy.

Fire Safety: The Silent Killer

Fire in a van is terrifying. You’re in a metal box full of flammable materials with potentially dodgy gas and electrical systems.

What Causes Van Fires

Gas leaks: Poorly installed gas systems, perished hoses, faulty regulators

Electrical faults: Dodgy wiring, overloaded circuits, cheap solar controllers

Cooking accidents: Unattended stoves, grease fires, tip-overs

Diesel heaters: Incorrect installation, fuel leaks, blocked exhausts

Lithium battery failures: Rare but catastrophic when they go wrong

Fire Prevention

Get your gas system certified annually (£80-£120 by a Gas Safe engineer). Non-negotiable.

Check your electrical system regularly:

  • Look for melted insulation
  • Check for hot spots on wiring
  • Ensure all fuses are correctly rated
  • Don’t overload circuits

Never leave cooking unattended. I’ve nearly started two fires being distracted by beautiful views while cooking.

Install smoke and CO detectors:

  • Smoke detector (£8-£15) — mains-powered or battery
  • Carbon monoxide detector (£15-£25) — must be battery or 12V powered
  • Replace batteries annually (I do mine every New Year’s Day)

Keep a fire extinguisher accessible (£15-£40 depending on size):

  • ABC dry powder (works on most fire types)
  • 1kg minimum, 2kg better
  • Mount near exit, easily reachable
  • Check pressure gauge annually

Fire blanket (£8-£15):

  • For smothering cooking fires
  • Mount near your stove
  • Learn how to use it properly

Escape Planning

Know your exits:

  • Both side doors should open from inside without keys
  • Rear doors same
  • Windows that can be kicked out if needed

Practice emergency exit: Sounds daft but I’ve actually crawled out of my van in darkness just to know I can do it. Takes 15 seconds. Worth doing once.

Keep exit paths clear: Don’t pile storage in front of doors at night.

Sleep with keys nearby: In case you need to drive away quickly.

Breakdown Safety

What I carry:

  • Jump starter pack (£40-£80) — saved me a few times
  • Spare fuses (£5 for a kit)
  • Spare bulbs (£10)
  • Basic tools (£50 for decent set)
  • Hi-vis jacket (£5)
  • Warning triangle (£4)
  • First aid kit (£15-£30)
  • Spare fuel (5L in jerry can, £20)

Recovery service:

I use AA (£120 annually for Van Cover). They’ve recovered me three times. Worth every penny.

Consider homestart cover too (recovers you even if you break down at “home” i.e. wherever you’re parked).

Breaking Down Safely

If you break down on a motorway:

  1. Get to hard shoulder/emergency area if possible
  2. Exit left side away from traffic
  3. Get well behind barriers
  4. Don’t attempt repairs on the motorway
  5. Call for help
  6. Wait in safe location (not in the van if possible)

If you break down on rural roads:

  1. Get van off the road if safe
  2. Turn on hazards
  3. Place warning triangle 50m back
  4. Call for help
  5. Stay with van if safe, or walk to safe location

Never:

  • Attempt repairs in dangerous locations
  • Stand in the road
  • Accept help from random people (wait for official recovery)

Medical & First Aid

My first aid kit contains:

  • Plasters/bandages (various sizes)
  • Antiseptic wipes
  • Painkillers (paracetamol, ibuprofen)
  • Antihistamines
  • Rehydration sachets
  • Tweezers/scissors
  • Medical tape
  • Burn gel
  • Triangular bandage
  • Disposable gloves

Cost: About £30 to build a good kit.

I also carry:

  • Prescription meds (28-day supply)
  • Emergency contact list
  • Medical info card (allergies, blood type, emergency contacts)
  • NHS app downloaded with medical records

Remote area considerations:

If you’re parking in the middle of nowhere regularly, consider:

  • Advanced first aid course (£80-£150 for 2-day course)
  • Satellite communicator (Garmin inReach, £250 + subscription) — for areas with no phone signal
  • More comprehensive medical kit (£80-£150)

Scams & Sketchy Situations

Scams I’ve encountered:

The “helpful stranger” scam: Someone points out a “problem” with your van (flat tyre, leaking fluid). While you’re checking, their mate empties your van or steals from inside.

Solution: Thank them, check when you’re ready, don’t leave van unlocked.

The distraction technique: Someone knocks asking for directions/help while someone else tries your doors or takes from roof racks.

Solution: Talk through closed door, don’t get distracted, never leave doors unlocked.

The campsite “official”: Someone in a hi-vis knocks claiming to be collecting campsite fees. They’re not.

Solution: Always get receipts, verify with actual campsite office, don’t hand over cash to random people.

Fake parking fines: “Fines” placed on windscreen that look official but are actually scams to get your card details.

Solution: Real fines come from the council or private company with proper letterhead. Check online before paying anything.

Insurance Considerations

You need proper campervan insurance. Van insurance doesn’t cover your conversion or living in it.

What to look for:

  • Agreed value or market value
  • New-for-old replacement for your conversion
  • Personal belongings cover (usually £1,000-£5,000)
  • Security requirements clearly stated
  • UK and European cover

My insurance requires:

  • Thatcham-approved alarm
  • GPS tracker
  • Deadlocks on all doors
  • Vehicle kept in secure location overnight when at home

If you don’t meet these requirements and claim? They can refuse to pay.

Cost: £400-£900 annually depending on van, conversion value, your age, location.

Specialist insurers: Comfort, Safeguard, LV, Adrian Flux all do campervan policies.

What to Do If the Worst Happens

Your van is stolen:

  1. Report to police immediately (999)
  2. Call your tracker company (if you have one)
  3. Notify your insurance within 24 hours
  4. Cancel any direct debits for the vehicle
  5. Inform DVLA
  6. Check local sales sites/Facebook for your van

Your van is broken into:

  1. Don’t touch anything (forensics)
  2. Photograph the damage
  3. Call police (101 or 999 if in progress)
  4. Get crime reference number
  5. List stolen items with serial numbers/photos
  6. Notify insurance
  7. Get repairs done (keep receipts)

You’re attacked or threatened:

  1. Call police (999)
  2. Get to safety
  3. Note descriptions/vehicle details
  4. Don’t pursue them
  5. Get medical attention if needed
  6. Report even if you don’t want to pursue it (helps track crime patterns)

The Balance Between Safe and Paranoid

Here’s the thing: you can’t eliminate all risk. You can minimise it.

I’ve done thousands of miles enjoying vanlife across the UK and Europe. I’ve had two break-ins, one attempted break-in, and countless moments where I’ve felt uneasy.

But I’ve also had hundreds of amazing nights in incredible locations where nothing bad happened.

Don’t live in fear. But don’t be naive either.

My actual security routine:

Every night:

  • Close curtains/blackout blinds
  • Lock deadlocks on all doors
  • Activate alarm
  • Check phone is charged
  • Keep keys within reach

Takes 2 minutes. Becomes habit.

Every departure:

  • Steering wheel lock on
  • Valuables hidden or removed
  • Nothing visible in van
  • Check doors locked

Takes 3 minutes.

Regular maintenance:

  • Monthly alarm test
  • Quarterly security equipment check
  • Annual gas certificate
  • Tracker subscription maintained

The rest of the time? I’m not thinking about it. I’m living the life I wanted. Exploring. Enjoying. Being free.

Security is the foundation that lets you do that without constant worry.

Final Thoughts

That night when someone tried to break in while I was inside? It was horrible.

But you know what happened the next night? I parked somewhere better. I activated all my security. And I slept fine.

Because I’d learned. I’d improved. I’d adapted.

That’s what this is about. Not fear. Preparation.

Your van is your home. Protect it like one. But don’t let fear stop you living in it.

Useful Resources

Security equipment:

  • Van Vault — vanvault.co.uk (secure storage)
  • Locks 4 Vans — locks4vans.co.uk (deadlocks, alarms)
  • Smartrack — smartrack.co.uk (GPS trackers)

Personal safety:

  • Suzy Lamplugh Trust — suzylamplugh.org (personal safety advice)
  • Ask for ANI — scheme at participating venues if you feel unsafe

Emergency numbers:

  • Emergency: 999
  • Non-emergency police: 101
  • NHS: 111

Insurance:

  • Compare campervan insurers before committing
  • Read the security requirements carefully
  • Ensure your conversion value is properly covered

Stay safe out there. The adventure’s worth protecting.

So you think vanlife is about disconnecting from technology? Mate, I’ve got news for you: the right apps for vanlife can enhance your experience beyond what you can imagine.

Yeah, there’s the romantic notion of leaving your phone in a drawer and communing with nature. Then there’s the reality: you’re parked in a Tesco car park at 11pm desperately trying to find a legal spot for the night, your phone’s at 3%, and you can’t remember if that camping app needed WiFi to work offline or not.

I’ve spent a lot of nights in a van. My phone’s more important than my kettle most days. Not because I’m addicted to Instagram (though guilty as charged), but because the right apps are the difference between a decent night’s sleep and getting moved on at 2am by an angry farmer.

Here’s what I’ve learned works, what’s overrated bollocks, and what’ll actually make vanlife easier rather than more complicated.

The Reality Check Nobody Mentions

Before we get into the apps, let’s be honest about something. Smart tech in a van only works if you’ve got power. I spent my first three months with a useless portable battery pack and wondering why all my clever digital tools died by Wednesday.

You need a proper electrical setup. Not negotiable.

Most of these apps drain bugger all battery when used sensibly, but if you’re working remotely or streaming Netflix, you’ll need at least 100Ah of leisure battery. I run 200Ah lithium with 300W solar. Overkill for some, but it means I don’t have to think about it.

Right. Power sorted. Let’s talk apps.

Exploring the best apps for vanlife will help you make the most of your adventures, providing tools for navigation, camping, and staying connected.

Navigation & Spot Finding (The Essentials)

Park4Night (Free, £10/year premium)

This is the granddaddy of vanlife apps. If you only download one thing, make it this.

I’ve used Park4Night for literally hundreds of nights. It’s crowdsourced camping spots — everything from wild camping layups to Aires to official campsites. Users rate spots, upload photos, and leave reviews. The offline maps are brilliant.

What works: The sheer volume of spots. I’ve found hidden gems in the Highlands and dodged disaster in dodgy layups because someone left a “police patrol regularly” comment. The filters are dead useful too — you can search for spots with toilets, water, bins, or just pure wild locations.

What doesn’t: Sometimes the spots are outdated. I’ve rocked up to “perfect overnight layby” only to find new height barriers or “no overnight parking” signs. Always have a backup plan. And some users are precious — they’ll leave one-star reviews because there was litter (left by others) or the sunset wasn’t quite perfect enough.

The premium version adds more detailed maps and better filtering, proving essential for anyone serious about using apps for vanlife. I paid for it after two months. Worth every penny.

Google Maps Offline (Free)

Obvious, maybe. But you’d be surprised how many people forget to download offline maps before heading into the Scottish Highlands where 4G is a distant memory.

Download regions before you travel. I keep most of the UK downloaded and update them monthly. Takes up about 4GB on my phone, but it’s saved me more times than I can count.

Pro tip: drop pins for every good spot you find, even if it’s already on Park4Night. Add notes like “avoid weekends” or “brilliant sunrise” or “midges from hell”. Build your own personal map over time.

What3Words (Free)

Three random words that pinpoint any 3m square location on Earth. Sounds gimmicky. It’s not.

I use it constantly for meeting mates in the middle of nowhere, giving breakdown services my exact location, and finding that one perfect wild camping spot my friend told me about. Emergency services in the UK use it too, which is reassuring when you’re miles from anywhere.

Some older folk don’t get it. “Just tell me the postcode.” There isn’t one, Derek. We’re on a mountain.

OS Maps (Free basic, £28.99/year premium)

If you’re doing any proper exploring — hiking, finding remote spots, working out if that track is actually accessible — you need Ordnance Survey maps.

The free version is decent for casual use. The premium subscription gives you offline maps and all the detailed routes. I’ve had it for three years. As someone who’s ended up on a single-track road that turned into a literal sheep path, I can’t recommend it enough for route planning.

Power & Electrical Management

Victron Connect (Free)

If you’ve got Victron equipment — and you should, it’s the best — this app is essential. Real-time monitoring of your battery, solar input, and power consumption.

I obsessively check mine every morning. Battery at 87%? I can run the diesel heater guilt-free. Battery at 63% and it’s overcast? Maybe I’ll skip the Netflix binge.

It sounds nerdy. It is. But knowing exactly where your power stands stops you from unexpectedly running out at the worst moment.

Renogy DC Home App (Free)

Similar deal if you’ve gone with Renogy solar kit instead. Not quite as slick as Victron’s interface, but it does the job. Battery monitoring, solar production tracking, and consumption data.

I used this before I upgraded to Victron. It’s perfectly functional, just a bit less intuitive.

Connectivity & Remote Work

Starlink (£75/month + £460 hardware)

Right, controversial one. Starlink’s expensive as hell and most vanlifers don’t need it.

But.

If you’re working remotely and actually need reliable internet — not just “check emails” but “attend video calls without dropping out” — Starlink’s the only thing that’s genuinely worked everywhere I’ve gone.

I resisted for ages. Seemed excessive. Then I had one too many 4G dropouts mid-client call and caved. The Starlink Roam package works brilliantly for UK and European travel.

Reality check: You need power for it (50-70W draw), space for the dish, and you’ll look like a massive nerd setting it up in a field. But the internet speed is ridiculous — 100-200Mbps in the middle of nowhere.

Only get it if you’re actually working remotely with proper bandwidth needs. For casual browsing, it’s total overkill.

Three Mobile Unlimited Data SIM (£20-35/month)

For everyone else, a good unlimited data SIM is plenty. Three’s coverage is excellent in the UK and includes “Go Roam” for Europe (though post-Brexit it’s 12GB fair use limit for roaming).

I use my phone as a hotspot for laptop work. Works fine for writing, emails, video calls in areas with decent 4G. Chews through battery, but that’s what power banks are for.

Speedtest by Ookla (Free)

Simple app that tests your internet speed. Useful for finding the best spot to park for signal — sometimes moving 50 metres makes the difference between 1 bar and full 4G.

I use it every time I’m setting up for remote work. Drive around the car park like a weirdo watching the Mbps numbers until I find the sweet spot.

Weather Apps (Actually Important)

Met Office (Free)

UK’s official weather forecasting. More accurate than generic apps for British weather patterns.

I check it every morning and before planning routes. The warnings are particularly good — if there’s snow or storms coming, you want to know before you’re halfway up a mountain pass.

The hourly breakdown is spot-on most of the time. “Rain in 47 minutes” is surprisingly useful when you’re planning to empty your grey water or hang washing out.

Windy (Free, £19/year premium)

This became essential after I spent a miserable night getting buffeted by 60mph winds I didn’t know were coming.

Windy shows wind speed and direction with animated maps. Brilliant for working out if that exposed coastal spot is going to be peaceful or a nightmare. Also great for checking when to extend your solar panels (or not) without them becoming projectiles.

The premium version adds more detailed forecasts and removes ads. I stuck with free for ages, upgraded eventually. Worth it if you’re full-timing.

Tides Planner (Free)

Only relevant if you’re coastal camping, but if you are, it’s essential. I’ve seen vans get cut off by incoming tides because people didn’t check.

Shows tide times and heights for UK beaches. Simple, does one job well, could save you from losing your van to the sea. Can’t ask for more than that.

Money & Travel Management

Monzo/Starling (Free banking)

Online banks with brilliant apps and no foreign transaction fees. Essential for European travel.

I switched to Monzo three years ago and wish I’d done it sooner. Instant spending notifications, budgeting tools, and fee-free card payments abroad. The spending breakdowns show me exactly how much I’m spunking on diesel versus coffee versus actual useful stuff.

Starling’s the same deal. Pick whichever interface you prefer. Both are miles better than traditional banks for vanlife.

Splitwise (Free)

If you’re travelling with a partner or mate and splitting costs, this app is a relationship-saver.

Add shared expenses as they happen — diesel, food shops, campsite fees. It tracks who owes what and settles up at the end. Stops those “I paid for fuel last time” “No you didn’t” arguments.

GasBuddy or Petrolprices.com (Free)

Find the cheapest fuel near you. Sounds minor. It’s not.

When you’re doing 1,000+ miles a month, saving 5p per litre adds up. I’ve saved probably £300 in a year just by using this app and planning fuel stops around cheaper stations.

The crowdsourced prices aren’t always bang up-to-date, but they’re close enough. Just don’t drive 20 miles out of your way to save 2p. That defeats the point.

Entertainment & Downtime

Spotify/Netflix (£10-15/month each)

Download everything over WiFi or when you’ve got good signal. Offline mode is your friend.

I keep about 10 playlists and 20 albums downloaded at all times. Rainy days in the van get boring fast without music. And I’ll admit it — sometimes after a long drive, I just want to watch stupid telly.

Both drain battery if you’re streaming over mobile data and watching video. Plan accordingly or charge your phone more.

Kindle/Apple Books (Varies)

Books take up zero space and keep you sane during bad weather. I’ve read more in vanlife than I did in the previous decade.

E-readers are better for battery life than reading on your phone, but I’m lazy and just use the phone app. Always have at least three books downloaded for when signal disappears.

BBC Sounds (Free)

UK radio, podcasts, and audiobooks. The “download for offline” feature is brilliant. I’ve got about 50 podcast episodes saved at any time for long drives or boring laybys.

Safety & Security Apps

Life360 (Free basic, £40/year premium)

Location sharing with your emergency contact. Controversial for some (privacy concerns), but as someone who wild camps alone regularly, it gives you peace of mind.

You can see where your contacts are in real time. If I don’t move for 24 hours and stop responding to messages, at least someone knows where I am. Morbid, maybe. But practical.

The premium version adds crash detection and 30 days location history. I use the free version. It’s enough.

What I Don’t Use (But You Might)

Ring doorbell cameras — Some people stick these on their vans for security. Seems excessive to me. They’re constantly triggered by movement, drain power, and make you look paranoid. If you’re that worried about security, you’re parked in the wrong spot.

Van security apps — Various gadgets promise to alert you if someone’s near your van. I tried one. Got woken up 14 times by a curious cat. Never again.

Community & Social

iOverlander (Free)

Similar to Park4Night but more global. Useful if you’re heading to Europe and want spot recommendations from international users.

The reviews are decent, and it’s got a good filter system. I use both Park4Night and iOverlander together — sometimes one has spots the other doesn’t.

Vandog Traveller (Free)

UK-specific vanlife community app. Find events, meetups, and connect with other vanlifers.

I’ll be honest — I’m not much for vanlife meetups. Too social. But if you’re looking for community or want to attend festivals with other van dwellers, it’s useful. And the reviews of spots are often more detailed than Park4Night.

WhatsApp/Signal (Free)

Not vanlife-specific, but essential for staying connected with other travellers you meet. I’ve got probably 30 group chats with various vanlife mates sharing spot recommendations and warnings.

“Police checking the seafront tonight” messages have saved me more hassle than any paid app ever could.

Work & Productivity

Notion (Free basic, £8/month premium)

If you’re working on the road, Notion’s brilliant for staying organised. Notes, to-do lists, project management, wiki pages — all synced across devices.

I use it to track van maintenance, plan routes, manage writing projects, and keep a list of good parking spots with detailed notes. The offline mode works well enough for when signal’s patchy.

Free version’s fine for personal use. Premium adds unlimited file uploads and better team features if you’re collaborating.

Trello (Free basic, £4/month premium)

Simpler than Notion if you just need task management. Visual boards with cards you move around.

I used this before switching to Notion. It’s less powerful but easier to learn. Good for tracking van projects, shopping lists, or travel planning.

The Apps I Tried and Ditched

Roadtrippers — Looked great. Terrible in the UK. All the recommendations are American, and the UK version is sparse and outdated.

Campercontact — Wanted to like it. Interface is clunky, fewer UK spots than Park4Night, and the free version is crippled enough to be annoying.

Various solar panel apps — Unless it’s your charge controller’s official app (Victron, Renogy, Epever), they’re all guesswork and estimates. Pointless.

Vanlife WiFi — Supposed to find free WiFi spots. Never worked properly. Just use public library car parks or McDonald’s like everyone else.

What About Smart Home Tech in Vans?

Right, confession time. I’ve gone a bit overboard with smart tech in my current van build.

What works:

  • Smart LED strips (£20-40) — RGB lights you control from your phone. Ridiculous, yes. But being able to dim lights from bed without getting up? Game changer. I use Govee strips powered by 12V.
  • Smart plugs (£8-15 each) — Turn stuff on and off remotely or on schedules. I’ve got one on my diesel heater timer so it warms up the van before I wake up. Luxury.
  • Bluetooth speakers (£30-150) — Portable speaker that connects to your phone. Mine’s a JBL Flip 6 (£120). Waterproof, decent battery life, good sound. Use it for music, podcasts, and pretending I’m in a nightclub when I’m actually in a layby.

What doesn’t work:

  • Voice assistants — Alexa, Google Home, whatever. Too much setup, need constant power and WiFi, and honestly, just use your hands. It’s not that hard to flip a switch.
  • Smart thermostats — Overkill for a small van space. Just turn your heater on and off manually. You’re not heating a house.
  • Security cameras — Already mentioned, but worth repeating. More hassle than they’re worth.

Power Draw Reality Check

Here’s the thing nobody tells you: apps themselves barely use power. It’s what you do with them that matters.

Low drain activities:

  • Reading articles (offline)
  • Using maps offline
  • Checking battery stats
  • Messaging
  • Photos

High drain activities:

  • Streaming video (100MB-3GB per hour depending on quality)
  • Video calls (500MB-2GB per hour)
  • GPS navigation with screen on (kills battery in 4-6 hours)
  • Gaming
  • Uploading photos/videos

I keep a small power bank (20,000mAh, about £30) charged for my phone. Means I don’t have to constantly plug into the van’s USB ports and can use my phone as a hotspot without worrying about van battery drain.

My Actual Daily Tech Usage

Morning: Check Met Office, Windy, and Victron battery stats. Browse Park4Night for tonight’s spot while having coffee.

During the day: Maps offline for navigation. Spotify for driving. Speedtest if I’m working. Notion for actual work. WhatsApp for ignoring messages from my mum asking if I’m eating properly.

Evening: Check Park4Night reviews for tomorrow. Maybe Netflix if the battery’s good. Kindle before sleep because screens are bad for you or whatever.

That’s it. I’m not constantly glued to my phone despite having a thousand apps installed. Most days I probably use 6-8 apps total.

What You Actually Need (Minimal Setup)

If you’re just starting out and overwhelmed by options, here’s the bare minimum:

  1. Park4Night (spots)
  2. Google Maps offline (navigation)
  3. Met Office (weather)
  4. Your charge controller app (power monitoring)
  5. Good mobile data plan (connectivity)
  6. WhatsApp (community)

That’s genuinely enough. Everything else is nice-to-have, not essential.

The Bottom Line

Smart tech in vanlife isn’t about having every gadget and app imaginable. It’s about having the right tools that make life easier without overcomplicating things.

I spent my first year with barely any apps and survived fine. I’ve also spent the last six months testing every vanlife app I could find, and most are forgettable.

The ones listed here are what I actually use regularly. Not what I think I should use, or what looks good on Instagram, but what genuinely makes vanlife more practical, safer, or more enjoyable.

Start simple. Add things as you discover what you actually need, not what YouTubers tell you is essential.

And for god’s sake, don’t forget to download offline maps before you head into Scotland. Learn from my mistakes.

Got questions about specific apps or tech setups? Drop a comment. I’ve probably tried it and can tell you if it’s worth your time and money.


I ran three campervans without proper battery monitoring systems. The first had nothing but a basic voltmeter that told me almost nothing useful. The second had a fancy digital display that was essentially lying to me about battery state. The third had a “percentage” display that was so inaccurate I might as well have been reading tea leaves.

Between those three vans, I underestimated my battery capacity twice (ran power too low, damaged batteries), overestimated it countless times (thought I had power when I didn’t), and made decisions based on voltage readings that were fundamentally misleading. Cost me two batteries (£330 total), loads of frustration, and probably 50+ hours of my life worrying about power.

After 30 years as a maintenance manager, you’d think I’d understand the importance of accurate measurement. I do – in buildings. But vehicle electrical systems are different. Batteries behave in ways that aren’t intuitive. Voltage is a terrible indicator of state of charge. And without proper monitoring, you’re basically flying blind.

This guide is everything I wish I’d known before I installed my first leisure battery. Not the theory. Not the perfect setups. The actual reality of managing power in a van, what monitoring genuinely helps, and how to stop guessing and start knowing what’s actually happening with your electrical system.

This guide will explain the importance of Battery Monitoring Systems in campervans and how they can transform your power management experience.

Why I Wasted 3 Years Without Proper Monitoring

Van #1 (2018-2019): The Voltmeter That Told Me Nothing

Monitoring setup: Basic analog voltmeter (£6 from eBay)

What it showed: Voltage. Just voltage. 12.8V… 12.4V… 11.9V…

What I thought that meant:

  • 12.8V = Battery full
  • 12.4V = Battery half full
  • 11.9V = Battery nearly empty

Reality: This is completely wrong for lithium batteries, and misleading for AGM.

What actually happened:

Day 1 camping: Voltage showed 12.7V. “Great, battery’s full!” Used lights, fridge, laptop all evening. Next morning: 12.3V. “Still got loads of power.” Used more power. That evening: 12.0V. “Getting low.” Started diesel heater overnight. Next morning: Battery dead. 11.2V. Wouldn’t even run the water pump.

Actual capacity used: Started with 110Ah battery at 90% (99Ah). Used approximately 85Ah over 24 hours. Battery was at 14Ah remaining (13% full) when I thought I had “loads of power.”

Why voltage is useless:

AGM voltage curve is relatively flat between 80% and 20% state of charge. Voltage drops from 12.6V to 12.1V across 60% of capacity. You can’t tell 70% full from 30% full by voltage alone.

Cost: Ran AGM too low repeatedly. Battery died after 4 months (normal lifespan: 2-4 years). £95 wasted.

Van #2 (2020-2021): The Display That Lied

Monitoring setup: “Smart” battery monitor with percentage display (£35)

What it showed: Voltage and a “percentage” (12.4V – 68%)

What I thought: Finally, proper monitoring! I can see actual state of charge!

Reality: The “percentage” was calculated from voltage using a lookup table. Not actual amp-hour counting. Just as useless as the voltmeter but with false confidence.

What actually happened:

Trip to Scotland. Started at “100%” (actually 95%). Used power normally. Display showed: 82%… 71%… 65%. “Plenty of power left.” Then suddenly: 42%… 28%… 15% in the space of 3 hours. What?

Voltage under load dropped faster than expected. Display panicked. I panicked. Drove for 2 hours to recharge (unnecessary – battery was actually fine, just under load).

The problem: Voltage-based “percentages” don’t account for:

  • Load (heavy load drops voltage temporarily)
  • Temperature (cold batteries show lower voltage)
  • Battery type differences
  • Actual amp-hours consumed

It was guessing. Badly.

Cost: £35 for a monitor that was barely better than a voltmeter. Plus stress and unnecessary driving.

Van #3 (2022-2023): Better Battery, Still Guessing

Monitoring setup: Same voltage-based monitor

Battery: Upgraded to 200Ah AGM (£420)

Problem: With a bigger battery, the guessing game was even worse. I had no idea if I’d used 50Ah or 100Ah. The voltage-based percentage was even less accurate with the larger capacity.

Result: Either drove to recharge too early (wasting time) or ran battery too low (damaging it).

After 18 months, battery capacity had dropped to about 140Ah (from 200Ah). Killed it through poor management and deep discharging without realizing.

Cost: Battery degraded faster than it should have. Lost 2 years of life. Value loss: £150-180.

Van #4 (2023-present): Finally Got It Right

Monitoring setup: Victron BMV-712 battery monitor (£185)

What it does: Actually counts amp-hours in and out. Shows:

  • Real state of charge (based on actual Ah consumed, not voltage)
  • Current draw/charge (in amps)
  • Power (in watts)
  • Time remaining at current draw
  • Historical data
  • Bluetooth to phone app

Result: Complete transformation. I finally know what’s actually happening.

Example from last week:

Morning: 87% (91Ah remaining of 105Ah) Turned on fridge: Drawing 4A Made coffee (inverter + laptop): Drawing 6A total Total draw: 10A Time remaining: 9.1 hours at current draw

Actually useful information.

Used 22Ah during the day. Evening: 66% (69Ah remaining). Knew exactly how much capacity I had. Planned accordingly. Drove next day to recharge (or could have relied on solar – summer).

No guessing. No stress. No damaged batteries.

Cost: £185. Should have bought it for Van #1. Would have saved me £330 in damaged batteries plus countless hours of worry.

Understanding Battery Monitoring Systems and State of Charge (Why Voltage Lies)

This is the fundamental problem everyone gets wrong.

Voltage vs State of Charge: The Misleading Relationship

AGM battery voltage curve:

State of ChargeResting VoltageUnder 10A LoadUnder 30A Load
100%12.7V12.5V12.2V
80%12.5V12.3V11.9V
60%12.3V12.1V11.7V
40%12.1V11.9V11.4V
20%11.9V11.6V11.1V
0%11.7V11.3V10.8V

Notice: Under load, voltage drops significantly. 12.2V under load could be 100% full or 80% full. You can’t tell.

Lithium battery voltage curve (even worse):

State of ChargeResting VoltageUnder 10A LoadUnder 30A Load
100%13.4V13.3V13.2V
80%13.3V13.2V13.1V
60%13.2V13.1V13.0V
40%13.0V12.9V12.8V
20%12.9V12.7V12.6V
10%12.5V12.3V12.0V

Notice: Voltage is incredibly flat from 100% to 40%. 13.2V could be 100% or 60% full. Completely useless for determining state.

This is why I had no idea what was happening in Van #1-3.

What You Actually Need to Know

1. Amp-hours consumed:

  • Started with: 105Ah
  • Consumed: 22Ah
  • Remaining: 83Ah
  • State of charge: 79%

This is real information.

2. Current draw:

  • Fridge: 4A
  • Lights: 1A
  • Total: 5A

This tells you what’s using power right now.

3. Time remaining:

  • 83Ah remaining ÷ 5A draw = 16.6 hours

This tells you how long you can continue at current consumption.

4. Historical data:

  • Yesterday consumed: 28Ah
  • This week average: 25Ah/day
  • Solar generated today: 42Ah

This tells you patterns and trends.

None of this is available from a voltmeter.

How Proper Monitoring Actually Works (Shunt-Based Systems)

The shunt method:

  1. A “shunt” (precision resistor) is installed in the negative cable between battery and loads
  2. All current flows through the shunt
  3. Monitor measures voltage drop across shunt
  4. Calculates current using Ohm’s law (V = IR)
  5. Integrates current over time to count amp-hours
  6. Tracks state of charge by counting Ah in (charging) and Ah out (discharge)

Example:

Morning: Battery at 100% (105Ah)

  • Fridge draws 4A for 12 hours = 48Ah consumed
  • Lights draw 1A for 4 hours = 4Ah consumed
  • Laptop charging draws 6A for 2 hours = 12Ah consumed
  • Total consumed: 64Ah

Evening: Battery at 39% (41Ah remaining)

Next day:

  • Solar charges at 10A for 5 hours = 50Ah added
  • Battery now: 87% (91Ah)

Accurate. Real. Useful.

This is what I have now. It’s transformed how I manage power.

Battery Monitor Types: What’s Actually Available

Type 1: Basic Voltmeter (£5-£15)

What it is: Simple voltage display

What it shows: 12.4V

Pros:

  • Cheap (£5-15)
  • Simple
  • Never breaks

Cons:

  • Voltage is useless for state of charge
  • No current information
  • No historical data
  • Basically decorative

My experience: Van #1. Useless. Don’t buy.

Verdict: Save your £10. Buy nothing instead.

Type 2: Voltage-Based “Smart” Monitors (£25-£50)

What it is: Voltage monitor with percentage calculated from voltage lookup table

What it shows: 12.4V – 68%

Pros:

  • Cheap (£25-50)
  • Shows “percentage” (comforting but inaccurate)
  • Easy to install

Cons:

  • Percentage is guessed from voltage (wrong)
  • No current measurement
  • No amp-hour counting
  • False sense of accuracy

My experience: Van #2-3. Marginally better than voltmeter but still fundamentally flawed.

Verdict: Don’t bother. You’re paying £30 for a fancy voltmeter that guesses.

Type 3: Shunt-Based Battery Monitors (£60-£200)

What it is: Proper monitoring with shunt to measure current and count amp-hours

What it shows:

  • Voltage: 13.2V
  • Current: -8A (discharging)
  • Power: -96W
  • Consumed: 28Ah
  • State of charge: 73%
  • Time remaining: 9.4 hours

Pros:

  • Accurate state of charge (actual Ah counting)
  • Current and power measurement
  • Time remaining estimates
  • Historical data
  • Programmable for battery type
  • Bluetooth monitoring (on better models)

Cons:

  • More expensive (£60-200)
  • More complex installation (need to install shunt)
  • Need programming for battery capacity

My experience: Van #4. Victron BMV-712 (£185). Absolutely worth it. Transformed my power management.

Verdict: This is what you should buy if you’re serious about managing power.

Popular models:

Budget (£60-£90):

  • Renogy 500A Battery Monitor: £65
  • Basic features, adequate for most people

Mid-range (£120-£150):

  • Victron BMV-700: £125
  • Excellent, no Bluetooth (display only)

Premium (£180-£220):

  • Victron BMV-712: £185 (what I have)
  • Bluetooth to phone app
  • Multiple battery banks
  • Midpoint voltage monitoring
  • This is what I recommend

Professional (£250-£350):

  • Victron SmartShunt: £120 (shunt only, no display)
  • Victron BMV-712 Smart: £220 (all features)
  • Multiple device integration

Type 4: All-in-One Systems (Inverter/Charger with Built-in Monitoring)

What it is: Combined inverter/charger/monitor systems

Examples:

  • Victron MultiPlus: £800-£1,400
  • Includes inverter, charger, and monitoring

Pros:

  • Everything integrated
  • Professional grade
  • Single system

Cons:

  • Very expensive
  • Overkill for most vans
  • Complex installation

My experience: Never used (overkill for my needs).

Verdict: Only for very high-end builds or full-time professional conversions.

My Current System: Victron BMV-712 Detailed

Since this is what actually works in real life, let me break down exactly what I have and how it performs.

System:

  • Victron BMV-712 battery monitor: £185
  • 500A/50mV shunt (included)
  • Temperature sensor (optional, I don’t use it)
  • Bluetooth built-in
  • VictronConnect app (free)

Installation location:

  • Shunt: In negative cable, within 30cm of battery
  • Display: Mounted on wall above seating area (visible from bed and seating)
  • Temperature sensor: Not installed (can’t be bothered)

Battery monitored:

  • Fogstar Drift 105Ah lithium
  • Programmed as: 105Ah capacity, lithium chemistry

What the display shows:

Main screen:

  • Voltage: 13.2V
  • Current: -8.2A (negative = discharging)
  • State of charge: 73% (77Ah remaining)
  • Time remaining: 9.4 hours

Secondary screens (cycle through with button):

  • Power: -98W
  • Consumed Ah: 28Ah
  • Temperature: — (no sensor fitted)

History data:

  • Deepest discharge: 62Ah
  • Average discharge: 31Ah
  • Charge cycles: 187
  • Full discharges: 0
  • Synchronizations: 187

What the Bluetooth app shows (same data, more detail):

On phone, I can see:

  • All current values (real-time)
  • Historical graph (voltage, current over time)
  • Trends (daily consumption for past weeks)
  • Settings (program capacity, parameters)
  • Alarms (set low voltage, low state of charge warnings)

Accuracy after 18 months:

I’ve tested accuracy multiple times:

  • Discharge battery from 100% to 20%
  • Count actual Ah consumed (should be 84Ah for 105Ah battery)
  • Monitor shows: 82-85Ah consumed
  • Accuracy: Within 2-3%

That’s good enough.

What I actually use it for:

1. Morning check:

  • Wake up, look at display
  • See state of charge (typically 65-75% after night)
  • Decide if I need to charge today

2. Real-time monitoring:

  • Turn on heater: See current jump to 12A
  • Laptop charging: See current increase by 6A
  • Everything turned off: Should see <1A (parasitic draw)

Helps identify power hogs and problems.

3. Planning:

  • Evening: Check state of charge
  • See remaining capacity
  • Decide: Can I run heater overnight? (yes if above 60%)
  • Or: Need to charge tomorrow? (yes if below 40%)

4. Troubleshooting:

  • Something drawing power when everything’s off?
  • Check current: If showing 3A with nothing on, something’s wrong
  • Hunt down the problem

I found my fridge was stuck “on” this way (current showed 4A when fridge should have been off). Thermostat had failed. Fixed it before it drained battery overnight.

5. Solar performance:

  • Check how much solar generated today
  • Yesterday: 42Ah
  • This week average: 38Ah
  • Helps me know if solar is working properly

Value provided:

1. Battery life extension:

  • I never discharge below 20% now (monitor warns me)
  • AGM batteries last 50% longer when not deep discharged
  • Lithium batteries last 30% longer
  • Value: £100-150 in battery life

2. Confidence:

  • I know exactly what my power situation is
  • No stress, no guessing
  • Value: Priceless

3. Efficiency:

  • I identified power-wasting devices (old LED lights drawing more than expected)
  • Optimized usage patterns
  • Value: 10-15% power saving = less charging needed

Payback: The £185 has already paid for itself in battery life extension alone. Everything else is bonus.

Installing a Battery Monitor: Complete Guide

For Victron BMV-712 (other shunt-based monitors similar)

Components Needed

Included with BMV-712:

  • Display unit
  • 500A/50mV shunt
  • 10m cable (display to shunt)
  • Fuse (for positive connection)

Not included (you need to buy):

  • Cable for positive voltage sense (1.5mm², 2m): £3
  • Battery cables for shunt (35mm² or 50mm²): £15-25
  • Terminals for cables: £8
  • Heat shrink: £5

Tools needed:

  • Cable cutters
  • Ratchet crimpers
  • Heat gun
  • Screwdriver
  • Drill (for mounting display)

Installation Steps

Step 1: Disconnect Battery (CRITICAL)

Safety first.

  1. Turn off all systems
  2. Disconnect negative terminal from battery
  3. Wait 5 minutes

Step 2: Decide Shunt Location

Requirements:

  • In negative cable between battery and all loads
  • Within 30cm of battery
  • Accessible (you might need to check connections)
  • Dry location

Critical: ALL negative connections must go through shunt. This includes:

  • Loads (lights, fridge, etc.)
  • Chargers (solar, DC-DC, mains)
  • Inverter

If any negative bypasses the shunt, monitoring will be inaccurate.

My location: Right next to battery, on the wall. Negative from battery goes to shunt. Negative from loads connects to other side of shunt.

Step 3: Install Shunt

Shunt has two sides:

  • Battery side: Connects to battery negative
  • System side: Connects to all loads/chargers

Process:

  1. Cut negative cable from battery:
    • This is scary but necessary
    • Cut it about 20cm from battery terminal
  2. Install terminals on cut cable:
    • Battery end: Crimp M8 ring terminal
    • System end: Crimp M8 ring terminal
  3. Connect to shunt:
    • Battery cable to shunt “battery” side (marked “-“)
    • System cable to shunt “system” side (marked “load”)
    • Tight connection (shunt gets warm under load)
  4. Label clearly:
    • “Battery” and “Load” sides
    • Future you will thank present you

Step 4: Run Cable to Display Location

The 10m cable (included) connects shunt to display.

Cable routing:

  • From shunt to display location (wherever you want display)
  • Can run with other cables
  • Needs protection where it might chafe

My route: Along wall, cable-tied to existing cables, to display location above seating. About 3m total.

Step 5: Install Display

Location choice:

  • Visible from main living area
  • Easy to read
  • Not in direct sunlight (can’t read display)

I mounted mine on wall above seating. Can see from bed, from seating, from kitchen.

Mounting:

  • Two screws (included)
  • Plastic snap-fit bezel
  • Simple

Step 6: Connect Positive Voltage Sense

Display needs positive voltage reference.

Cable from battery positive:

  • 1.5mm² cable (adequate for voltage sensing)
  • FUSED at battery end (2A fuse, included with monitor)
  • To display unit

My cable: 2.5m run from battery to display.

Critical: This cable must be fused at battery. If it shorts, you need protection.

Step 7: Reconnect Battery

Order:

  1. Connect display cables to shunt (included cable)
  2. Connect positive sense to display
  3. Connect battery negative to shunt battery side
  4. Connect battery positive (with fuse for monitor)

Display should power on when battery connected.

Step 8: Programming

Display will show “—” initially. Needs programming.

Settings to configure:

1. Battery capacity:

  • Enter actual capacity (mine: 105Ah)
  • Critical for accurate state of charge

2. Charged voltage:

  • Voltage at which battery is considered 100% full
  • AGM: 14.4V
  • Lithium: 14.4V
  • Mine: 14.4V

3. Tail current:

  • Current below which charging is considered complete
  • Typically 4% of capacity
  • Mine: 4.2A (4% of 105Ah)

4. Peukert exponent:

  • Compensates for capacity loss at high discharge rates
  • AGM: 1.25
  • Lithium: 1.05
  • Mine: 1.05

5. Charge efficiency factor:

  • Accounts for charging losses
  • AGM: 85%
  • Lithium: 99%
  • Mine: 99%

Programming via Bluetooth app is easier than button interface. I used the app.

Step 9: Synchronization

Monitor needs to “synchronize” to know battery is at 100%.

Process:

  1. Charge battery fully (14.4V+ for lithium)
  2. Monitor detects full charge
  3. Monitor resets state of charge to 100%
  4. From then on, counts Ah consumed

First synchronization: Charge battery with DC-DC or solar until voltage reaches 14.4V and holds for 5 minutes. Monitor will synchronize automatically.

My installation:

Time: 3 hours (including programming and testing)

Challenges:

  • Cutting the negative cable felt wrong (but essential)
  • Cable routing through existing loom (a bit fiddly)
  • Programming settings (read manual twice to understand)

Result: Flawless. 18 months later, still working perfectly.

Using Your Monitor: Real-World Tips

Having a monitor is one thing. Using it effectively is another.

Daily Routine

Morning:

  1. Check state of charge (typically 65-75% after night with heating)
  2. Note overnight consumption (usually 15-20Ah with heating)
  3. Decide if charging needed today

During day: 4. Monitor current draw when turning things on (is fridge actually cycling off?) 5. Check solar generation mid-day (should be charging if sunny)

Evening: 6. Check state of charge (plan for overnight) 7. Check total consumed today (typically 28-35Ah) 8. Decide on heating (can run if above 50%)

Weekly: 9. Check history (average consumption, trends) 10. Verify solar generation patterns

Takes maybe 2 minutes total per day. Worth it.

Reading the Data Correctly

State of charge:

  • Above 80%: Excellent, no worries
  • 60-80%: Good, normal range
  • 40-60%: Adequate, start planning to charge
  • 20-40%: Low, charge soon (AGM shouldn’t go lower)
  • Below 20%: Critical, charge immediately

Current draw:

  • 0-5A: Normal (just fridge and parasitic)
  • 5-15A: Moderate (lights, laptop, water pump)
  • 15-30A: High (heater on high, inverter load)
  • Above 30A: Very high (inverter with kettle, etc.)

Time remaining:

  • Above 10 hours: Comfortable
  • 5-10 hours: Fine but monitor
  • 2-5 hours: Plan accordingly
  • Below 2 hours: Charge soon or reduce load

Remember: Time remaining assumes current draw stays constant. If you turn heater off, time remaining increases.

Setting Alarms

Useful alarms to set:

Low voltage alarm:

  • AGM: 12.0V (about 30% full)
  • Lithium: 12.5V (about 10% full)
  • Warns before battery too low

Low state of charge alarm:

  • 30% for AGM
  • 20% for lithium
  • I have mine set to 25% (plays it safe)

High current alarm:

  • Set to 40A (would indicate problem)
  • Never triggered (max draw is 25A with everything on)

I use state of charge alarm primarily. Phone beeps when battery below 25%. Very useful.

Identifying Problems

Problem 1: Current draw higher than expected

Example: Everything off but showing 3A draw.

Diagnosis:

  1. Turn things off one at a time
  2. Watch current
  3. Identify culprit

Found fridge was malfunctioning this way (drawing 4A constantly instead of cycling).

Problem 2: Battery not charging

Example: Solar panels in sun but current shows 0A charging.

Diagnosis:

  • Check solar controller
  • Check connections
  • Check panel cleanliness

Found dirty panels this way (output was 30% normal).

Problem 3: Capacity degrading

Example: Battery capacity seems lower than programmed.

Diagnosis:

  • Check history (deepest discharge should match capacity)
  • Run full discharge test
  • Battery might be aging

My 105Ah lithium after 18 months: Still showing 102-103Ah usable. No degradation.

Problem 4: State of charge drifting

Example: State of charge shows 45% but battery voltage is 13.2V (should be 70%+).

Diagnosis:

  • Monitor needs re-synchronization
  • Charge to 100% to reset

Happens if battery never reaches full charge (synchronization voltage). Easy fix.

Power Consumption Analysis: What I Actually Use

Having accurate monitoring let me see exactly where power goes.

Typical Day Breakdown (Summer, No Heating)

DevicePower (W)Hours/DayAh/Day
LED Lights (4x)15W4h5.0Ah
Fridge (cycling 50%)45W12h22.5Ah
Water Pump40W0.25h0.8Ah
Laptop Charging65W2h10.8Ah
Phone Charging (2x)15W2h2.5Ah
USB Devices10W4h3.3Ah
Parasitic Draw5W24h10.0Ah
Total55Ah

Actual measured consumption: 58Ah (close to calculation)

Typical Day Breakdown (Winter, With Heating)

DevicePower (W)Hours/DayAh/Day
LED Lights15W6h7.5Ah
Fridge45W12h22.5Ah
Water Pump40W0.25h0.8Ah
Laptop Charging65W2h10.8Ah
Phone Charging15W2h2.5Ah
Diesel Heater25W avg10h20.8Ah
USB Devices10W4h3.3Ah
Parasitic Draw5W24h10.0Ah
Total78Ah

Actual measured consumption: 82Ah (heater uses slightly more on startup)

Surprises From Monitoring

1. Parasitic draw was higher than expected

Expected: 2A (lights on circuit boards, controllers) Actual: 5A (found old phone charger that drew 3A even with nothing plugged in)

Saving: 3A x 24h = 36Ah per day (nearly 50% of fridge consumption!)

2. LED lights varied widely

Cheap LEDs: 6W each Good LEDs: 4W each

Replaced 4 lights, saved 8W total = 32Wh per day = 2.7Ah

Small but adds up.

3. Laptop charging more efficient via inverter than 12V

12V car charger: 90W draw (inefficient conversion) 230V inverter + laptop charger: 75W draw (laptop charger is efficient)

Counter-intuitive but true. Saved 15W per charging session.

4. Fridge cycling was inefficient

Original fridge: Cycled 60% of time (too often) Reduced thermostat 2°C: Now cycles 40% of time

Saving: 9Ah per day (20% reduction)

Total savings from monitoring and optimization: About 15Ah per day (20% reduction)

This extended battery life from 2 days to 2.5 days between charges.

Integration With Other Systems

Battery monitor doesn’t exist in isolation. It integrates with other electrical components.

Solar Controller Integration

My Victron MPPT controller and Victron BMV-712 can share data via Bluetooth.

What this means:

  • MPPT can see battery state of charge
  • MPPT adjusts charging accordingly
  • BMV can see solar generation
  • Both visible in one app

Practical benefit:

On VictronConnect app, I can see:

  • Battery: 73% (77Ah remaining)
  • Solar: Charging at 48W (4A)
  • Time to full: 3.2 hours

All in one screen. Very useful.

DC-DC Charger Integration

My Victron Orion DC-DC also connects via Bluetooth.

What this means:

  • DC-DC sees battery state
  • Adjusts charging profile
  • BMV sees charging current
  • All data in app

Practical benefit:

When driving, app shows:

  • Battery: Charging at 18A
  • DC-DC: Bulk phase, 93% efficiency
  • Estimated time to 90%: 1.2 hours

Helps me know how long to drive for charging.

Multiple Battery Banks

Some monitors (including BMV-712) can monitor two battery banks.

Use cases:

  • Starter battery + leisure battery
  • Two separate leisure banks
  • Lithium primary + AGM backup

I only monitor leisure battery (starter is fine with vehicle alternator).

But if you’re paranoid, you can monitor both.

Cost-Benefit Analysis

Let me be honest about whether £185 for a battery monitor is worth it.

Costs:

Initial:

  • Victron BMV-712: £185
  • Installation materials: £15
  • Installation time: 3 hours
  • Total: £200 + 3 hours

Ongoing:

  • Maintenance: None
  • Calibration: Automatic
  • Total: £0/year

Benefits:

1. Battery life extension:

Without monitoring (my Vans #1-3):

  • AGM batteries: 2-3 years average
  • Lithium batteries: 6-8 years estimated (based on poor management)

With monitoring (Van #4):

  • AGM would last: 4-5 years (50% longer due to better management)
  • Lithium will last: 10-12 years (better cycling, no deep discharge)

Value for my 105Ah lithium (£449):

  • Without monitoring: £449 / 8 years = £56/year
  • With monitoring: £449 / 11 years = £41/year
  • Saving: £15/year in battery costs

Over 20 years (two battery replacements): £300 saved

2. Reduced charging costs:

Power optimization (from monitoring data):

  • Reduced consumption 15% (from 65Ah to 55Ah daily in summer)
  • Less frequent charging needed
  • Fewer campsite stays (solar covers more days)

Estimated saving:

  • 3 fewer campsite nights per year @ £25 = £75/year

3. Reduced stress and decision-making:

Without monitoring:

  • Constant worry about battery state
  • Conservative (charge too often, waste time)
  • Or aggressive (run too low, damage battery)

With monitoring:

  • Know exact state
  • Make informed decisions
  • No stress

Value: Difficult to quantify but significant. £50/year equivalent?

Total annual benefit:

  • Battery longevity: £15/year
  • Reduced charging: £75/year
  • Stress reduction: £50/year
  • Total: £140/year

Payback: £200 / £140 = 1.4 years

After payback, it’s pure value.

I’m in year 2. Monitor has paid for itself. Years 3-20 are savings.

Verdict: Absolutely worth it if you use the van 50+ nights per year. Marginal if you use it 10-20 nights. Skip it if you use it 5 nights.

Budget Alternatives

Not everyone wants to spend £185 on a monitor.

Option 1: Basic Shunt Monitor (£60-£90)

Example: Renogy 500A Battery Monitor (£65)

What you get:

  • Shunt-based (accurate)
  • Amp-hour counting
  • State of charge
  • Basic display
  • No Bluetooth

What you miss:

  • Bluetooth monitoring (must look at display)
  • App features (history, trends)
  • Integration with other devices

Verdict: Adequate for budget builds. 80% of functionality for 35% of cost.

Option 2: Voltmeter + Current Meter (£15-£30)

What you get:

  • Voltage display
  • Current display (if you buy shunt separately, £12)
  • Basic info

What you miss:

  • No amp-hour counting (still guessing state of charge)
  • No history
  • No integration

Verdict: Better than nothing. Helps you see current draw (useful). But still doesn’t solve state of charge problem.

Option 3: DIY with Arduino/Raspberry Pi (£40-£80)

For the technically inclined:

  • Current sensor module (£15)
  • Voltage divider (£3)
  • Arduino or Pi (£25-£40)
  • Display (£8-£20)
  • Code (free, plenty of examples online)

Pros:

  • Customizable
  • Learn something
  • Cheaper than commercial

Cons:

  • Time investment (10-20 hours)
  • Programming required
  • Less reliable than commercial
  • No warranty

I considered this. Too much hassle for me. Would rather spend £185 and have it work.

My recommendation:

Tight budget: Renogy 500A monitor (£65) Normal budget: Victron BMV-712 (£185) Tech enthusiast: DIY project (£40-80 + 20 hours)

Common Mistakes With Battery Monitors

Mistake 1: Not Installing Shunt Correctly

What people do: Install shunt in positive cable (wrong)

Why wrong: Current flow must be measured in negative. Shunt in positive doesn’t work with monitor design.

Or: Some loads bypass shunt (separate negative return)

Result: Inaccurate monitoring (not counting all current)

Fix: ALL negatives must go through shunt.

Mistake 2: Wrong Capacity Programming

What people do: Program wrong capacity (e.g., 100Ah when battery is actually 95Ah)

Result: State of charge is inaccurate (thinks battery bigger than it is)

Fix: Program actual capacity. Check battery specs.

I initially programmed 105Ah. After testing, realized actual capacity was 102Ah. Reprogrammed. More accurate.

Mistake 3: No Synchronization

What people do: Never charge battery to full (so monitor never synchronizes)

Result: State of charge drifts over time (accumulating small errors)

Fix: Charge to 100% at least monthly (allows synchronization)

Mistake 4: Ignoring the Data

What people do: Install monitor, never look at it

Result: Wasted money (monitor sitting there unused)

Fix: Actually use the data to manage power

Seems obvious but I’ve met people with monitors who admit they rarely look at them.

Mistake 5: Over-Reliance on Time Remaining

What people do: Trust “time remaining” estimate absolutely

Reality: Time remaining assumes current draw stays constant. If you turn heater on, time remaining drops. If you turn everything off, it increases.

Fix: Use time remaining as guide, not gospel.

My Final Recommendations

After running three vans without monitoring and one with proper monitoring:

For regular van users (50+ nights/year):

Buy Victron BMV-712 (£185).

Why:

  • Accurate monitoring (shunt-based)
  • Bluetooth to phone
  • Historical data
  • Integration with Victron components
  • Reliable (18 months, zero issues)

Total cost: £200 including installation materials

For occasional users (20-40 nights/year):

Buy Renogy 500A monitor (£65) or similar budget shunt monitor.

Why:

  • Adequate monitoring for occasional use
  • Saves £120 vs Victron
  • Still accurate (shunt-based)

For weekend warriors (10-20 nights/year):

Consider skipping battery monitoring entirely.

Why:

  • £65-£185 is significant cost for limited use
  • Basic voltage monitoring might be adequate
  • Simpler system (less to go wrong)

Alternative: Just keep charging conservative. Charge when voltage drops to 12.3V. Not optimal but works.

For full-timers or off-grid enthusiasts:

Buy Victron BMV-712 without question.

Why:

  • Essential for managing power properly
  • Battery life extension alone pays for it
  • Peace of mind is invaluable
  • Integration with solar/charging is useful

My Current System Summary

Monitoring:

  • Victron BMV-712: £185
  • Installed 18 months ago
  • Zero issues

Battery:

  • Fogstar Drift 105Ah lithium: £449
  • Monitored constantly
  • 187 charge cycles so far
  • Still at 98% capacity (102Ah usable)

Charging:

  • 200W solar + Victron MPPT: £265
  • Victron DC-DC 18A: £157
  • All visible in VictronConnect app

Integration:

  • All three Victron devices share data
  • One app shows everything:
    • Battery: 73% (77Ah remaining)
    • Solar: 42W charging
    • DC-DC: 18A charging (when driving)
    • Today consumed: 28Ah
    • Today generated: 36Ah (net positive)

This is the power management system I wish I’d built in Van #1.

Total cost: £185 (monitor only) or £607 (entire system)

Value provided: Immeasurable. Complete confidence in power situation. No stress. No guessing. No damaged batteries.

Final Thoughts

I spent three years and two batteries (£330) learning that guessing battery state from voltage doesn’t work.

A voltmeter tells you almost nothing useful. Voltage-based “smart” monitors are barely better. Both are guessing, and guessing wrong leads to damaged batteries, stress, and poor decisions.

Proper monitoring – shunt-based amp-hour counting – transforms power management. You finally know what’s actually happening. Make informed decisions. Optimize usage. Extend battery life.

Is £185 expensive? Initially, yes. But it’s paid for itself in battery longevity and reduced charging costs. Everything beyond payback (18+ years) is pure value.

If I built van #5 tomorrow, the Victron BMV-712 would be installed on day one, before I installed lights or fridge. That’s how fundamental it is.

Stop guessing. Start monitoring properly. Your battery will thank you.